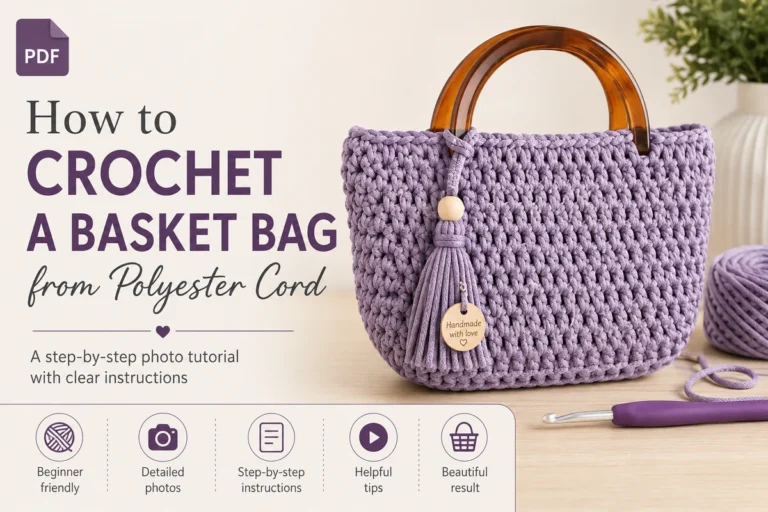
If you’ve been looking for a stylish, sturdy summer bag you can make yourself, this crochet basket bag is exactly what you need. Made from polyester cord with beautiful epoxy-resin handles, it looks like something you’d pick up at a boutique — but you’re making it with your own hands.
In this guide, I’ll walk you through the entire process: from covering the handles to shaping the sides, sewing the pieces together, and blocking the finished bag. No fluff, no guesswork — just clear steps you can follow.
What You’ll Need
Before you start, gather these materials. The pattern works with both 3 mm and 4 mm cord — pick whichever you prefer.
- Polyester cord — about 350 meters (3 mm or 4 mm)
- Crochet hook — 4.5 mm for 3 mm cord, or 5 mm for 4 mm cord
- Semicircular resin handles — 12 × 8 cm (one pair)
- Stitch markers — at least 6
- Scissors and a steam iron or hand steamer
How This Bag Is Built — The Big Picture
Here’s the idea in a nutshell so you always know where you are in the project:
- You make two identical pieces.
- Each piece starts at the handle and grows downward.
- You use a stitch called the split V-stitch (galochki v raskol in the original Russian pattern) and work in turning rows — back and forth.
- Right-side (RS) rows are worked in the pattern stitch; wrong-side (WS) rows are slip stitches.
- Once both pieces are done, you steam-block them, sew them together, edge the top, and do a final steaming.
That’s it. Now let’s get into the details.
Abbreviations
| Abbreviation | Meaning |
|---|---|
| ch | chain stitch |
| sc | single crochet (US term) |
| sl st | slip stitch |
| V-st | split V-stitch — the main pattern stitch |
| inc | increase — two split V-stitches into the same stitch base |
| RS / WS | right side (front) / wrong side (back) |
4 Golden Rules for a Clean, Even Fabric
Before we begin, keep these four rules in mind. They solve 90% of the “why does my bag look crooked” problems:
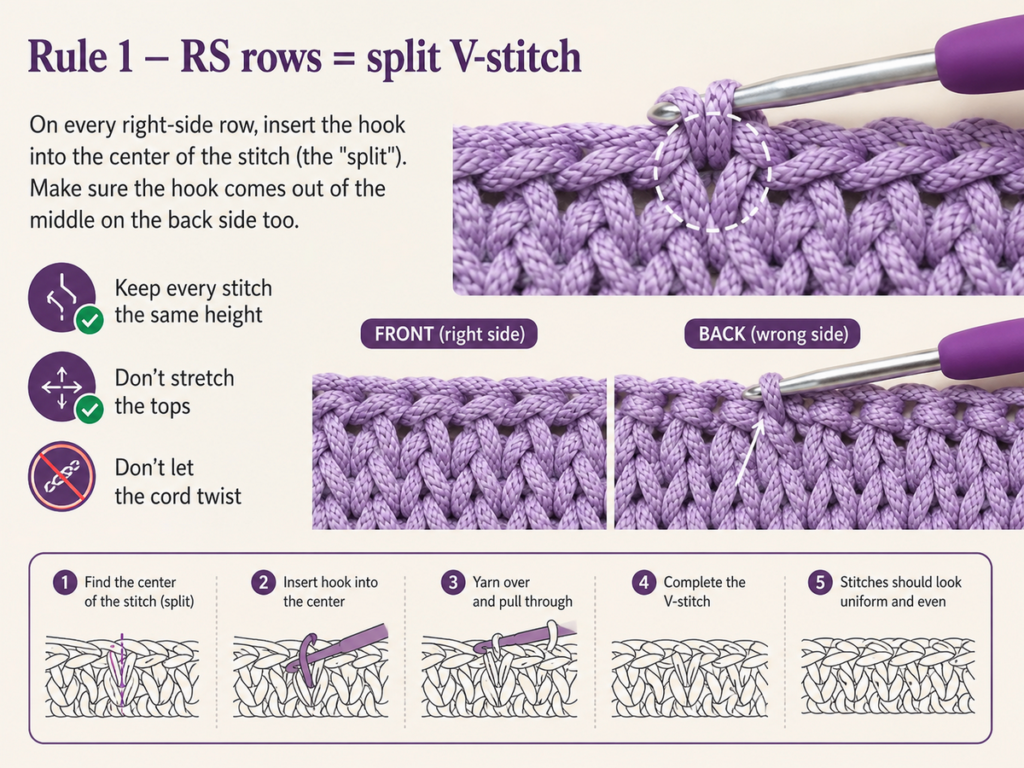
Rule 1 — RS rows = split V-stitch
On every right-side row, insert the hook into the center of the stitch (the “split”). Make sure the hook comes out of the middle on the back side too. Keep every stitch the same height, don’t stretch the tops, and don’t let the cord twist.
Rule 2 — WS rows = tight slip stitches
Work every wrong-side row in slip stitches through the near half-loop only. Keep them snug — but not so tight the fabric puckers.
Rule 3 — First stitch of every RS row: loose
Don’t pull it tight. It should match the height of every other stitch in the row.
Rule 4 — Last stitch of every RS row: firm
The opposite — snug it up, but keep the same height as the rest.
Step 1 — Covering the Handle
Every piece begins by covering the resin handle with stitches. Three things to remember:
- Pull the very first stitch really tight.
- Watch how the cord lies on both sides — front and back.
- Pull the last stitch tight too, so it hugs the handle snugly. You can’t fix this later.
Make your first chain stitch, but leave a long tail — about 1.5 to 2 meters. You’ll need this tail later to edge the top of the bag.
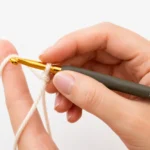
Turn the handle so the front faces you and start covering it: bring the hook around the handle, catch the working cord, and pull through. Keep going until you have 30 stitches across the handle.
The WS setup row
Slip the loop off your hook, rotate it 180° clockwise, and put it back on the hook. Do not make a turning chain — we never make one in this entire project. Work 30 slip stitches through the near half-loop all the way back.
These two rows (the cover row + the slip-stitch return) are your setup rows. From here, we start counting at Row 1.
Important: We never make a turning chain in this pattern — not once. That’s just how this stitch works.
Step 2 — The Special First Stitch
To keep the side edge straight, the first stitch of every RS row is made differently — almost like a slip stitch:
- Without making a turning chain, insert the hook over the first half-loop.
- Bring the working cord up to the front.
- Slip both loops off the hook and swap their places.
- Put them back on the hook.
- Instead of catching new cord, pull the far loop through the front loop.
Keep this stitch loose. That’s especially important at the start of every row. You’ll do this at the beginning of every single row from now on.
Step 3 — Widening the Panel (Rows 1–8)
Now we make the panel grow wider by adding increases in set spots on every RS row. Each RS row gets two increases, and you alternate them: one row into the right stitch of the previous increase, the next row into the left — mirrored around the center.
You start with 30 stitches from the handle cover. Place markers where the increases will go, following this chart:
Increase Chart — Rows 1 to 8
Read from the bottom up, right to left — the same direction you crochet. V = one increase (two split V-stitches into the same base).
| Row (RS) | Stitch Sequence (right → left) | Total |
|---|---|---|
| 1 | 4 — V — 5 — V — 7 — V — 5 — V — 5 | 35 sc |
| 2 | 5 — V — 6 — V — 9 — V — 6 — V — 5 | 39 sc |
| 3 | 6 — V — 7 — V — 9 — V — 7 — V — 6 | 43 sc |
| 4 | 6 — V — 8 — V — 11 — V — 8 — V — 6 | 47 sc |
| 5 | 7 — V — 9 — V — 11 — V — 9 — V — 7 | 51 sc |
| 6 | 7 — V — 10 — V — 13 — V — 10 — V — 7 | 55 sc |
| 7 | 8 — V — 11 — V — 13 — V — 11 — V — 8 | 59 sc |
| 8 | 8 — V — 12 — V — 15 — V — 12 — V — 8 | 63 sc |
A tip about Row 1
At the end of Row 1, after all the charted stitches are done, add one extra stitch right at the bottom, under the top of the handle-cover stitch. This keeps the top of the bag from looking lopsided on that side.
The split V-stitch pattern starts in Row 2
From Row 2 on, you’re working the real split V-stitch. Insert the hook into the center of the stitch body. On the back, the hook should come out of the exact middle of the stitch. That’s what makes the little V’s even and the fabric tidy on both sides.
Stitch height matters. Lift the base of the stitch as you work so the hook stays parallel to the fabric. Don’t stretch the stitch tops. Try catching the cord the way the photo shows — it gives firmer, neater tops.
After Row 8, you should have 63 stitches. The panel has reached its full width.
Step 4 — Shaping the Sides (Rows 9–15)
Now the panel is wide enough. From here, you keep working for length but also trim the side edges. You do this by simply leaving a set number of stitches unworked at each end of the row.
At the same time, you’re still adding center increases — so the panel keeps growing in the middle while the edges curve in.
Side-Shaping Chart
“Leave N” = stop short and do not work the last N stitches at that edge, then turn. V = one increase.
| Row | Leave (start) | Stitches | Leave (end) | Total |
|---|---|---|---|---|
| 8 (WS) | — | slip stitches | leave 7 | 56 |
| 9 (RS) | leave 7 | 2 — V — 13 — V — 15 — V — 13 — V — 2 | — | 56 |
| 9 (WS) | — | slip stitches | leave 3 | 50 |
| 10 (RS) | leave 3 | 14 — V — 17 — V — 14 | — | 47 |
| 10 (WS) | — | slip stitches | leave 2 | 47 |
| 11 (RS) | leave 2 | 13 — V — 17 — V — 13 | — | 45 |
| 11 (WS) | — | slip stitches | leave 2 | 45 |
| 12 (RS) | leave 2 | 11 — V — 19 — V — 11 | — | 43 |
| 12 (WS) | — | slip stitches | leave 2 | 43 |
| 13 (RS) | leave 2 | 10 — V — 19 — V — 10 | — | 41 |
| 13 (WS) | — | slip stitches | leave 2 | 41 |
| 14 (RS) | leave 2 | 8 — V — 21 — V — 8 | — | 38 |
| 14 (WS) | — | slip stitches | leave 3 | 38 |
| 15 (RS) | leave 3 | 6 — V — 21 — V — 6 | — | 37 |
| 15 (WS) | — | slip stitches | — | 37 |
After Row 15, count your stitches — you should have 37.
Now work slip stitches up the side edge (through the near half-loops) to get back to the top corner — 21 slip stitches total.
Step 5 — The Side Walls (Row 16–20)
Turn to the RS. The side walls need to stay smooth and not pull in the main panel, so you’ll add three increases on each side. Place markers near the start of rows 9, 12, and 15.
Row 16
Work across one side wall (21 stitches + 3 increases), then 37 stitches across the bottom, then the other side wall (21 stitches + 3 increases). You now have 85 stitches total (24 + 37 + 24).
Rows 17–20
Work four more RS rows straight (no more increases). When the panel is 20 RS rows tall, work 85 slip stitches across the RS (not the WS) to close the round. The first stitch of an RS row has no top chain, so work the 85th slip stitch into the stitch body itself.
Step 6 — The Second Piece
The second piece is made exactly the same way. The only difference: when you finish the last row, do not cut the cord. You’ll use it to sew the two pieces together. Pull the last loop up long so it won’t unravel during blocking.
Step 7 — First Steam Blocking
Before sewing, steam-block each piece individually. If you don’t have a hand steamer, use a steam iron — but always from the wrong side.
Warning: Never let the iron’s soleplate touch the polyester cord — it can melt or damage the surface. Hold the iron just above the fabric, or steam through a thin cotton cloth or muslin.
While the fabric is still warm, shape each piece into the form you want. Let it cool for at least 15 minutes.
Step 8 — Sewing the Pieces Together
Place the two pieces edge to edge, right sides facing out. Use the working cord from the second piece to sew them together with joining slip stitches.
- Place the piece with the working cord closest to you, cord underneath.
- Insert the hook into the edge half-loop of the opposite piece first, then into the half-loop of the near piece.
- Catch the cord and pull through all loops.
- Alternate which half-loop you grab first — this makes the seam look smoother.
- Don’t pull too tight — the seam should not draw in.
Check alignment as you go. Both sides should have 85 stitches. When you reach the end, fasten off, cut the cord, and hide the tails.
Step 9 — Edging the Top
Remember that long tail you left at the very beginning? Now it’s time to use it.
Bring the cord around the handle to the wrong side, then work slip stitches under the edge half-loop of each row, all the way across to the other handle. Keep it loose — don’t pull the fabric in.
When you reach the second handle, the edge might look slightly lower on that side. To fix it, wrap the cord around the handle twice (once in each direction), pulling through the loops as described in the pattern. This evens out both sides perfectly.
Repeat on the opposite side. Hide all remaining tails on the wrong side.
Step 10 — Final Blocking & Shaping
This last step gives the bag its crisp, professional shape:
- Roll a large bath towel into a tight spiral and stuff it firmly inside the bag.
- Tie the two handles together with a scrap of cord.
- Gently steam the bag from all sides — without touching the fabric.
- Leave everything in place and let the bag cool completely — at least 3 hours.
Once it’s cool, remove the towel, untie the handles — and you’re done.
Your Basket Bag Is Finished!
That’s it — you’ve made a beautiful, sturdy crochet basket bag from scratch. It’s the kind of bag that gets compliments every time you carry it, and there’s something extra satisfying about saying “I made it myself.”
Quick Reference — At a Glance
| Detail | Info |
|---|---|
| Cord | 350 m polyester cord (3 mm or 4 mm) |
| Hook | 4.5 mm (for 3 mm cord) or 5 mm (for 4 mm cord) |
| Handles | Semicircular epoxy-resin, 12 × 8 cm |
| Skill level | Intermediate |
| Main stitch | Split V-stitch (turning rows) |
| Pieces | 2 identical panels, sewn together |
| Direction | Top-down (handle → bottom) |
| Final stitch count | 85 per panel (24 + 37 + 24) |
Frequently Asked Questions
Can I use cotton cord instead of polyester?
You can, but keep in mind that cotton doesn’t hold its shape as well as polyester after blocking. Polyester cord gives the bag its signature stiffness and structure. If you use cotton, the bag will be softer and may need a fabric liner for support.
Why does my fabric pull to one side?
This usually happens when the first and last stitches of RS rows aren’t controlled properly. Follow the 4 Golden Rules above — especially keeping the first stitch loose and the last stitch firm. Also make sure you’re inserting the hook into the exact center of each stitch on both sides.
Can I use different handles?
Yes! Wooden ring handles, bamboo handles, or acrylic handles all work. Just make sure they’re roughly the same size (12 × 8 cm semicircular) so the stitch count fits. If your handles are significantly different, you may need to adjust the 30-stitch cover.
How long does this bag take to make?
For an intermediate crocheter, expect about 8–12 hours of active crocheting, plus blocking time. It’s a great weekend project if you spread it over two days.
What size is the finished bag?
The finished bag is roughly 30 cm wide × 25 cm tall (not counting the handle), which is a perfect everyday size — big enough for a phone, wallet, keys, sunglasses, and a small book.