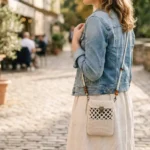
How to Crochet for Beginners: Step by Step with Pictures
Your complete guide โ from holding the hook to finishing your very first project today
If you’ve always wanted to learn how to crochet but had no idea where to start โ you are in exactly the right place. I remember picking up a hook for the first time and feeling completely lost. Too much yarn, too many videos, and zero idea what “yarn over” even meant. So I wrote the guide I wish I had back then: simple, clear, step-by-step, with real pictures at every stage.
By the end of this guide, you’ll know how to hold a hook, make your first stitches, AND finish a cute little beginner project you’ll actually be proud of. Let’s go! ๐
๐ What’s in this guide
- What you need to get started (supplies)
- How to hold your hook and yarn
- Make your first slip knot
- The chain stitch โ your foundation
- The single crochet stitch (SC)
- How to turn your work and start a new row
- Fasten off and weave in ends
- Your first project: Mini Crochet Bag Tag (30 minutes!)
- Beginner tips and common mistakes
- FAQ
1. What You Need to Get Started
The best thing about crochet? You barely need any supplies to begin. Here’s your starter kit โ nothing fancy required:
Crochet Hook
Start with a 5mm (US H-8) hook. It’s the perfect size for beginners โ not too tiny, not too big.
Yarn
Use medium-weight (size 4) worsted yarn in a light solid color. Light colors help you see your stitches clearly.
Scissors
Any small, sharp pair works. You’ll need these to cut your yarn when you finish.
Yarn Needle
A blunt tapestry needle for weaving in your ends at the finish. Gets you a clean, pro look.
๐ก Beginner Tip
Avoid dark or fuzzy yarn when you’re first learning. You need to be able to see each stitch clearly. A smooth, light-colored acrylic or cotton yarn (like cream, light gray, or pale yellow) is your best friend right now.
Everything you need to start crocheting โ a hook, yarn, scissors, and a yarn needle.
2. How to Hold Your Hook and Yarn
Before you make a single stitch, you need to get comfortable holding your hook. There’s no strict rule here โ just find what feels natural. Most beginners use one of two grips:
The Pencil Grip
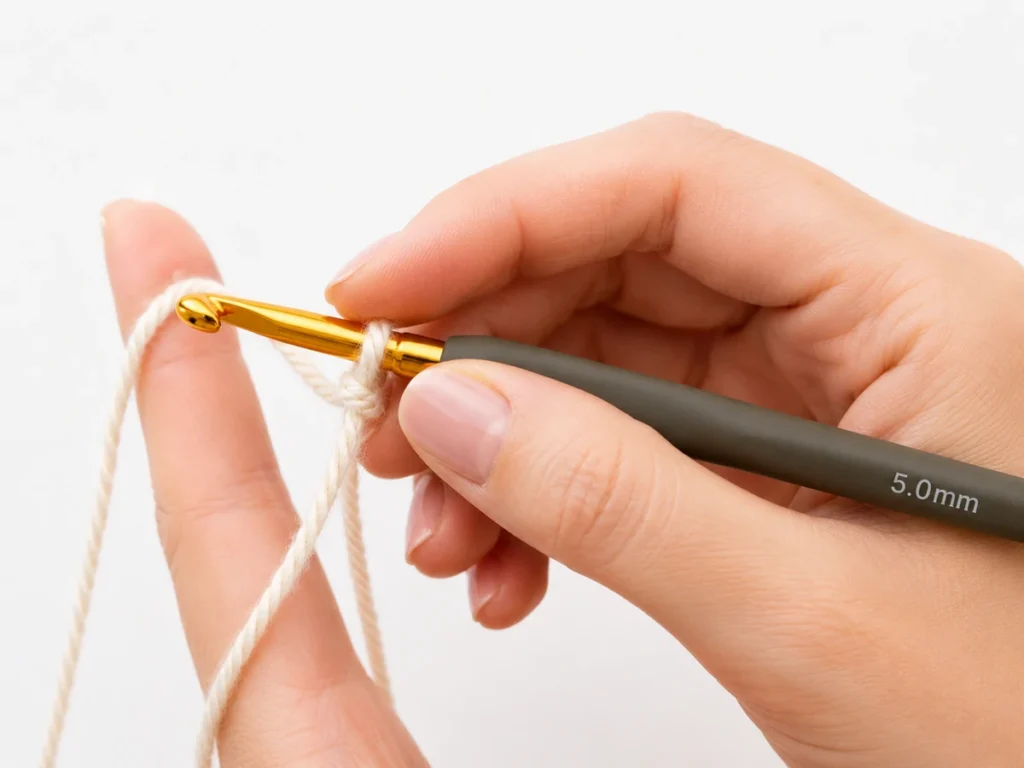
Hold the hook between your thumb and index finger, just like you’d hold a pencil. Your middle finger rests lightly on the flat section. This grip gives great control and is perfect for most people.
The Knife Grip
Hold the hook in your palm, like a knife, with your thumb on the flat section. Some people find this more comfortable for longer crochet sessions โ gives your hand a break from tension.
For your non-dominant hand, wrap the yarn loosely around your index finger and use your thumb and middle finger to hold your work steady. Don’t grip too tight โ tension is everything in crochet!
The pencil grip โ one of the most comfortable ways to hold your crochet hook.
3. Make Your First Slip Knot
Every single crochet project starts with a slip knot. It’s how you get the yarn onto your hook. Here’s how to do it in 3 easy steps:
Make a Loop
Take the end of your yarn and make a loop, crossing the yarn over itself. Hold the crossed section between your thumb and index finger.
Pull Through
Insert your crochet hook through the loop and pull the working yarn (the strand connected to the ball) through the loop to make a new loop on your hook.
Tighten
Pull both ends of the yarn gently to tighten the knot around your hook. It should be snug but still able to slide along the hook โ not too tight!
A slip knot in 3 steps โ the starting point of every crochet project!
4. The Chain Stitch (CH) โ Your Foundation
The chain stitch is the absolute first stitch in crochet. You’ll use it at the start of almost every project. It creates a foundation row that you work your stitches into.
“The chain stitch is the alphabet of crochet. Once you can chain comfortably, everything else becomes possible.”
Yarn Over โ Pull Through
Step 1: With your slip knot on the hook, bring the yarn over the hook from back to front. This move is called a “yarn over” (abbreviated YO).
Step 2: Use the hook to pull that yarn through the loop already on your hook. You now have one chain stitch!
Step 3: Repeat: yarn over, pull through. Each time you do this, you add one more chain. Practice making 15โ20 chains in a row.
๐ก Keep your tension loose enough that you can slide the loop along the hook easily. If it feels stiff, your chains are too tight โ relax your grip!
Yarn over and pull through โ that’s all a chain stitch is! Keep practicing until it feels natural.
5. The Single Crochet Stitch (SC)
This is the most important stitch you’ll ever learn. The single crochet (SC in US terms) is short, tight, and used in hundreds of projects โ from dishcloths and bags to stuffed animals and hats. Master this one stitch and you can make almost anything.
Insert Your Hook
After making your foundation chain, insert your hook into the second chain from the hook (skip the first chain โ it counts as a turning chain). Push the hook through the center of the V-shaped stitch.
Yarn Over and Pull Through
Yarn over (bring yarn from back to front over the hook), then pull that loop back through the chain stitch. You now have 2 loops on your hook.
Yarn Over Again, Pull Through Both
Yarn over one more time, then pull through both loops on your hook. You now have 1 loop left on the hook. Congratulations โ you just made your first single crochet stitch! ๐
Repeat Across the Row
Move to the next chain and repeat Steps 1โ3. Keep going until you’ve worked a single crochet into every chain. At the end of the row, count your stitches โ you should have the same number as your starting chain minus 1.
The single crochet stitch โ 4 simple moves that form the foundation of most crochet projects.
6. How to Turn Your Work and Start a New Row
When you reach the end of a row, you don’t just stop โ you turn your work and go back in the opposite direction. Here’s how:
Chain 1, Then Turn
At the end of each row: Make 1 chain stitch (this is called the “turning chain” and it lifts your yarn to the height of the next row). Then physically flip/rotate your work so the other side is now facing you. Your working yarn should be on the right (if right-handed).
Then: Work single crochets into each stitch of the previous row. The last stitch of each row can be easy to miss โ look carefully at the edge and make sure you work into it!
7. Fasten Off and Weave In Ends
When your project is done, you need to secure your work so it doesn’t unravel. This is called “fastening off.”
Cut and Pull Through
Step 1: Cut your yarn, leaving a tail about 6 inches (15cm) long.
Step 2: Yarn over with the cut end and pull it all the way through the last loop on your hook. Pull the tail snug to tighten โ your work is now secured!
Step 3: Thread the yarn tail onto your yarn needle and weave it through several stitches on the back of your work (going in different directions). Trim any excess. Your project now looks clean and finished! โจ
8. Your First Project: Mini Crochet Bag Tag ๐ท๏ธ
Now that you know all the basics, it’s time to make something real! This mini crochet bag tag is the perfect first project because it only uses chain stitch + single crochet, takes about 20โ30 minutes, and when you’re done, you have something genuinely cute and useful.
โจ Why this project is perfect
It only uses chain stitch + single crochet (the two stitches you just learned). It takes about 20โ30 minutes. It’s small enough to finish in one sitting, and when you’re done, you have something genuinely cute and useful. Big win energy! ๐
๐ท๏ธ Mini Crochet Bag Tag โ Free Pattern
You’ll Need
- 5mm (H-8) crochet hook
- Worsted weight yarn (any color!)
- Scissors + yarn needle
- 1 keyring or split ring
Abbreviations
- CH = chain
- SC = single crochet
- YO = yarn over
- FO = fasten off
Finished Size
- Approx. 3″ ร 2″ (7.5 ร 5cm)
- Perfect for a bag or backpack!
- Ready in 20โ30 minutes
Foundation Chain: Make a slip knot and chain 11. (The loop on your hook does NOT count as a stitch.)
Row 1: Single crochet (SC) in the 2nd chain from hook. SC in each chain across. = 10 stitches. Chain 1, turn.
Rows 2โ7: SC in each stitch across (10 SC per row). At the end of each row: chain 1, turn. Repeat for a total of 7 rows.
Fasten Off: Cut yarn leaving a 6″ tail. Pull the tail through the last loop and tighten. Weave in ends with your yarn needle.
Finish: Fold the short end of your rectangle over a keyring and sew it in place with your yarn needle. Weave in any remaining ends. Done! ๐
Your finished mini bag tag! A small project, a huge confidence boost. ๐ท๏ธ
9. Beginner Tips and Common Mistakes
Tension Too Tight
Your stitches should feel snug but not strangled. If your hook is hard to pull through, loosen your grip on the yarn. You can also try going up one hook size โ a 5.5mm instead of 5mm works wonders for tight crocheters.
Losing or Adding Stitches
Count your stitches at the end of every row. You should have the same number each time. If you’re gaining stitches, you’re probably accidentally working into your turning chain. If you’re losing them, you’re missing the last stitch of each row.
Edges Going Wonky
Uneven edges usually happen when you miss the first or last stitch of a row. Use a stitch marker (or a piece of scrap yarn) to mark the first stitch of each row until you get the hang of it.
๐ Golden Rule
Your first stitches will not be perfect โ and that is 100% normal and okay. Every single crocheter started with uneven, awkward-looking work. The only way to get better is to keep going. Practice 10โ15 minutes a day and you’ll be amazed how quickly it clicks!
10. Frequently Asked Questions
How long does it take to learn crochet as a beginner?
Most beginners can learn the basic stitches (chain and single crochet) within a few hours. Feeling truly comfortable usually takes 1โ2 weeks of regular practice. After finishing 3โ5 small projects, most people feel confident enough to try any beginner pattern.
Is crochet easier to learn than knitting?
Most beginners find crochet easier than knitting because you only work with one hook (instead of two needles), and you only have one active stitch at a time. Mistakes are also much easier to fix in crochet โ you can simply pull the yarn and undo your work without losing anything!
What is the best yarn for a crochet beginner?
A smooth, medium-weight (size 4 worsted) yarn in a light solid color is ideal. Acrylic yarn like Lion Brand Pound of Love or Red Heart Super Saver is affordable, durable, and easy for beginners to work with. Avoid fluffy or dark yarns until you’re more comfortable.
What hook size should I start with?
A 5mm (US H-8) or 5.5mm hook is the perfect starting point for most beginners. It’s large enough to see what you’re doing clearly, but not so large that stitches look sloppy. The hook size should always match your yarn’s label recommendation.
What is the easiest thing to crochet for a beginner?
The easiest beginner projects are flat rectangles: dishcloths, washcloths, scarves, and bag tags. They use only the chain and single crochet stitch with no shaping or counting changes. Our mini bag tag pattern above is one of the simplest things you can make โ and it’s done in under 30 minutes!
Can I learn crochet by myself at home?
Absolutely! In 2026, it has never been easier to learn crochet at home. Between step-by-step guides like this one, YouTube tutorials, and beginner-friendly communities on Instagram and Reddit, most people teach themselves crochet entirely from home. All you need is a little patience and a lot of yarn!
Ready to Start Your Crochet Journey? ๐งถ
Grab your hook and yarn, and try that bag tag pattern today. You’ve got this!
Explore More Beginner Patterns โ


Pingback: Archimedes Spiral Doily Pattern โ Free Crochet Guide