Crochet boots are one of the most beautiful and useful handmade projects. They are warm, comfortable, and perfect for home use. In this simple guide, you will learn how to make crochet boots step by step using easy techniques, even if you are a beginner.
This tutorial is based on a real pattern from the PDF and includes all important steps from start to finish.
Materials You Need
Before you start, prepare the following materials:
- Yarn (about 200 grams, 2 colors recommended)
- Crochet hook (size 2.5 mm)
- Felt insole (about 24–24.5 cm for size 36–37)
- Thick sewing needle
- Cord or ribbon (optional for decoration)
👉 Tip: Soft acrylic yarn works best for comfort and durability.
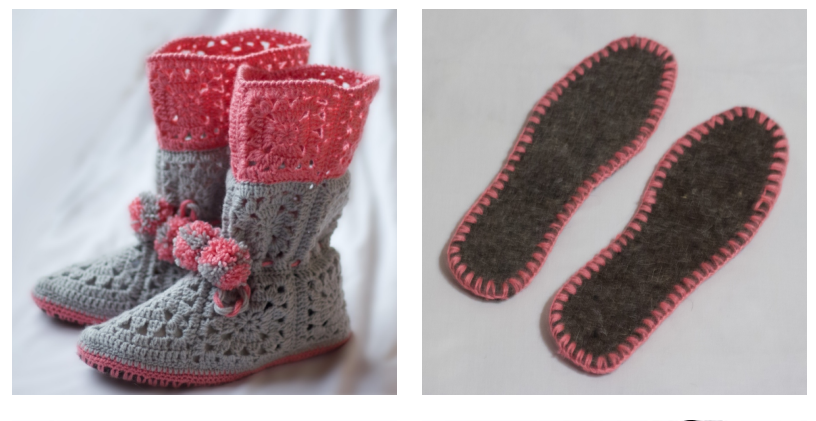
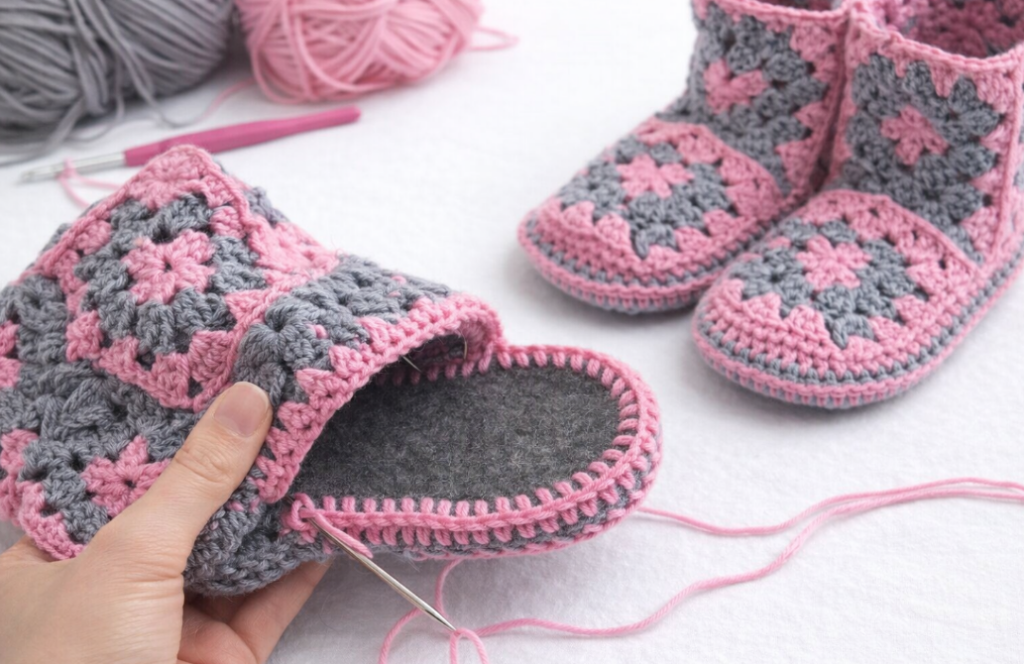
Step 1: Prepare the Insole
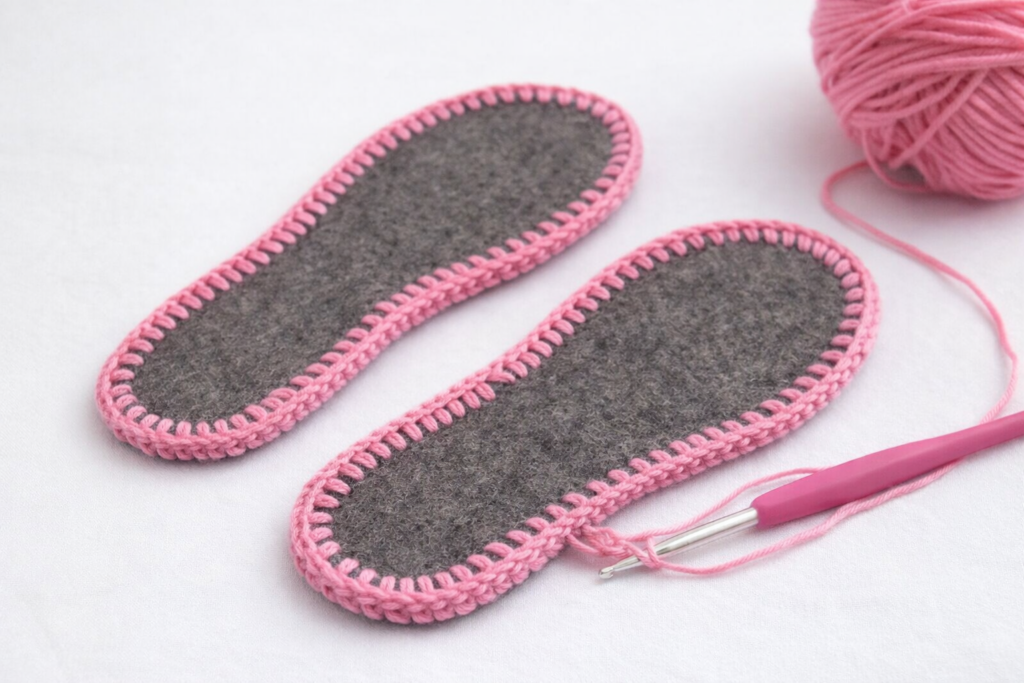
First, take your felt insole and sew around the edges using a blanket stitch.
Then:
- Crochet 3 to 4 rows of single crochet (SC) around the insole
- If the foot is wide, make 5 to 6 rows
This creates a strong base for your crochet boots.
Step 2: Make Square Motifs
Now you need to crochet 26 square motifs:
- 13 motifs for each boot
Important details:
- Each square should be about 1/3 of the insole length
- Example: If insole = 24 cm → square ≈ 8 cm
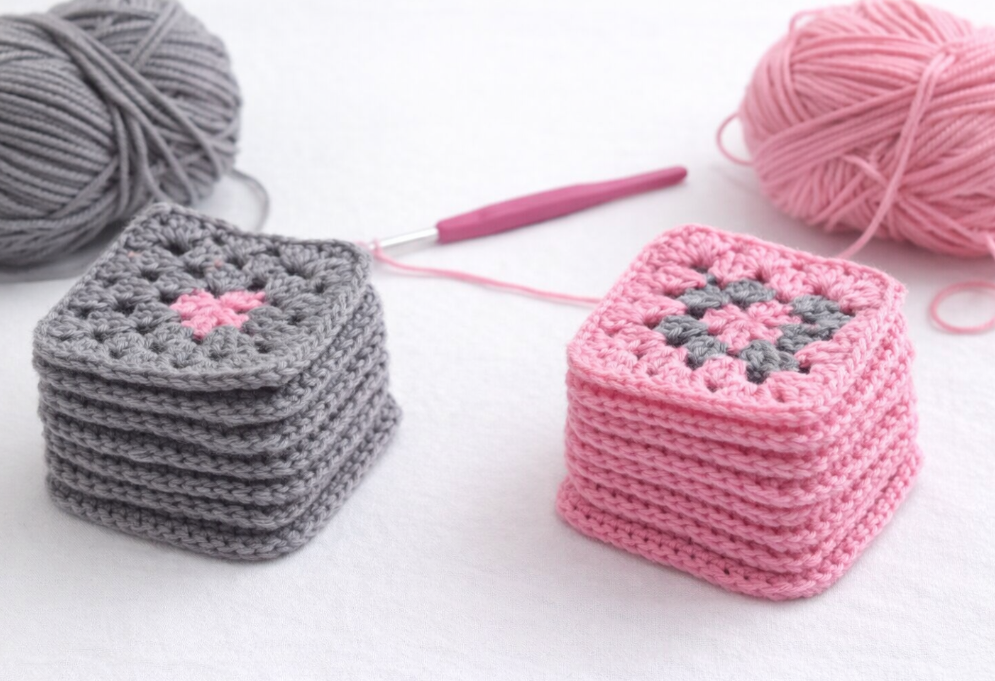
Color idea:
- 18 squares (main color – gray)
- 8 squares (second color – pink)
👉 This gives a beautiful and stylish look.
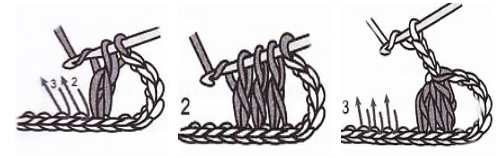
Step 3: Special Toe Motifs
From the motifs:
- Choose 2 squares for the toe part
- Add an extra row of double crochet (DC) on 2 sides
This helps shape the front of the boots.
Step 4: Assemble the Motifs
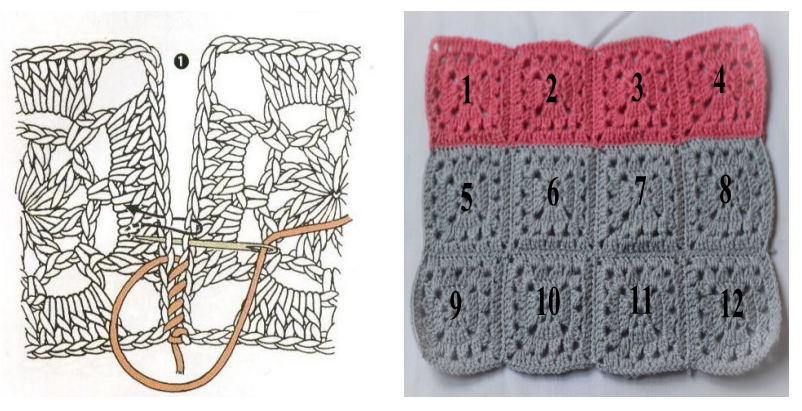
Now it’s time to build the boots:
- Sew motifs into strips
- Join the strips together
- Use a needle to sew edges carefully
👉 Important technique:
- Sew using the back loops only for a clean finish
Structure:
- Connect motifs in rows
- Insert the toe piece in the front center
Step 5: Attach to the Sole
Turn the boot inside out and:
- Sew it to the insole using a blanket stitch
- Make sure the sole is also aligned correctly
👉 If needed:
- Add extra rows to adjust size
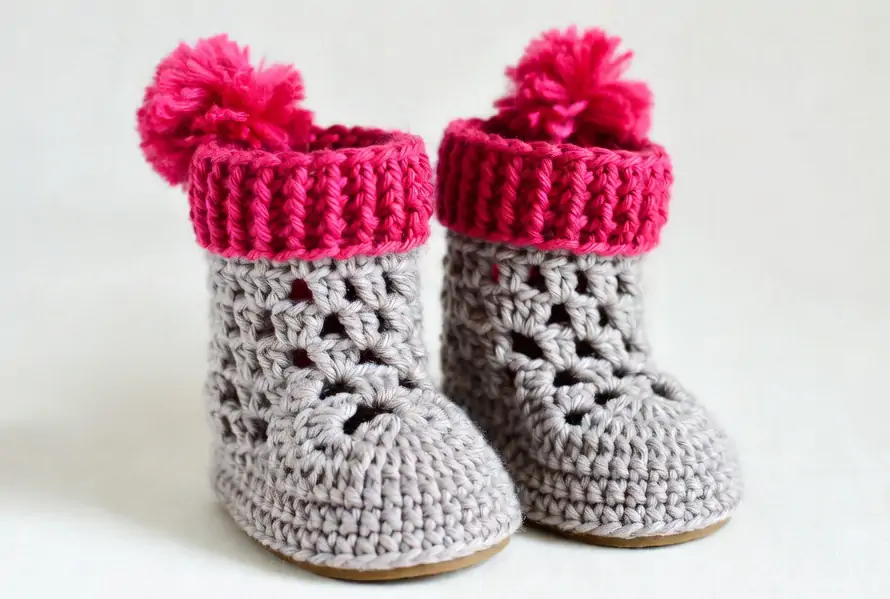
Step 6: Add Decoration
Now the fun part 🎉
Finish your boots with:
1. Top Edge
- Use reverse single crochet (crab stitch)
2. Cord or Ribbon
- Make a chain or use ready cord
- Insert it around the ankle
3. Pom-poms (Optional)
- Add small pom-poms (about 3 cm)
- Attach them for a cute look
Step 7: Size Tips
To get the perfect fit:
- Measure your foot length
- Add 0.5 to 1 cm for comfort
- Adjust rows if needed
Different yarn types you can use:
- Acrylic (easy and soft)
- Wool blend (warmer)
- Polyamide mix (stronger)
Final Result
Now you have your own handmade crochet boots 👢✨
They are:
- Warm
- Stylish
- Perfect for home
You can also make:
- Short boots
- Different colors
- Custom designs
Conclusion
Making crochet boots is a fun and creative project. By following these simple steps, you can create beautiful handmade footwear even if you are a beginner.
Try different colors and decorations to make your design unique!