
Magic Circle Crochet Tutorial
If you are learning crochet, you will hear about the magic circle very early. It might look confusing at first, but once you understand it, it becomes one of the most useful techniques you can learn.
In this guide, I will show you exactly how to make a magic circle step by step, in a simple and clear way.
What Is a Magic Circle in Crochet?
A magic circle (also called a magic ring) is a way to start crochet projects that are worked in the round.
Instead of using a chain loop, the magic circle lets you:
- Start with a tight center
- Avoid holes in the middle
- Create cleaner and more professional projects
This technique is perfect for:
- Amigurumi (crochet toys)
- Hats
- Coasters
- Granny circles
Why Use a Magic Circle?
Many beginners start with a chain loop, but it often leaves a hole in the center. The magic circle solves this problem.
Here’s why people prefer it:
- You can pull the center tight
- Your work looks neater
- It works better for small circles
- It gives more control over your stitches
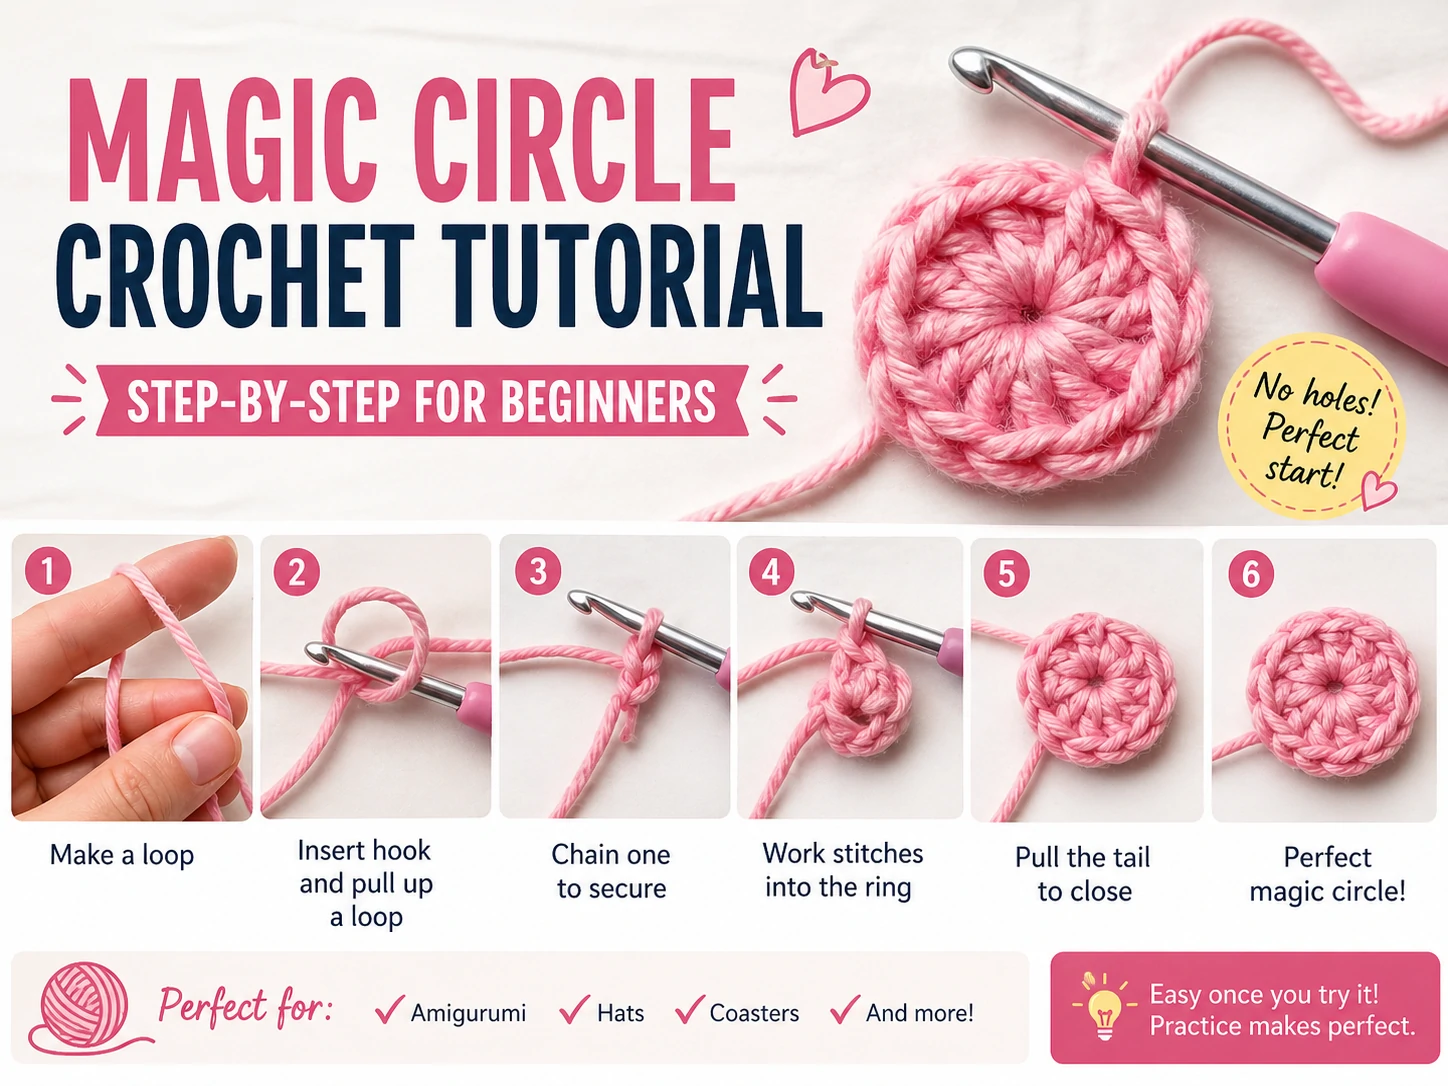
Step-by-Step Magic Circle Crochet Tutorial
Follow these simple steps:
Step 1: Wrap the Yarn
Hold the yarn in your hand and wrap it around your fingers to make a loop.
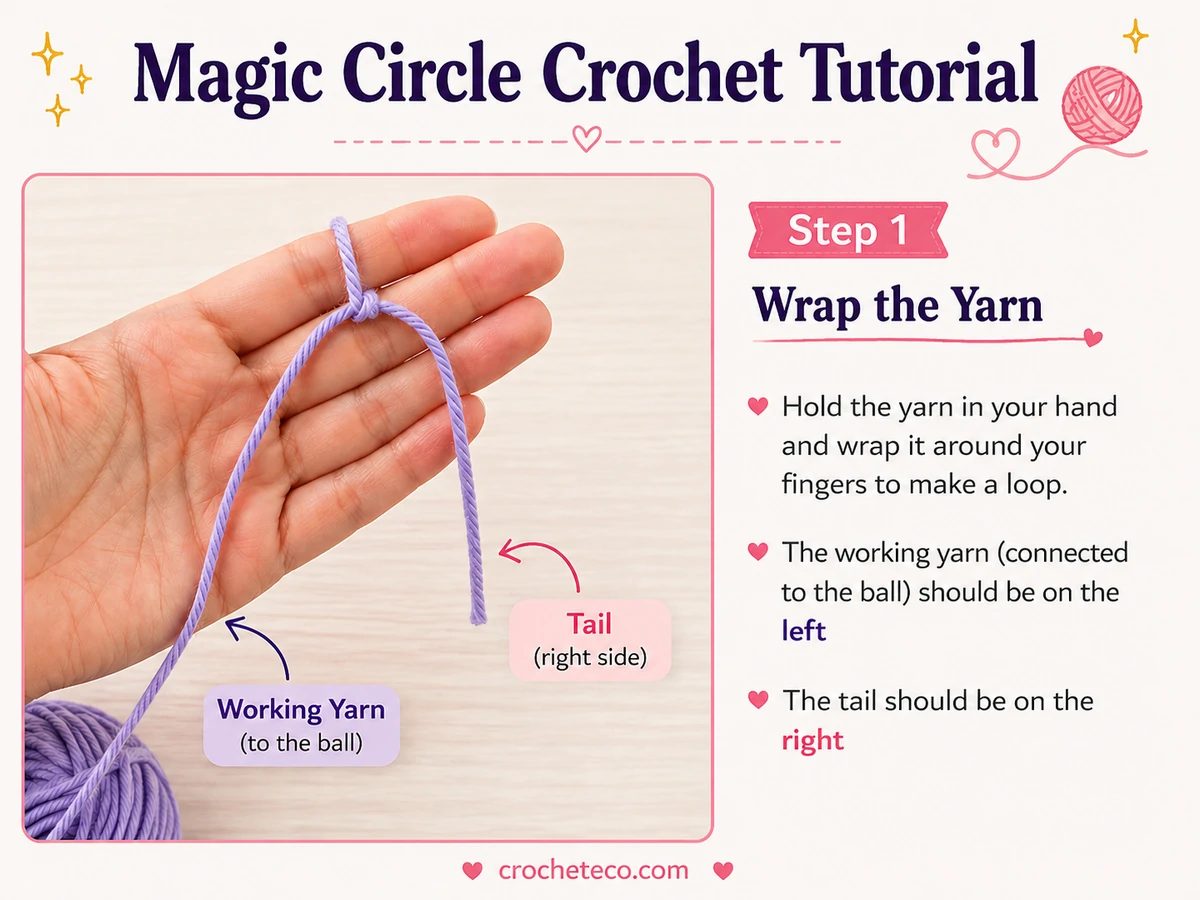
- The working yarn (connected to the ball) should be on the left
- The tail should be on the right
Step 2: Insert Your Hook
Insert your crochet hook under the loop.
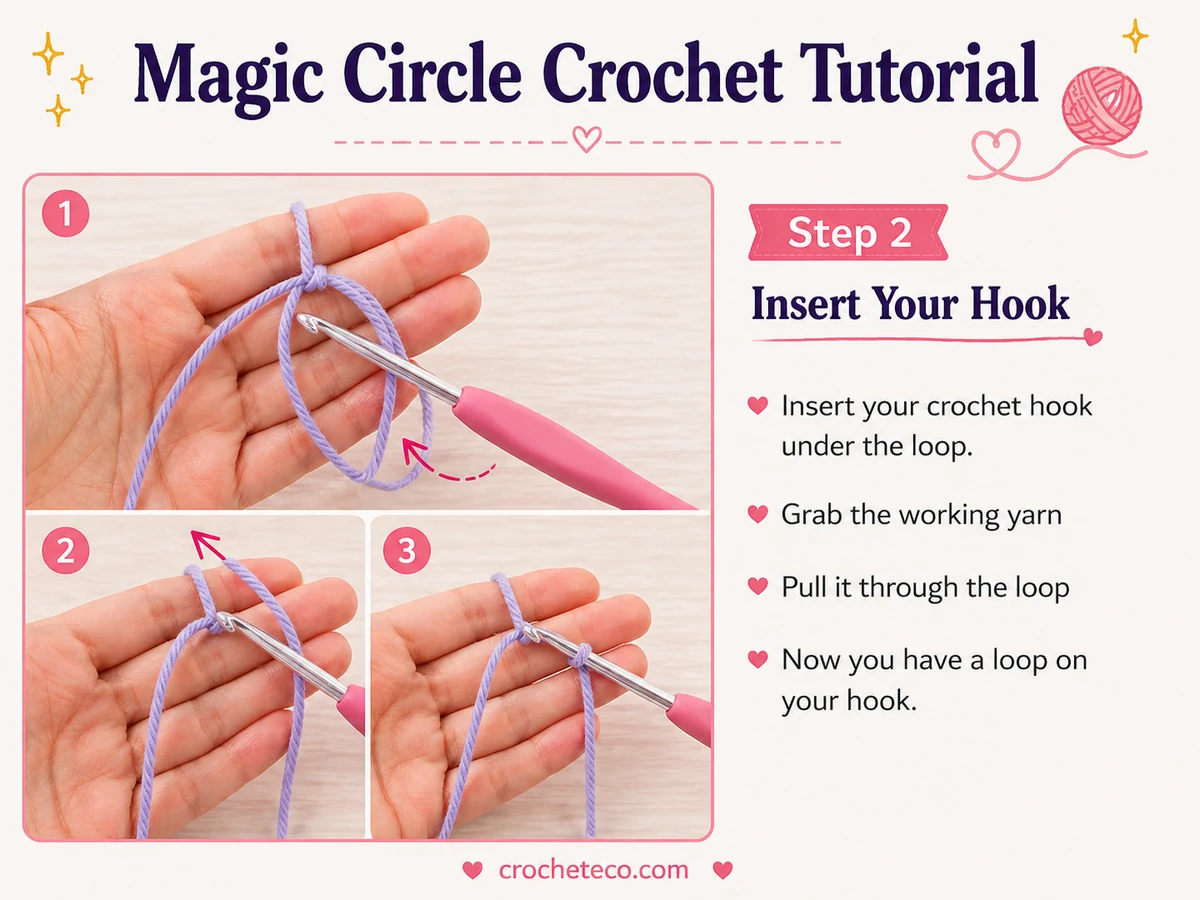
- Grab the working yarn
- Pull it through the loop
Now you have a loop on your hook.
Step 3: Chain One – Step 4: Make Your Stitches
Make one chain stitch to secure the loop.
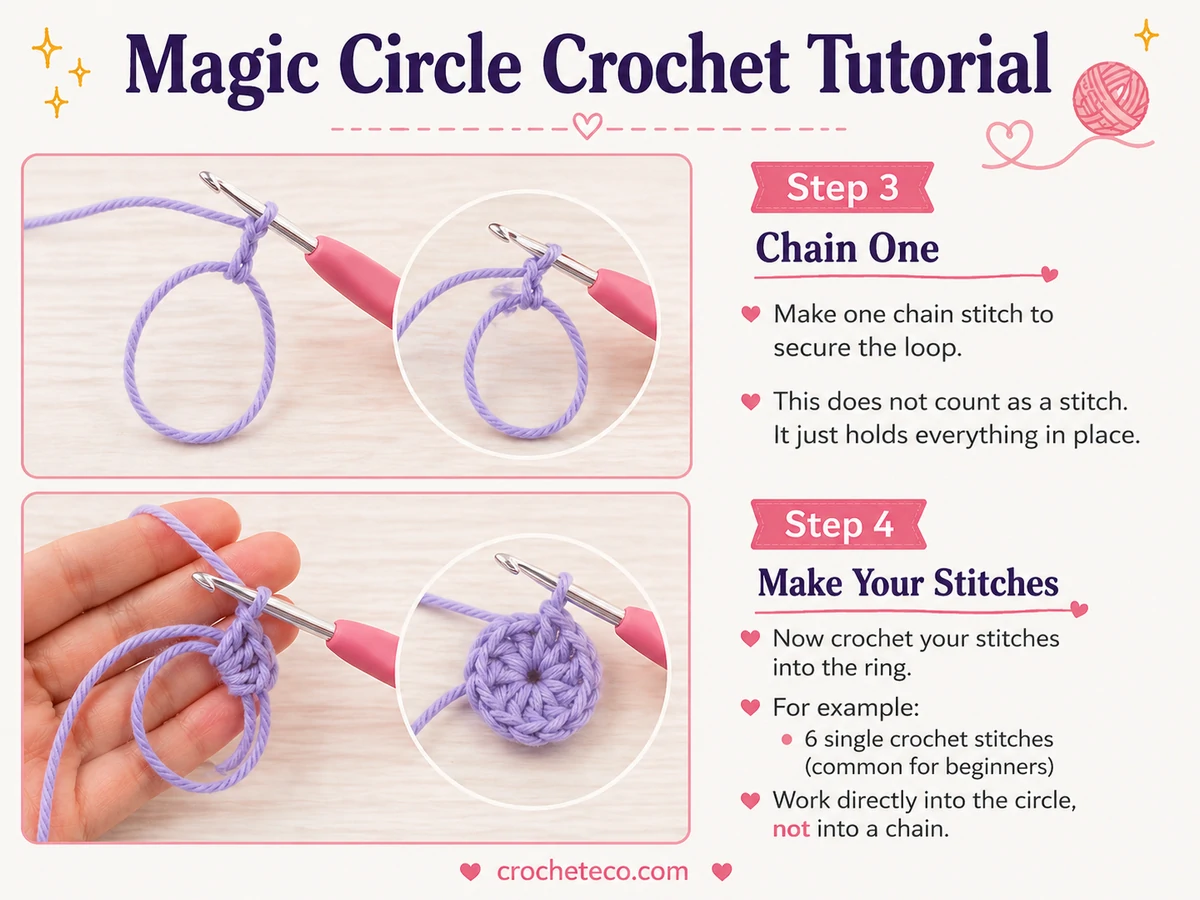
This does not count as a stitch. It just holds everything in place.
Now crochet your stitches into the ring.
For example:
- 6 single crochet stitches (common for beginners)
Work directly into the circle, not into a chain.
Step 5: Pull the Ring Tight
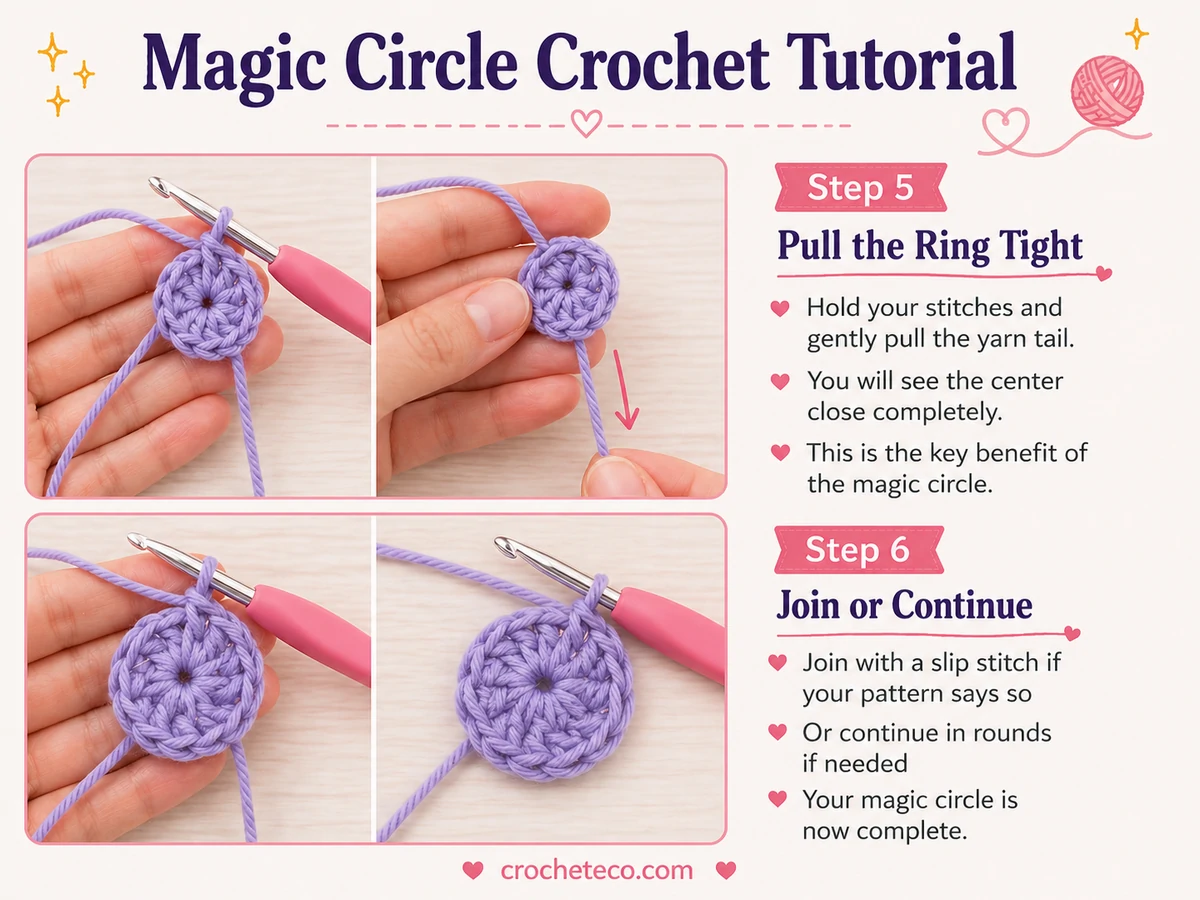
Hold your stitches and gently pull the yarn tail.
You will see the center close completely.
This is the key benefit of the magic circle.
Step 6: Join or Continue
- Join with a slip stitch if your pattern says so
- Or continue in rounds if needed
Your magic circle is now complete.
Common Mistakes (And How to Fix Them) :
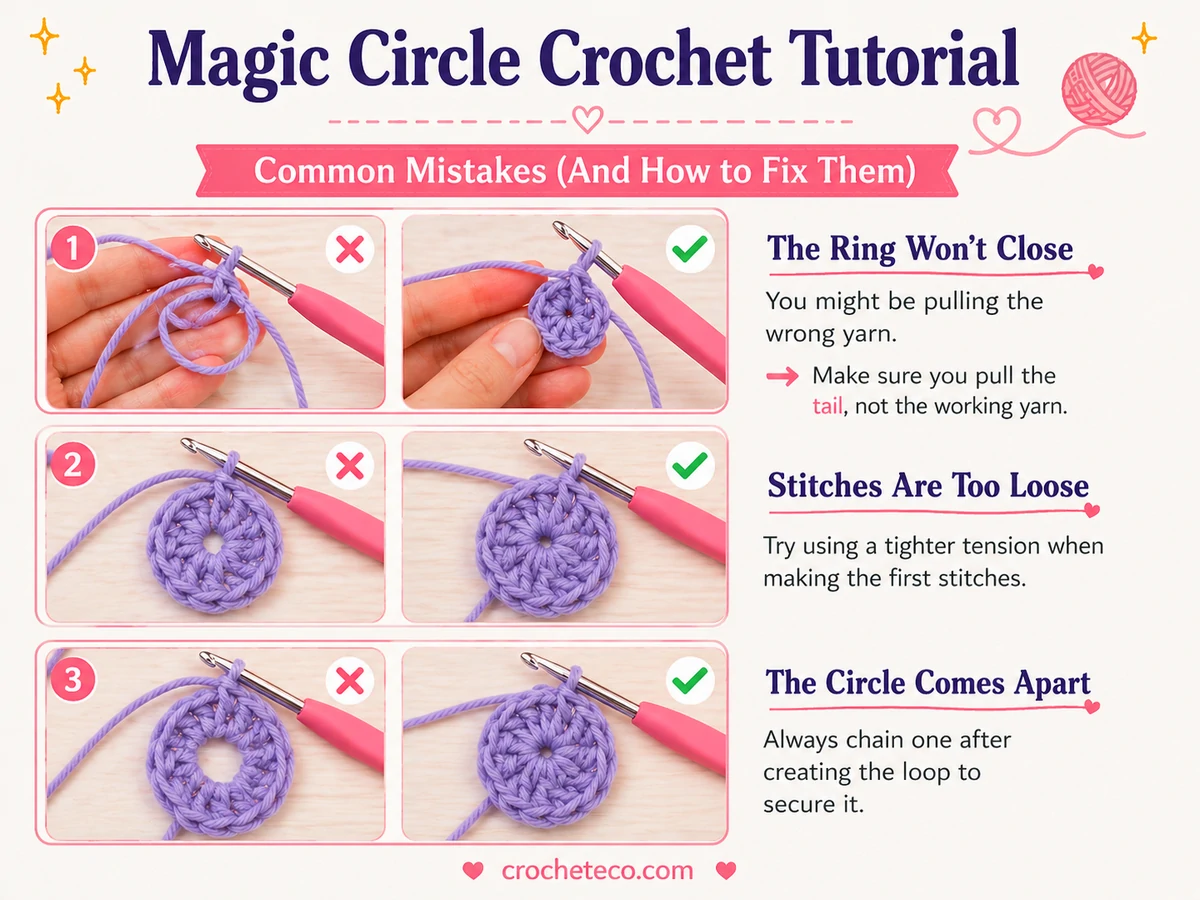
1. The Ring Won’t Close:
You might be pulling the wrong yarn.
Make sure you pull the tail, not the working yarn.
2. Stitches Are Too Loose
Try using a tighter tension when making the first stitches.
3. The Circle Comes Apart
Always chain one after creating the loop to secure it.
Tips for Beginners
- Practice with thicker yarn first
- Use a larger hook to make it easier
- Go slowly the first few times
- Don’t worry if it feels awkward at the beginning
It becomes natural with practice.
When Should You Use a Magic Circle?
Use a magic circle when:
- You want a closed center
- You are making round projects
- You need a clean and tight finish
Avoid it if:
- You are working flat
- Your pattern specifically says chain start
Final Thoughts
The magic circle might seem tricky at first, but it is one of the best crochet techniques to learn. Once you get used to it, you will use it in many projects.
Start slow, practice a few times, and soon it will feel easy.

Pingback: How to Crochet Crochet: Easy Beginner Guide to Start Today - How to Crochet Easily for Beginners - CrochetEco