
Knit and Purl English Style — A Crocheter’s Guide to the Two Basic Stitches
What the needles are doing, why it matters to you, and how to get the same textures with your hook
Every crocheter runs into knitting eventually. A pattern you love turns out to be knit, not crochet. A friend hands you needles at a craft night. A blog post says “worked in stockinette” and quietly assumes you know what that means.
This guide covers the two stitches that all of knitting is built from — knit and purl — worked in the English style, written for people who already know their way around a hook. We will translate the terminology as we go, and show you where crochet gives you the same textures without a single needle involved.
📋 What’s in this guide
- The quick answer
- What “English style” actually means
- What you need to get started
- How to knit, English style
- How to purl, English style
- What you can build with just these two
- Knitting terms, translated for crocheters
- Prefer to stay with your hook?
- Practice swatch — 16 rows, 3 fabrics
- Common mistakes and FAQ
1. The Quick Answer
English style knitting means you hold the working yarn in your right hand and wrap it around the needle tip with that same hand — knitters call it “throwing.” The knit stitch is worked with the yarn behind your work; the purl stitch is worked with the yarn in front. Those two stitches, in different combinations, produce every knitted fabric you have ever seen.
2. What “English Style” Actually Means
There are two mainstream ways to hold your yarn while knitting, and the difference is entirely in your hands — not in the fabric.
| Style | Yarn hand | Motion | Nickname |
|---|---|---|---|
| English | Right | Wrap the yarn around the needle | Throwing |
| Continental | Left | Catch the yarn with the needle tip | Picking |
Neither produces a different fabric. The finished stitches are identical. The only difference is how your hands get there.
Here is the part that matters for crocheters: in Continental knitting the yarn sits in your left hand and you scoop it with the needle tip — almost exactly what your hands already do with a hook.
So why bother with English style? Because letting go of the yarn to wrap it gives you very deliberate control over tension while you are still learning. Beginners who fight with tight or uneven stitches often find English more forgiving at the start. Plenty of knitters use both and pick whichever suits the project.
3. What You Need to Get Started
Needles
5 mm (US 8) straight needles are a comfortable starting size — large enough to see what you are doing.
Yarn
Worsted weight (size 4) in a light colour. Dark yarn hides the stitch structure exactly when you need to see it.
Scissors
Small and sharp. The same pair you already keep in your crochet bag will do.
Yarn Needle
For weaving in ends once you bind off. Identical to the one you use for crochet.
Use smooth yarn for your first attempts. Fuzzy or novelty yarn hides mistakes precisely when you need to spot them — the same rule that applies to a first crochet project. If you want the equivalent logic on hooks, see our crochet hook size chart.
You will also need a cast-on. Any method works; the long tail cast-on is the most common starting point. Cast on 20 stitches for the practice swatch further down.
4. How to Knit, English Style
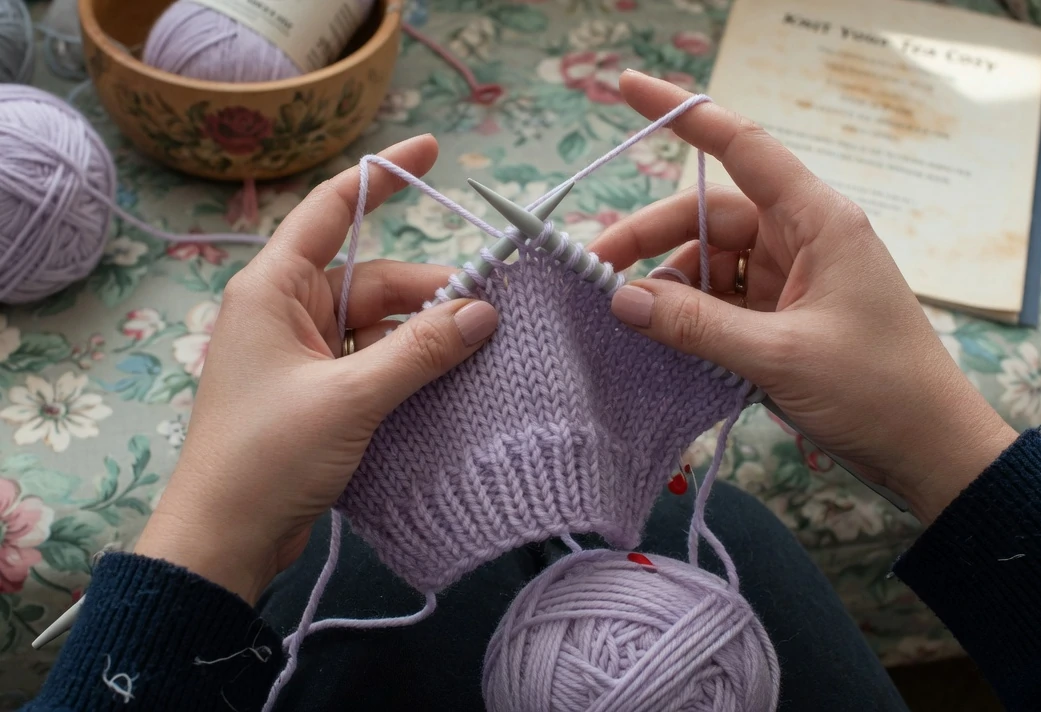
The knit stitch worked English style — the working yarn stays in the right hand and gets wrapped around the needle tip.
Hold the needle with your cast-on stitches in your left hand and the empty needle in your right. Keep the working yarn behind your work, held in your right hand.
🧶 The Knit Stitch — Step by Step
Yarn position
- Behind the work
- Held in the right hand
- Wrapped counterclockwise
Result
- Smooth “V” shapes
- Faces you as you work
- Knitters call this the knit face
Difficulty
- ⭐ Beginner
- ~10 minutes to learn
- Learn this one first
Insert. Push the tip of the right needle into the first stitch on the left needle, front to back, left to right. The right needle sits underneath the left one.
Wrap. With your right hand, take the working yarn and wrap it counterclockwise around the right needle tip, passing between the two needles.
Pull through. Bring the right needle tip back through the stitch, carrying the new loop with it.
Slide off. Let the old stitch slip off the left needle. The new stitch now lives on your right needle.
Repeat and turn. Work across the row. When the left needle is empty, swap the needles between your hands and begin the next row.
5. How to Purl, English Style
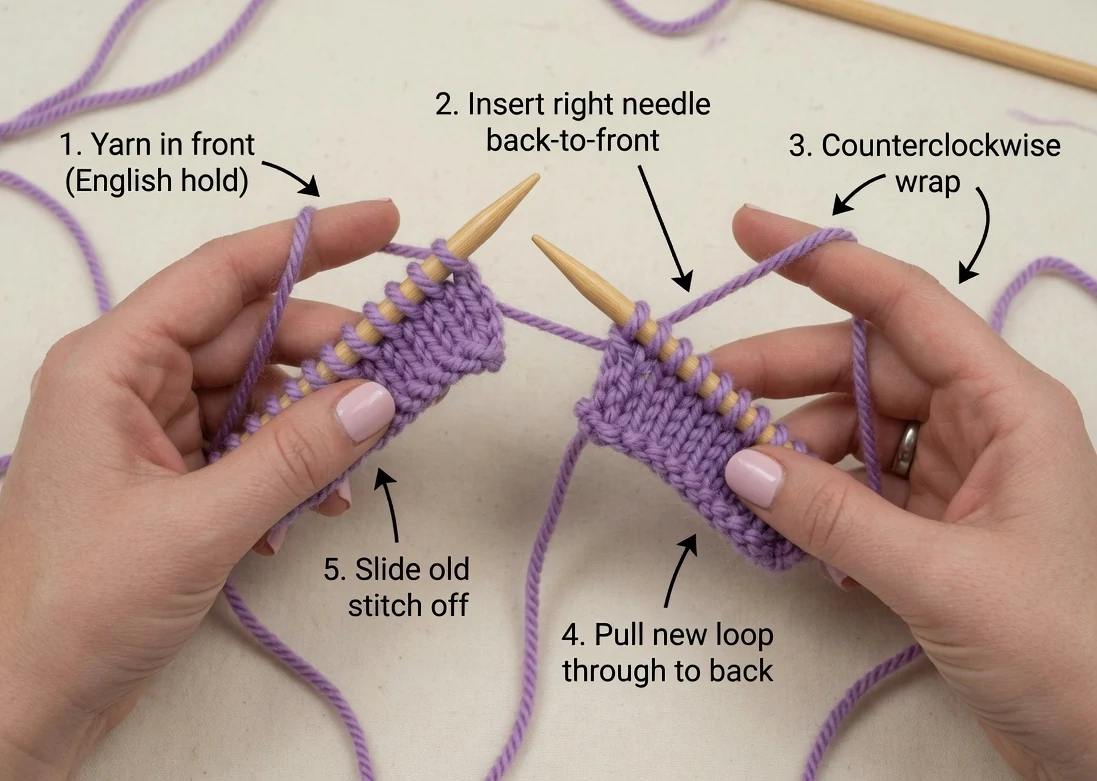
For the purl stitch the yarn moves to the front of the work before the needle goes in — the single most important difference.
The purl is the knit stitch reversed. The biggest difference is where the yarn lives: purling requires the yarn in front of your work.
🪡 The Purl Stitch — Step by Step
Yarn position
- In front of the work
- Held in the right hand
- Wrapped counterclockwise
Result
- Horizontal bumps
- Faces you as you work
- The purl face
Difficulty
- ⭐ Beginner
- Slightly slower than knit
- Learn it second
Move the yarn. Bring the working yarn to the front, between the two needle tips. Skipping this step is the most common beginner error.
Insert. Push the right needle into the first stitch from right to left, back to front. The right needle now sits in front of the left one.
Wrap. Wrap the yarn counterclockwise around the right needle tip with your right hand.
Push through. Push the right needle backwards through the stitch, taking the new loop with it.
Slide off. Let the old stitch drop off the left needle, and repeat across the row.
A knit stitch viewed from the back looks exactly like a purl stitch, and the reverse is equally true. Knitters are not really making two different stitches — they are choosing which face of the same stitch points toward them. Once that clicks, ribbing and stockinette stop feeling like separate techniques.
6. What You Can Build With Just These Two
| Fabric | How it is worked | What it looks like |
|---|---|---|
| Garter stitch | Knit every row | Ridged, squishy, lies flat |
| Stockinette | Knit one row, purl the next | Smooth V’s front, bumps back |
| 1×1 ribbing | k1, p1 across every row | Vertical stretchy columns |
| Seed stitch | k1, p1, offset on the next row | Scattered bumps, lies flat |
Stockinette curls at the edges. That is the structure of the fabric, not a mistake you made. Garter and seed stitch lie flat, which is why they show up so often on scarves and blanket borders.
7. Knitting Terms, Translated for Crocheters
Pattern abbreviations are where most crocheters stall. Here are the ones you will meet first.
| Term | Meaning | Nearest crochet idea |
|---|---|---|
| CO | Cast on | Foundation chain |
| BO | Bind off / cast off | Fasten off |
| k | Knit stitch | — |
| p | Purl stitch | — |
| st / sts | Stitch / stitches | Same |
| RS / WS | Right side / wrong side | Same concept |
| Row gauge | Rows per 10 cm | Same, and just as easy to skip and regret |
| Live stitches | Stitches still on the needle | Only your one working loop |
That last row is the real conceptual gap. In crochet you carry one live loop at a time, so a dropped loop is a minor annoyance. In knitting every stitch in the row is live at once — which is why knitters worry about dropped stitches in a way crocheters simply do not.
8. Prefer to Stay With Your Hook?
You do not have to learn knitting to get knit-looking fabric. Crochet has its own routes to the same textures.
Four ways to get knit and purl texture with a hook
Back post and front post double crochet worked alternately produce true ribbing that stretches like 1×1 rib. Slip stitch in the back loop only makes convincing ribbed cuffs and hat brims. Waistcoat stitch mimics the smooth V face of stockinette. The purl slip stitch creates the bumpy purl face directly.
All four are covered step by step, with a 30-minute ribbed cuff you can make today, in our guide to purl texture in crochet.
9. Practice Swatch — 16 Rows, 3 Fabrics
Cast on 20 stitches and work this. It takes about an hour and teaches all three basic fabrics in a single piece.
🧵 Three-Fabric Practice Swatch
Materials
- Worsted weight yarn
- 5 mm (US 8) needles
- Yarn needle for ends
Finished size
- Approx. 10 × 10 cm
- Time: about 1 hour
- Level: ⭐ Beginner
Why bother
- A physical reference
- Teaches tension fast
- Keep it in your bag
Rows 1–4 — Garter. Knit every stitch of every row. Notice the horizontal ridges building up on both sides.
Rows 5–10 — Stockinette. Knit one full row, purl the next, alternating. Watch one face turn smooth and the other turn bumpy.
Rows 11–16 — Ribbing. Work k1, p1 across every row, moving the yarn front and back between each stitch. The fabric will start pulling in sideways.
Finish. Bind off loosely and weave in the ends. Keep the swatch — it will tell you more than any photograph.
10. Common Mistakes
Forgetting to move the yarn
Purling with the yarn still behind the work creates an accidental yarn over and adds a stitch. If your stitch count keeps creeping upward, this is almost always the reason.
Wrapping the wrong way
Wrapping clockwise instead of counterclockwise twists the stitch. It will look subtly wrong and sit tighter than its neighbours.
Knitting too tight
Crocheters usually arrive with a firm tension habit, which serves you well with a hook and works against you with needles. Stitches need to slide. If you are wrestling each one off the needle, loosen up or go up a size.
Losing your place in ribbing
Read the fabric instead of counting from memory. A V facing you means knit it. A bump means purl it.
11. Frequently Asked Questions
Is English or Continental better for someone who crochets?
Continental usually feels more natural, because the yarn stays in your left hand exactly as it does in crochet. English tends to give beginners steadier tension while they are learning. Try both for a few rows and keep whichever your hands prefer — neither is more correct.
Does English style knitting look different from Continental?
No. The finished fabric is identical. Continental is generally faster once learned, and English is often described as easier to control at the start. Many knitters switch between them depending on the project.
Can I follow a knitting pattern with a crochet hook?
Not stitch for stitch. The construction and gauge are completely different, so the numbers will not transfer. You can recreate the look using the crochet methods listed above, but you will need to rework the stitch counts yourself.
Why does my stockinette curl at the edges?
It always does. The structure of the fabric pulls that way. Add a garter or ribbed border, or block the finished piece by wetting it and pinning it flat until dry.
Do I need to learn knitting to be a better crocheter?
No. But understanding knit and purl makes knitting patterns readable, which widens the pool of designs you can adapt — and it makes conversations at craft groups considerably less confusing.
Want the Same Texture Without Needles? 🪝
Four crochet techniques that produce ribbing, stockinette, and purl bumps — plus a 30-minute ribbed cuff to practise on.
Purl Texture in Crochet →