
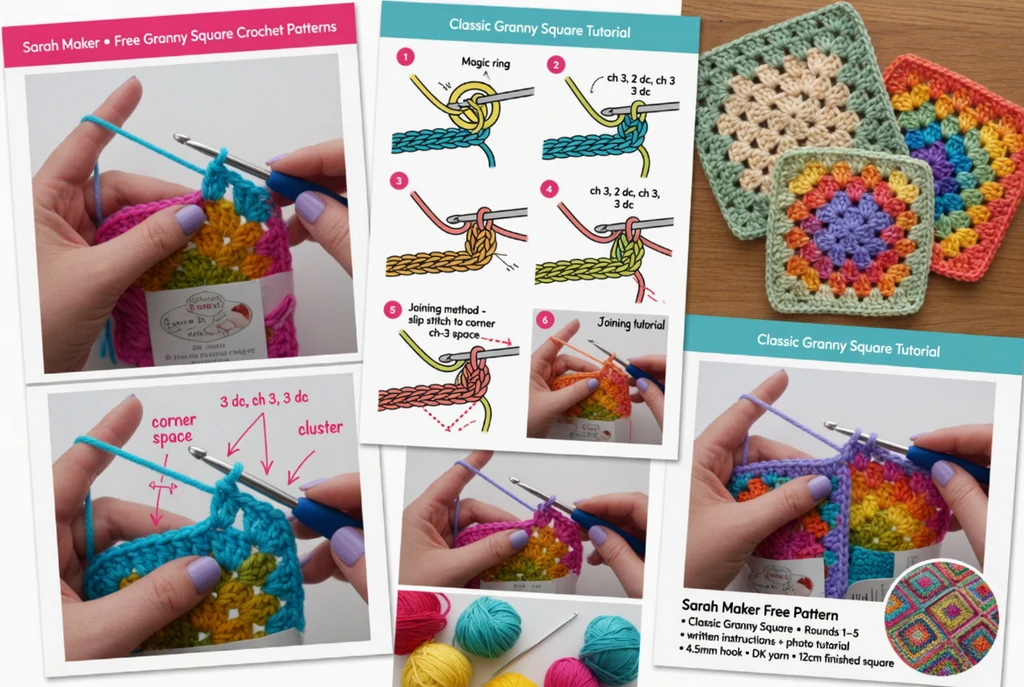
Free Granny Square Patterns for Beginners
Free granny square patterns are a simple way to practice crochet while making something you can use in blankets, bags, pillows, scarves, and other projects. This guide includes a classic granny square and a solid granny square with clear instructions, stitch counts, and help for common mistakes.
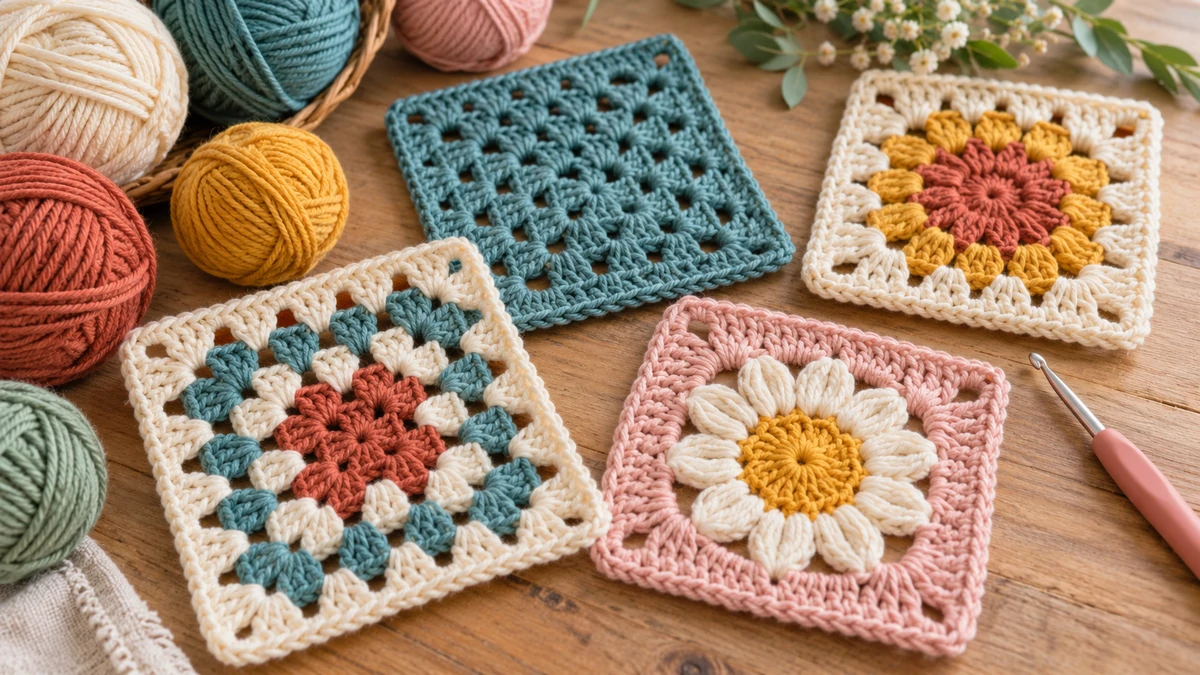
Which Granny Square Should You Make First?
Classic Granny Square
The classic granny square uses groups of three double crochet stitches separated by chain spaces. This creates the familiar open design often used in colorful crochet blankets.
Good for: blankets, bags, scarves, garments, and scrap-yarn projects.
Solid Granny Square
The solid granny square uses double crochet stitches across each side instead of leaving open spaces between the stitch groups.
Good for: pillows, bags, denser blankets, and projects where you want fewer holes.
If you are learning crochet for the first time, our crochet guide for beginners can help you practice the basic stitches before starting a square.
What You Need
- Smooth worsted-weight / #4 yarn
- 5 mm crochet hook, or the hook recommended for your yarn
- Scissors
- Yarn needle
- Stitch marker, optional
A smooth, light-colored yarn makes individual stitches and chain spaces easier to see while you practice.
Other yarn weights can also be used. A thinner yarn usually creates a smaller square, while a thicker yarn creates a larger and heavier square when the same number of rounds is used.
If you are unsure which hook to use, see the CrochetEco crochet hook size chart.
Crochet Abbreviations Used in These Patterns
| Abbreviation | Meaning |
|---|---|
| ch | chain |
| dc | double crochet |
| sl st | slip stitch |
| sp | space |
| ch-sp | chain space |
| st / sts | stitch / stitches |
| rnd | round |
Free Classic Granny Square Pattern
The classic granny square is made from groups of three double crochet stitches. These groups are often called granny clusters.
Each corner contains two clusters separated by a ch-2 space. The spaces along the straight sides use ch 1 between neighboring clusters.
Start the Center Ring
Ch 4. Join with a sl st in the first chain to form a small ring.
4 clusters • 12 dc • 4 corner spaces
8 clusters • 24 dc • 4 side spaces
12 clusters • 36 dc
Check Your Square After Round 3
- 4 ch-2 corner spaces
- 1 side cluster between each pair of corners
- 12 granny clusters
- 36 double crochet stitches
Free Solid Granny Square Pattern
A solid granny square creates a denser fabric because the straight sides are filled with double crochet stitches. The four corner chain spaces remain so the fabric can turn cleanly at each corner.
Start the Center Ring
Ch 4. Join with a sl st in the first chain to form a ring.
12 dc • 4 corner spaces
28 dc • 4 corner spaces
44 dc • 4 corner spaces
60 dc • 4 corner spaces
Solid Granny Square Stitch Count
| Round | Total dc | Stitches on each side |
|---|---|---|
| 1 | 12 | 3 |
| 2 | 28 | 7 |
| 3 | 44 | 11 |
| 4 | 60 | 15 |
How to Make a Classic Granny Square Larger
- Work (3 dc, ch 2, 3 dc) in each corner.
- Work 3 dc in every existing ch-1 side space.
- Ch 1 between neighboring clusters.
Each new round adds one more granny cluster to each straight side.
| Round | Total clusters | Side clusters between corners |
|---|---|---|
| 1 | 4 | 0 |
| 2 | 8 | 0 |
| 3 | 12 | 1 |
| 4 | 16 | 2 |
| 5 | 20 | 3 |
How to Make a Solid Granny Square Larger
Continue working (2 dc, ch 2, 2 dc) in every corner space and work 1 dc in each stitch across every straight side.
The number of double crochet stitches between corner spaces increases by four on each new round: 3 → 7 → 11 → 15 → 19.
How to Change Colors
- Finish the current round and join with a slip stitch.
- Fasten off the old color.
- Join the new yarn in a corner space.
- Continue with the next round.
Starting a new color in a corner also makes the beginning of the next round easy to find.
Should You Block Granny Squares?
Blocking can help several granny squares match more closely before they are joined. It can also smooth small differences along the edges.
Follow the care instructions for your yarn because fibers can respond differently to water, steam, and heat.
Common Granny Square Problems and How to Fix Them
The Square Looks Round
Check all four corners. Each corner needs the full corner sequence and a clear ch-2 space. A missed corner increase can pull the fabric inward.
The Square Is Turning Into a Bowl
Check the number of corners, clusters, and side stitches. Missing stitches or very tight tension can make a flat square curve upward.
The Edges Are Wavy
Look for extra clusters, extra corner groups, or unusually loose chain spaces. Extra fabric around the outside can make the edges wave.
The Squares Are Different Sizes
Use the same yarn weight, hook size, round count, and similar tension for every square. Blocking can help with small differences, but it cannot correct a large stitch-count difference.
The Center Hole Is Too Large
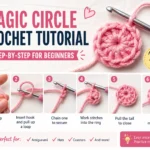
You can replace the starting chain ring with a magic ring. Tighten the center after the first round and weave the yarn end in securely.
If your work keeps curling even when the stitch count is correct, see why crochet curls and how to fix it.
What Can You Make With Granny Squares?
- Blankets: join multiple squares into a grid.
- Tote bags: use squares to build the front and back panels.
- Pillow covers: join squares into panels sized for your pillow.
- Scarves: join several squares in one long row.
- Cardigans: arrange squares into larger garment panels.
- Coasters: make smaller squares using a suitable yarn.
Classic vs. Solid Granny Square
| Feature | Classic | Solid |
|---|---|---|
| Fabric | Open and airy | Denser |
| Main structure | 3-dc clusters | Continuous dc sides |
| Open side spaces | Yes | No |
| Corner spaces | Yes | Yes |
| Suitable as a first square | Yes | Yes |
Frequently Asked Questions
What Is the Easiest Granny Square to Start With?
The classic three-round granny square is a useful starting pattern because the stitch groups and four corners are easy to identify as you work.
What Yarn Should I Use for Granny Squares?
A smooth yarn is easier to work with when you are learning. Light colors also make individual stitches easier to see than very dark yarn.
What Crochet Hook Size Should I Use?
Start with the hook size recommended for your yarn. A 5 mm hook works with many worsted-weight yarns, but yarn and tension can change the best hook size.
Can I Use a Magic Ring?
Yes. A magic ring can replace the starting chain ring and lets you tighten the opening in the center after finishing the first round.
How Many Rounds Should a Granny Square Have?
There is no required number. Continue until the square reaches the size you need. When making several matching squares, use the same number of rounds for each one.
Do Granny Squares Have to Be Blocked?
No. Blocking is optional, but it can help when several finished squares need to match closely before joining.
Which Pattern Should You Try First?
Start with the classic three-round square if you are still learning how granny-square construction works. It teaches chain spaces, corners, clusters, and joined rounds in a small project.
After that, try the solid version. These two free granny square patterns start in a similar way but create noticeably different fabrics.
Once your stitch counts and corners stay consistent, you can repeat the same squares for blankets, bags, pillows, scarves, and many other crochet projects.
Which Granny Square Pattern Should You Start With?
Classic Granny Square
The classic granny square uses groups of three double crochet stitches separated by chain spaces. It creates the familiar open granny square look.
Good for: blankets, scarves, bags, garments, and scrap-yarn projects.
Solid Granny Square
The solid granny square uses double crochet stitches across each side instead of open chain spaces between clusters.
Good for: pillows, denser blankets, bags, and projects where you want fewer holes.
If crochet is completely new to you, start with our step-by-step beginner crochet guide.
What You Need
- Smooth worsted-weight / #4 yarn
- 5 mm (H-8) crochet hook, or the size recommended for your yarn
- Scissors
- Yarn needle
- Optional stitch marker
A smooth, light-colored yarn makes the stitches and chain spaces easier to see while you learn.
You can use other yarn weights, but the finished granny square will become smaller or larger.
If you are unsure which hook matches your yarn, see the CrochetEco crochet hook size chart.
U.S. Crochet Abbreviations
| Abbreviation | Meaning |
|---|---|
| ch | chain |
| dc | double crochet |
| sl st | slip stitch |
| sp | space |
| ch-sp | chain space |
| st / sts | stitch / stitches |
| rnd | round |
Free Classic Granny Square Pattern
The classic granny square is built from granny clusters. One granny cluster is three double crochet stitches worked into the same chain space.
Each corner contains two granny clusters separated by a ch-2 space. Straight sides use a ch-1 space between neighboring clusters.
Start the Center Ring
Ch 4. Join with a sl st in the first chain to form a small ring.
4 granny clusters • 12 dc • 4 corner spaces
8 granny clusters • 24 dc • 4 ch-1 side spaces
12 granny clusters • 36 dc
Check Your Square After Round 3
- 4 clear ch-2 corner spaces
- 1 side cluster between each pair of corners
- 12 granny clusters total
- 36 double crochet stitches total
Free Solid Granny Square Pattern
The solid granny square has fewer open spaces across the sides. The four ch-2 corner spaces remain because the fabric needs room to turn at each corner.
Start the Center Ring
Ch 4. Join with a sl st in the first chain to form a ring.
12 dc • 4 ch-2 corner spaces
28 dc • 4 ch-2 corner spaces
44 dc • 4 ch-2 corner spaces
60 dc • 4 ch-2 corner spaces
Solid Granny Square Stitch Count
| Round | Total dc | Stitches on each side |
|---|---|---|
| 1 | 12 | 3 |
| 2 | 28 | 7 |
| 3 | 44 | 11 |
| 4 | 60 | 15 |
The total number of double crochet stitches increases by 16 on each new round because each of the four corners adds four stitches.
How to Make a Classic Granny Square Larger
- Each corner gets (3 dc, ch 2, 3 dc).
- Each existing ch-1 side space gets 3 dc.
- Ch 1 between neighboring clusters.
Every new round adds one more side cluster to each side.
| Round | Total granny clusters | Side clusters between corners |
|---|---|---|
| 1 | 4 | 0 |
| 2 | 8 | 0 |
| 3 | 12 | 1 |
| 4 | 16 | 2 |
| 5 | 20 | 3 |
How to Make a Solid Granny Square Larger
Continue placing (2 dc, ch 2, 2 dc) in every corner space and work 1 dc in every stitch across each side.
The number of stitches across each side increases by four on every round: 3 → 7 → 11 → 15 → 19 and so on.
How to Change Colors
- Finish the round and join with a slip stitch.
- Fasten off the old color.
- Join the new color in a corner space.
- Continue with the next round.
Joining a new color in a corner makes the beginning of the round easy to locate.
Should You Block Granny Squares?
Blocking is useful when several squares need to match before joining. It can help smooth the edges and make small differences in tension less noticeable.
Always follow the care instructions for your yarn. Different fibers respond differently to water, steam, and heat.
Common Granny Square Mistakes and How to Fix Them
The Square Looks Round
Check the four corners. Each corner needs its full corner sequence and a clear ch-2 space. A missing corner increase can pull the square inward.
The Square Is Turning Into a Bowl
Count your corners, clusters, and side sections. Missing stitches or very tight tension can make a flat square curve upward.
The Edges Are Wavy
Look for extra clusters, extra corner groups, or unusually loose chain spaces. Too much fabric around the outside can create waves.
My Squares Are Different Sizes
Use the same yarn weight, hook size, round count, and similar tension for every square. Blocking can help small differences, but it cannot correct a major stitch-count difference.
The Center Hole Is Too Large
You can replace the starting chain ring with a magic ring. Tighten the center after the first round and weave in the yarn tail securely.
If your crochet keeps curling even when the stitch count is correct, see why crochet curls and how to fix it.
What Can You Make With Granny Squares?
- Blankets: Join matching squares into a grid.
- Tote bags: Arrange squares into front, back, and side panels.
- Pillow covers: Join squares into panels sized for the pillow insert.
- Scarves: Join squares into a long row.
- Cardigans: Combine groups of squares into garment panels.
- Coasters: Use one small square made with a suitable yarn.
Classic vs. Solid Granny Square
| Feature | Classic | Solid |
|---|---|---|
| Fabric | Open and airy | Denser |
| Main structure | 3-dc clusters | Continuous dc sides |
| Side chain gaps | Yes | No |
| Corner spaces | Yes | Yes |
| Good for beginners | Yes | Yes |
Frequently Asked Questions
What Is the Easiest Granny Square for a Beginner?
The classic three-round granny square is a good starting point because the pattern repeats in easy-to-see groups of three double crochet stitches and four clear corners.
What Yarn Is Best for Learning Granny Squares?
A smooth, light-colored yarn is easier to see while learning. Worsted-weight yarn is a practical choice because the stitches are large enough to identify without making the square too bulky.
What Crochet Hook Should I Use?
Start with the hook size suggested on the yarn label. A 5 mm (H-8) hook is a common starting point for many worsted-weight yarns, but the best size depends on the yarn and your tension.
Can I Start a Granny Square With a Magic Ring?
Yes. A magic ring can replace the starting chain ring and lets you tighten the center opening after the first round.
How Many Rounds Should a Granny Square Have?
There is no required number. Stop when the square reaches the size needed for your project.
Do I Have to Block Granny Squares?
No. Blocking is most useful when several squares need to match closely before joining or when the edges need light shaping.
Which Granny Square Pattern Should You Make First?
For your first project, start with the three-round classic square. It teaches you how to work into chain spaces, make corners, join rounds, and recognize granny clusters.
Once that structure feels comfortable, try the solid version. These two free granny square patterns use the same basic center but create noticeably different fabrics.
Keep your first few squares small and focus on clean corners and consistent tension. When the squares match, you can repeat them for a blanket, bag, pillow, scarf, or larger crochet project.


Reader discussion
Reader Comments
Tried this pattern? Share what worked, ask a question, or help another crocheter.
Your turn
Comments are moderated to keep the discussion useful and family-friendly. Please do not post personal information.