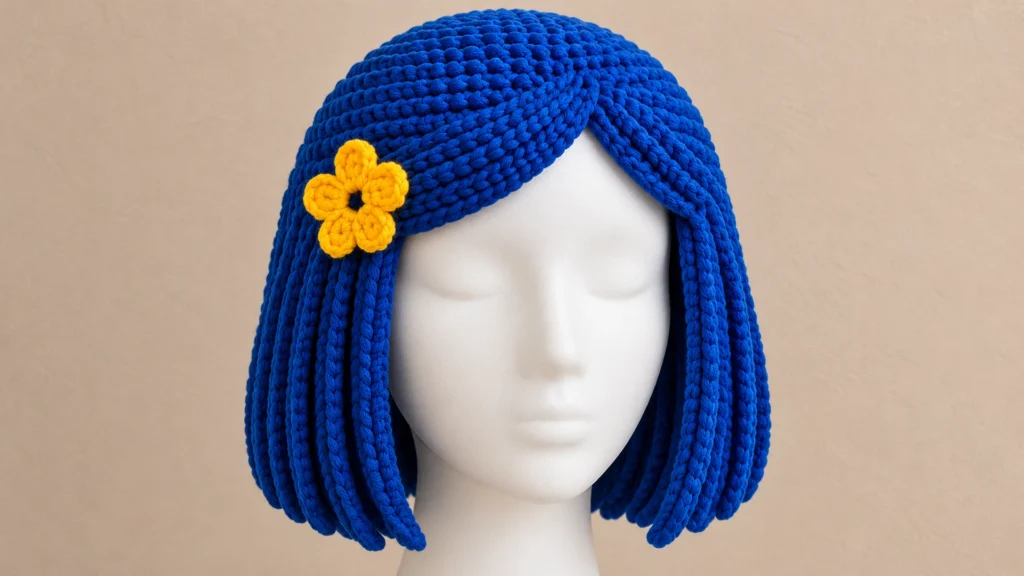
This free crochet bob wig hat pattern makes a royal-blue hairstyle hat with a smooth rounded crown, thick ribbed hair, side-swept bangs, and a little yellow flower. Make the cap first, then crochet 24 separate hair strips and two front panels. The sections are sewn in place, so you can adjust the look while trying it on.
- Skill level
- Intermediate (crochet and assembly)
- Yarn weight
- 4 Medium / worsted
- Yarn used
- Smooth royal-blue acrylic or cotton-blend; a little yellow
- Hook
- 4.5 mm (US 7), adjusted to gauge
- Finished size
- Approx. 21 in (53 cm) unstretched cap circumference at target gauge
- Gauge target
- 16 HDC and about 11 HDC rows per 4 in (10 cm)
- Hair pieces
- 24 ribbed strips + 2 swept-bang panels
- Time
- Not measured; depends on strand assembly
Materials and size check
Use smooth worsted-weight yarn in rich blue and a little golden yellow for the flower. Gather a 4.5 mm crochet hook, blunt yarn needle, stitch markers, scissors, tape measure and an adult-size mannequin or the head that will wear the hat.
You can estimate the yarn you need by weighing one hair strip and multiplying by 24, then allowing more for the cap, bangs and flower. No tested yardage is available for this version.
Measure around the head across the forehead and above the ears. At a gauge of 16 HDC per 4 in (10 cm), an 84-stitch round is about 21 in (53 cm) around before stretching. The Craft Yarn Council head chart lists adult sizes to help you compare. A different gauge changes the fit. Do not force the cap to fit just because the stitch count is correct.
US stitch terms and back-loop stitch
MR = magic ring; ch = chain; sc = single crochet; hdc = half double crochet; inc = two HDC in one stitch; BLO = back loop only; sl st = slip stitch.
For HDC, yarn over, insert the hook, pull up a loop, yarn over and pull through all three loops. For BLO, insert your hook under only the back loop. In flat rows, the turning ch 1 does not count as a stitch.
Crochet bob wig hat pattern: Step 1, the crown
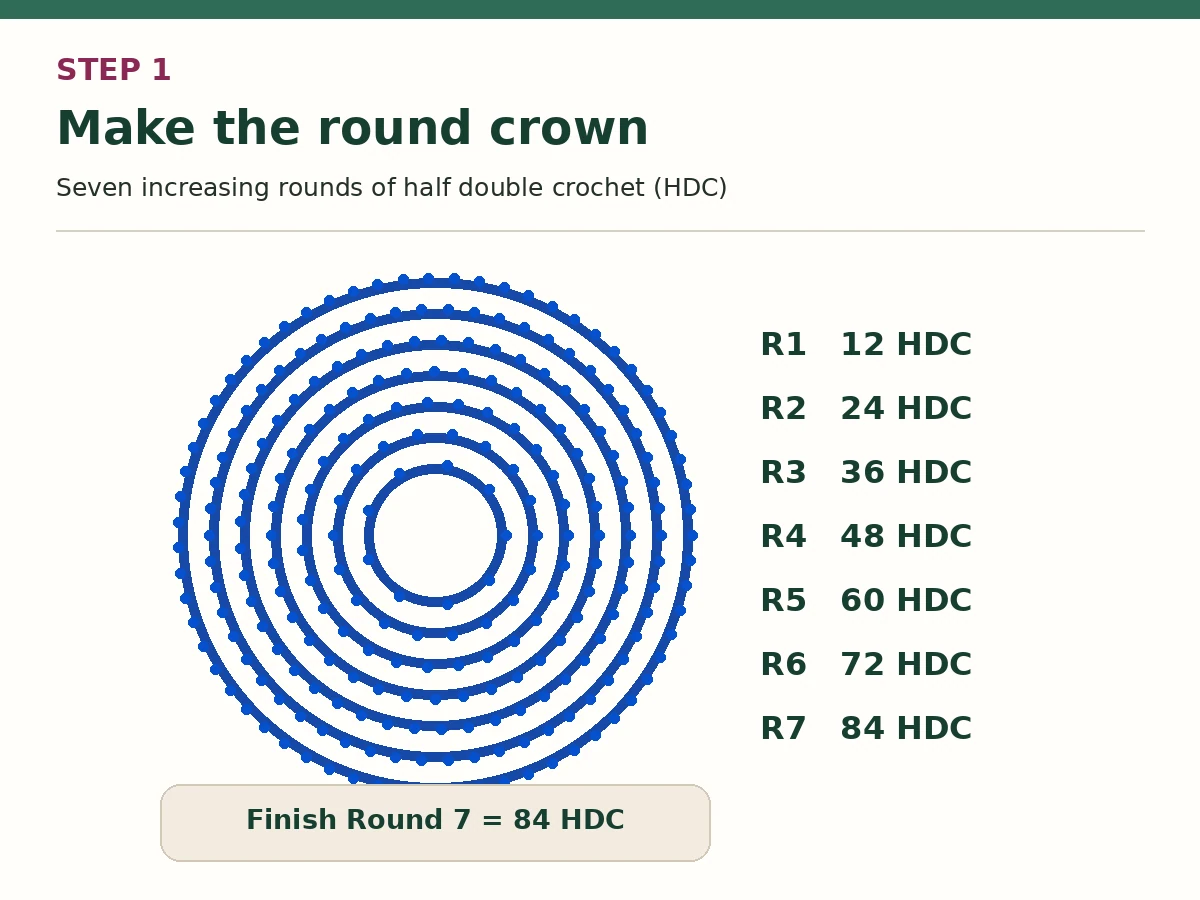
Work the blue crown from the center outward in joined rounds. Mark the first HDC and move the marker every round. Count carefully before starting a new round.
Round 1: Make MR, ch 1, work 12 HDC into the ring; join with sl st. (12 HDC)
Round 2: Ch 1; 2 HDC in every stitch; join. (24 HDC)
Round 3: Ch 1; *1 HDC, inc* 12 times in all; join. (36 HDC)
Round 4: Ch 1; *2 HDC, inc* 12 times in all; join. (48 HDC)
Round 5: Ch 1; *3 HDC, inc* 12 times in all; join. (60 HDC)
Round 6: Ch 1; *4 HDC, inc* 12 times in all; join. (72 HDC)
Round 7: Ch 1; *5 HDC, inc* 12 times in all; join. (84 HDC)
Step 2. Make the base cap
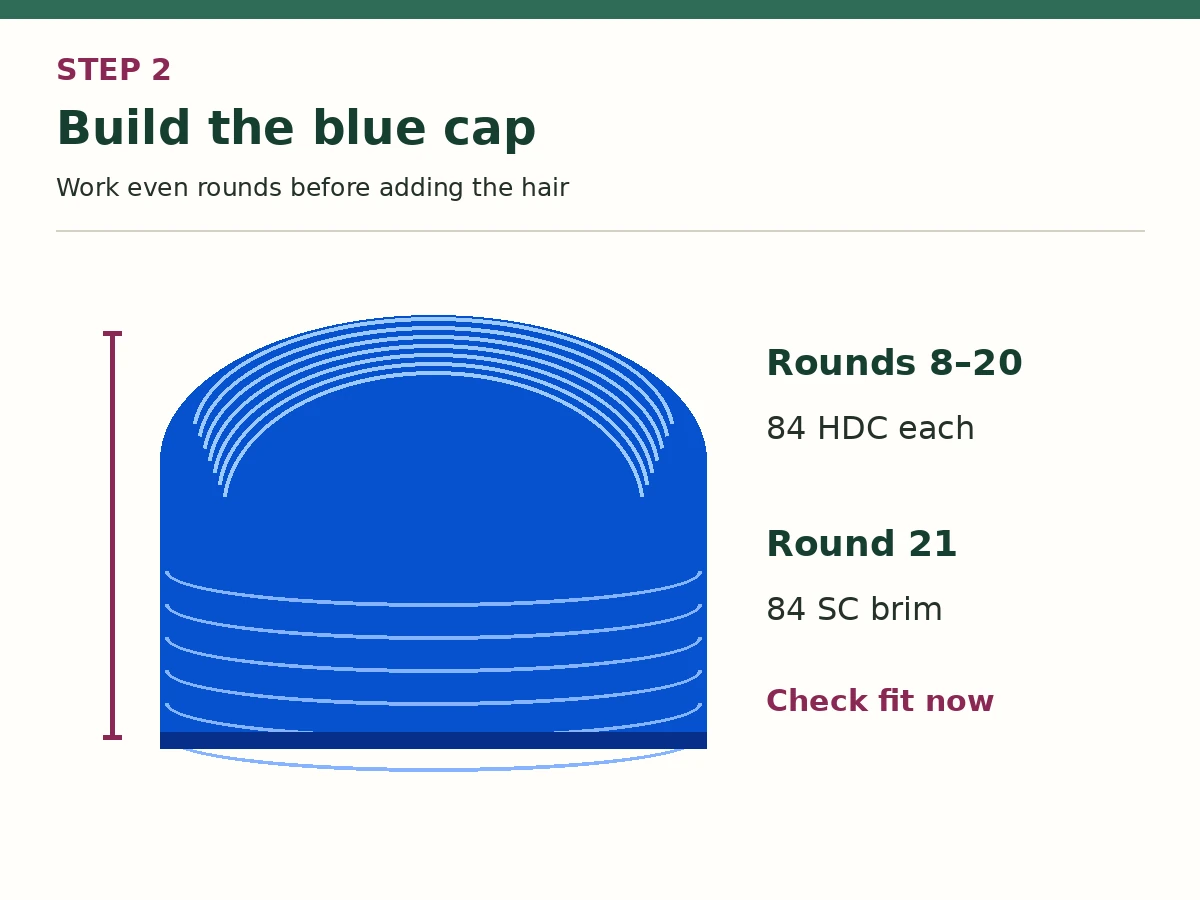
Stop increasing. The same 84 stitches now curve down over the head to form the cap beneath the hairstyle.
Rounds 8–20: Ch 1, work 1 HDC in every stitch, and join. (84 HDC in each round)
Round 21: Ch 1, work 1 SC in each stitch. Join and fasten off with a long tail. (84 SC)
Try on the cap after Round 16. Continue to Round 20 only if you need that depth. The lower edge should rest near the natural hairline without blocking the eyes. If you change the number of even rounds, keep the final brim at 84 SC for the attachment plan below.
Step 3. Crochet 24 ribbed hair strips
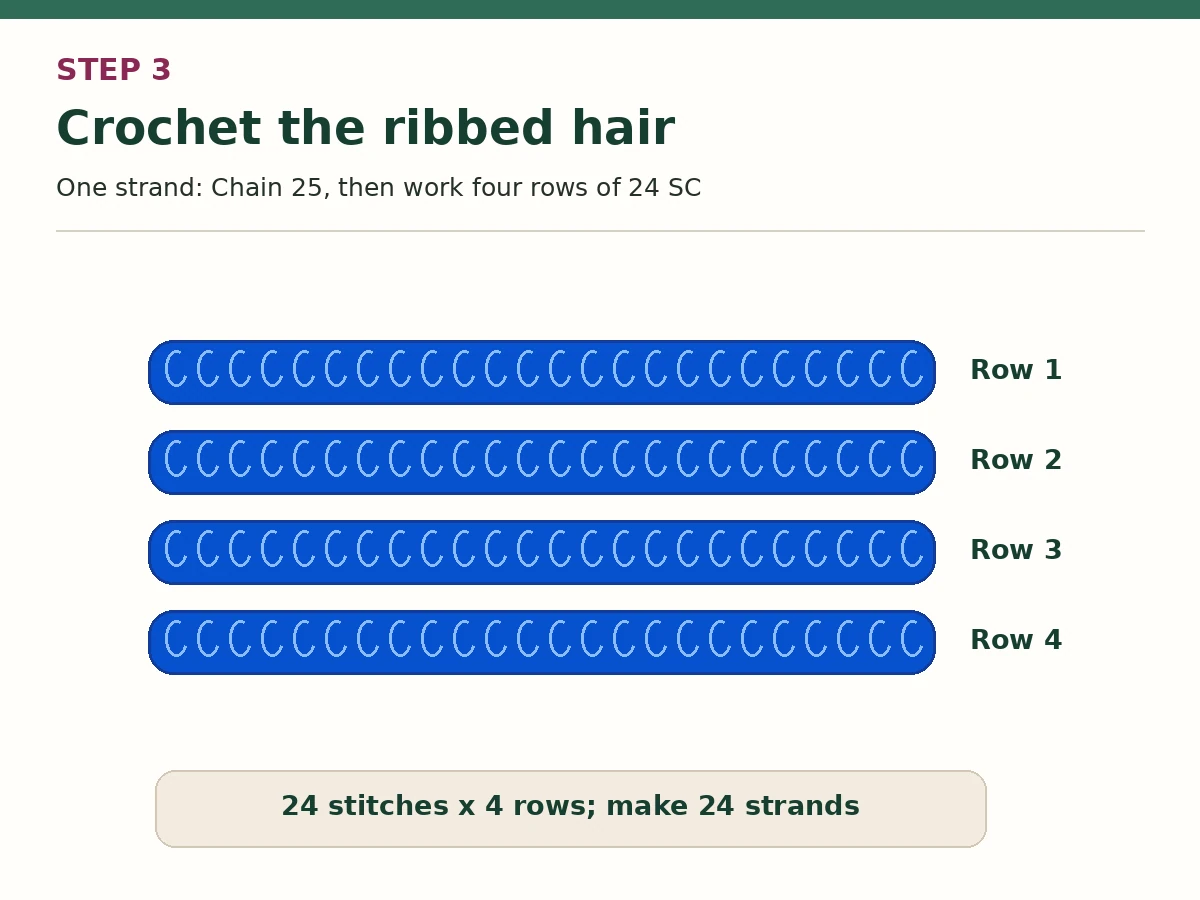
These flat, narrow pieces become the long blue strands seen around the sides and back. Working across the long side of the strip in BLO gives raised lines running from top to tip.
Foundation: Ch 25.
Row 1: SC in the second chain from the hook and in the remaining chains. Ch 1 and turn. (24 SC)
Rows 2–4: SC in BLO across all 24 stitches; ch 1 and turn between rows. Do not add a turning chain after Row 4. (24 SC per row)
Fasten off, leaving a long tail at one short end. Make 24 matching strips.
At an example gauge of 16 SC and 20 SC rows per 4 in (10 cm), one strip is about 6 in (15 cm) long and ¾–1 in (2–2.5 cm) wide. This size is only a calculation. Make one first and hold it alongside the mannequin’s jaw before making all 24.
Step 4. Attach the hair strips evenly
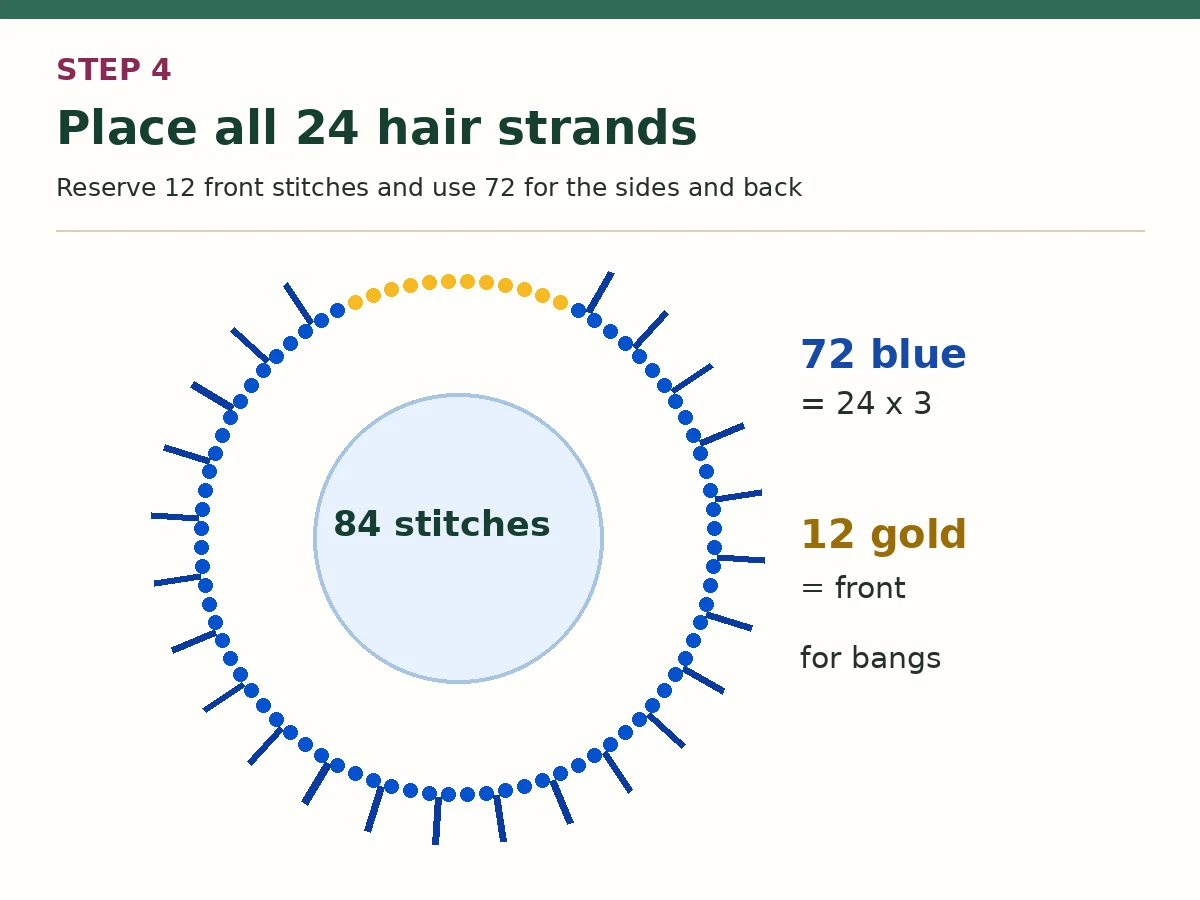
Place the cap on your mannequin with the front centered. Mark the point between brim stitches 84 and 1 as the front center. Leave stitches 79–84 and 1–6 clear for the bangs. That is 12 front stitches.
1. The other 72 brim stitches run from stitch 7 through stitch 78. Divide them into 24 groups of three: 7–9, 10–12, 13–15, continuing until 76–78.
2. Pick up one ribbed strip. Place its short top end against the first three-stitch group, with the longer ribbed fabric hanging downward.
3. Use the long yarn tail to sew the top of the strip securely over those three brim stitches. Do not sew along the full length of the strip.
4. Attach the remaining 23 strips, one per group. Let the strips overlap slightly, rather than twisting them into rope.
Step 5. Make the V-shaped side-swept bangs
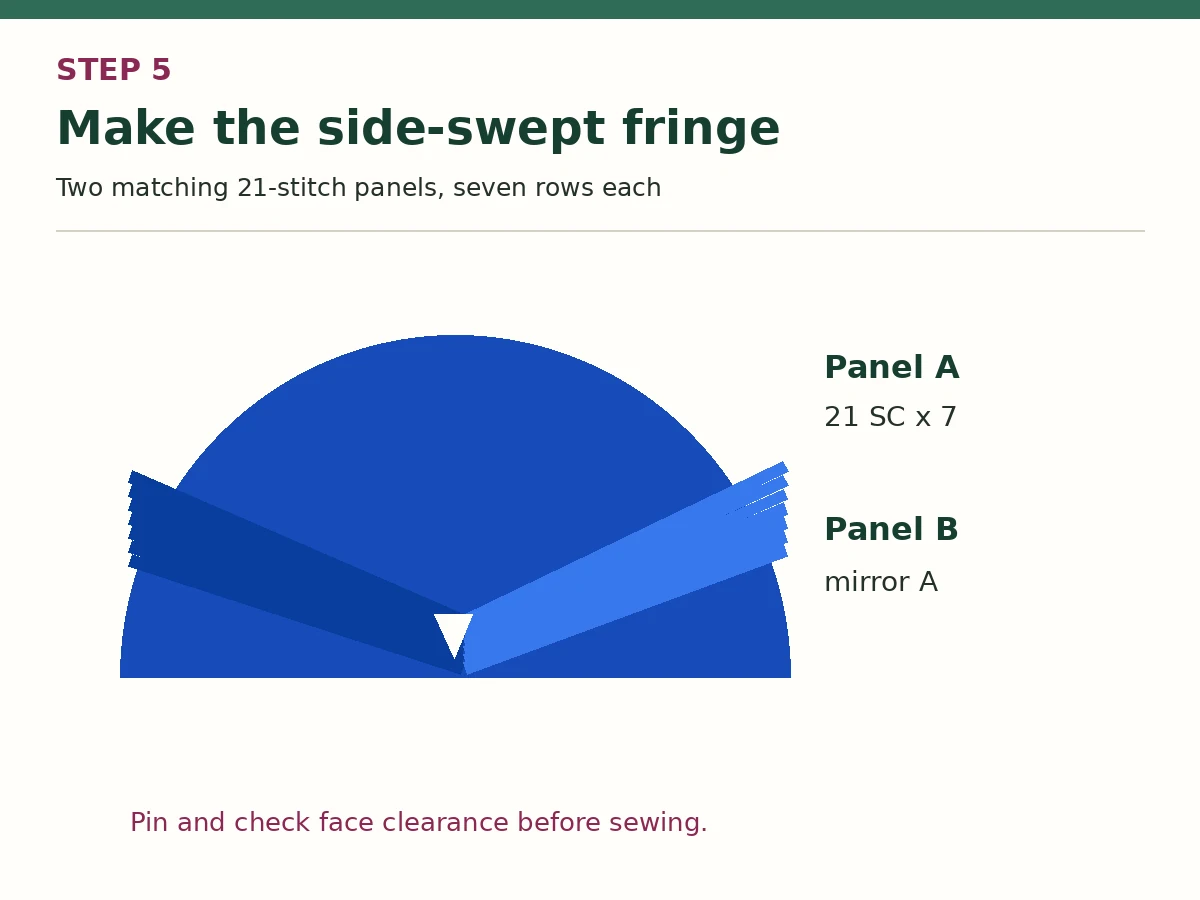
The reference has two wide, curved front sections that meet above the forehead. Make two matching ribbed panels and turn one over to mirror the first.
Foundation: Ch 22 with blue yarn.
Row 1: SC in the second chain and in each remaining chain; ch 1 and turn. (21 SC)
Rows 2–7: SC in BLO across; ch 1 and turn between rows. (21 SC per row)
Fasten off with long sewing tails. Make two panels (147 SC each).
Pin the first panel across the left half of the cap front. Angle its long top edge from the left temple toward a point just above the front center. Pin the second in a mirrored position from the right temple. Let the inner ends meet in a shallow V, leaving the face clear.
Sew along the upper long edges using small hidden stitches through the cap fabric, then anchor the temple ends. Keep the lower edges free so the front looks layered.
Do this while the cap is on the mannequin. The panel shape is adjustable, and no fixed seam position will suit every head. Check the symmetry and face opening from the front before removing the pins.
Step 6. Make the five-petal yellow flower
The small yellow flower sits over the temple on the viewer’s left. It covers the place where the side-swept front panel meets the hanging strips.
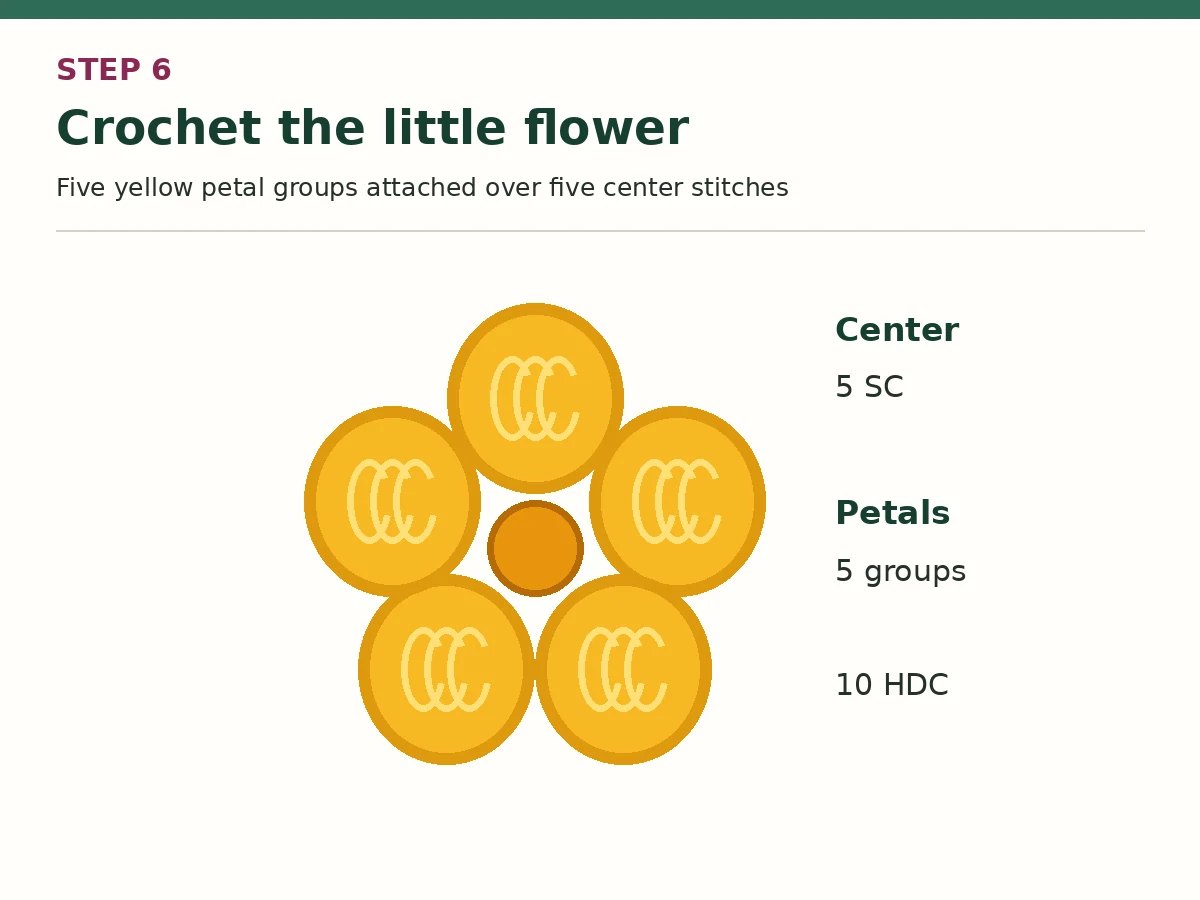
Center: With yellow yarn, MR, ch 1, and work 5 SC in the ring. Join. (5 SC)
Petal round: In each center SC, work (sl st, ch 2, 2 HDC, ch 2, sl st) in that same stitch. Repeat in the other four center stitches. (5 petals, 10 HDC total)
Fasten off with a long tail. Sew through the center of the flower, catching several strands of the blue cap. Leave the petal tips free.
Finish, adjust the fit, and solve problems
Weave loose tails through several nearby stitches on the inside of the cap. Check that none of the hanging strips pulls on the brim. Comb the strips gently with your fingers and trim no yarn unless you are intentionally shortening a removable test strip. The ends should form a soft line around the jaw.
| Problem | What to check |
|---|---|
| Cap feels too tight | Measure the 84-stitch circumference and change hook or yarn before making hair pieces. Do not rely on stretch alone. |
| One strip is much longer | Recheck Ch 25, 24 SC per row and equal yarn tension. |
| Hair pulls the front downward | Reduce the weight of the strips or secure the cap with an optional hidden tie; avoid too many extra strands. |
| Front fringe blocks the eyes | Pin the panels higher on the cap and check the V-shaped opening before sewing. |
| Flower flops sideways | Sew through its center and anchor it to more than one cap stitch. |
Can I make the bob shorter?
Yes. Begin each hair strip with fewer chains and keep the same four-row width. Make one test strip first. The joining plan still uses 24 strips.
Will this crochet wig fit every adult?
No. The base pattern targets an unstretched circumference of about 21 in (53 cm), assuming the stated gauge. Measure the wearer, check the crown, and adjust your gauge before committing to the full wig.
Are the strands crocheted separately?
Yes. The 24 ribbed strips are worked flat and sewn to the lower brim. This differs from a one-piece short-row wig construction.
Can I change the color or flower?
Yes. Keep the blue cap and hair strips the same yarn weight if you switch colors. The little flower can be any color you like or omitted entirely.
Save this crochet bob wig hat pattern
Keep this crochet bob wig hat pattern open while you attach the hair. If you need practice with rounds, try the CrochetEco beanie tutorial first. The hook size chart can help you choose another hook for the gauge.
Editorial note: Stitch counts and the strip-allocation map were checked mathematically. The hairstyle is a proposed construction based on a supplied image, not a physically tested pattern. The diagrams explain the sequence but are not photographs of a handmade sample. Test cap fit, bang placement, and seam strength before describing the finished pattern as verified.
Comments
Leave a Comment