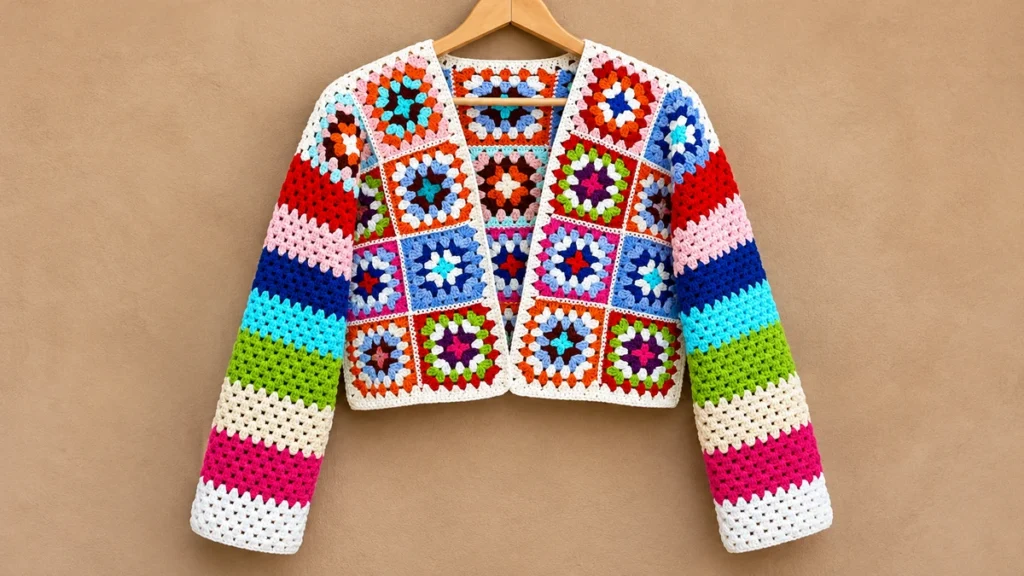
This granny square cardigan crochet pattern combines 24 bright squares with long, striped sleeves and a neat cream border. It makes a cropped, open-front cardigan inspired by the colorful jacket in the reference photo. You’ll make one repeatable square, join three body panels, and crochet both sleeves directly into the armholes.
- Skill level
- Confident beginner; sewing and fit checks
- Construction
- 24 squares + 2 granny-stripe sleeves
- Yarn
- Medium/worsted (4), several colors
- Hook
- 5 mm (US H-8), adjust for gauge
- Square size target
- 4¾ in (12 cm), blocked
- Sample body
- About 38 in (96.5 cm) around
- Body length
- About 14¼ in (36 cm) before edging
- Terms
- US crochet abbreviations
Materials, colors, and a fit check
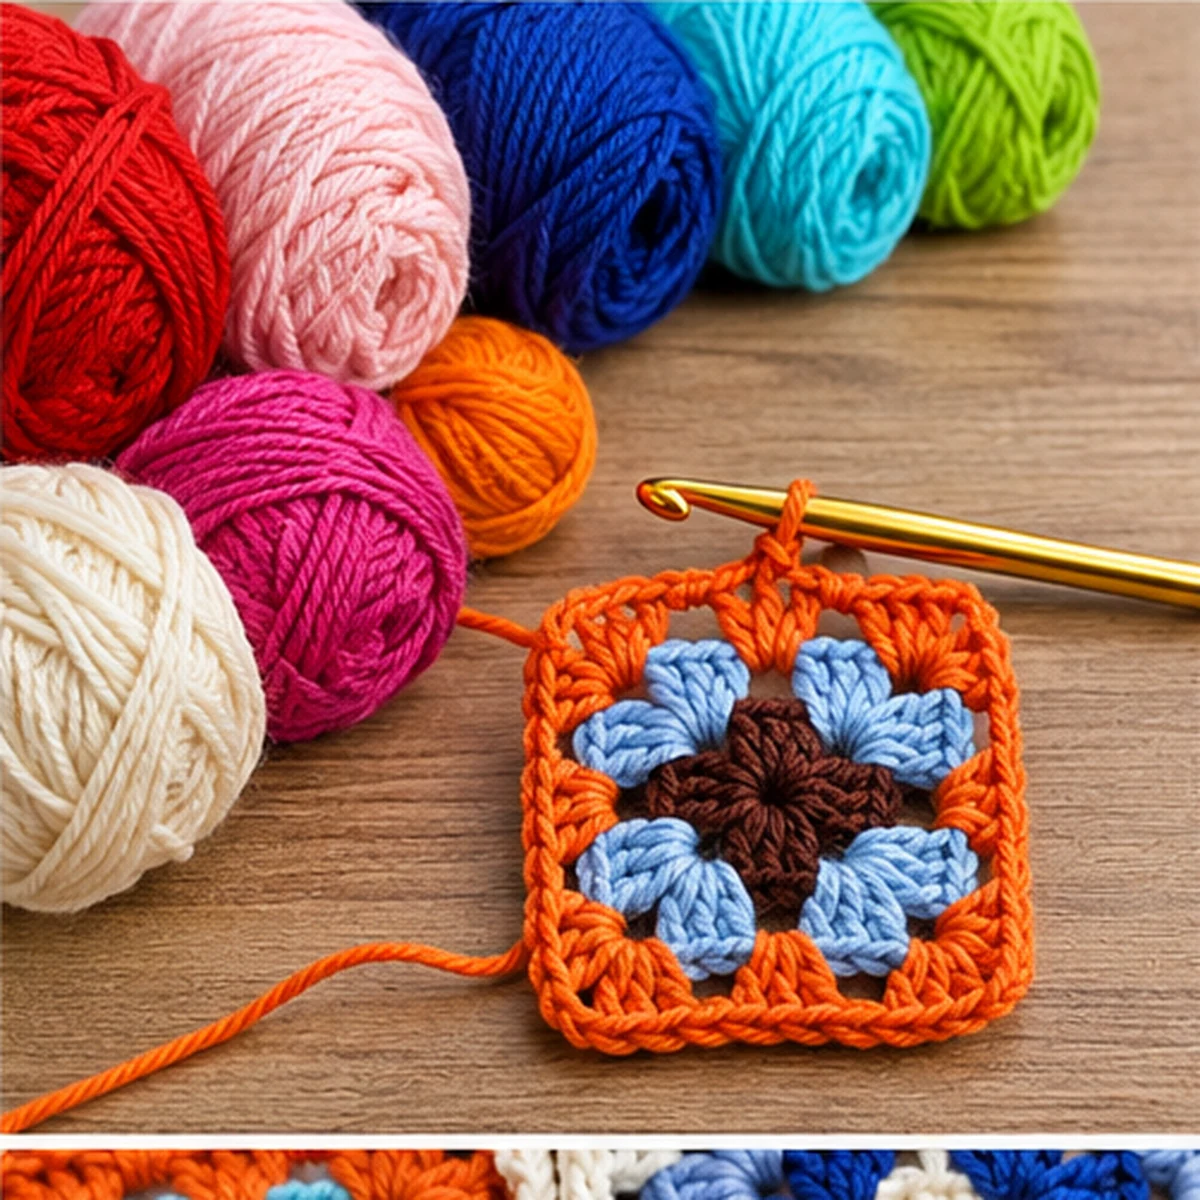
Choose medium/worsted-weight yarn that feels comfortable against your skin. Acrylic or cotton blends can work; keep the yarn weight the same throughout. You’ll need cream for the square borders and seams, plus orange, rust, pink, red, navy, cobalt, aqua, lime, magenta, and dark brown for the squares and sleeves.
- 5 mm crochet hook or the size that gives your desired square
- Colorful worsted yarn, with extra cream for joins and edging
- Yarn needle, scissors, measuring tape, and locking stitch markers
- A light blocking mat or towel for measuring all 24 squares
The Craft Yarn Council yarn weight guide explains medium-weight category 4. For yarn amounts, weigh one finished square and multiply by 24. Add yarn for two long sleeves and the joining seams. This is more dependable than an untested yardage estimate.
Measure before you continue: Aim for a square that is 4¾ in (12 cm) across after light blocking. Four squares across the back make about 19 in (48 cm). Four more squares across the combined fronts make about 19 in. The sample cardigan is therefore approximately 38 in (96.5 cm) around, before edging and seam take-up. Try the panel width against a garment that already fits.
Open US crochet terms
ch: chain; dc: double crochet; sc: single crochet; sl st: slip stitch; sp: space; RS: right side; WS: wrong side. A granny group is three double crochet stitches worked into the same space.
In the granny squares, the beginning ch 3 counts as the first dc. A joining slip stitch never counts as a dc. Change colors only at the start of a new round.
Granny square cardigan crochet pattern: Step 1
Make one four-round granny square
Every square uses four rounds. Make the center in a dark or bright color, use two other colors for the middle rounds, and finish with cream. The last cream round helps the squares look connected once they’re joined.
Round 1 (center): Ch 4 and sl st into the first chain to make a ring. Ch 3 (counts as 1 dc), 2 dc into the ring, ch 2. Work *3 dc into the ring, ch 2* three more times. Sl st to the top of the beginning ch 3. (4 granny groups, 12 dc, 4 corner ch-2 spaces)
Round 2 (new color): Join yarn in any corner ch-2 space. In that space work (ch 3, 2 dc, ch 2, 3 dc), then ch 1. In each of the other three corners work (3 dc, ch 2, 3 dc), then ch 1. Join into the beginning ch 3. (8 groups, 24 dc, 4 corners, 4 side ch-1 spaces)
Round 3 (new color): Join in any corner. Work (ch 3, 2 dc, ch 2, 3 dc), ch 1. Work 3 dc into the next side ch-1 space, ch 1. Repeat that full corner-and-side sequence around the other three sides; join to the beginning ch 3. (12 groups, 36 dc, 4 corners, 8 side ch-1 spaces)
Round 4 (cream): Join in any corner. Work (ch 3, 2 dc, ch 2, 3 dc), ch 1. Work 3 dc in each of the next TWO side ch-1 spaces, making ch 1 after each group. Work the same corner and two-side-groups sequence on the remaining three sides. Join and fasten off. (16 groups, 48 dc, 4 corners, 12 side ch-1 spaces)
Step 2. Make 24 squares and plan the colors
For this granny square cardigan crochet pattern, make the remaining 23 squares. Mix the bright colors so neighboring motifs do not have the same center and middle rounds. Use cream for Round 4 on every square. Weave in the color-change ends before joining.
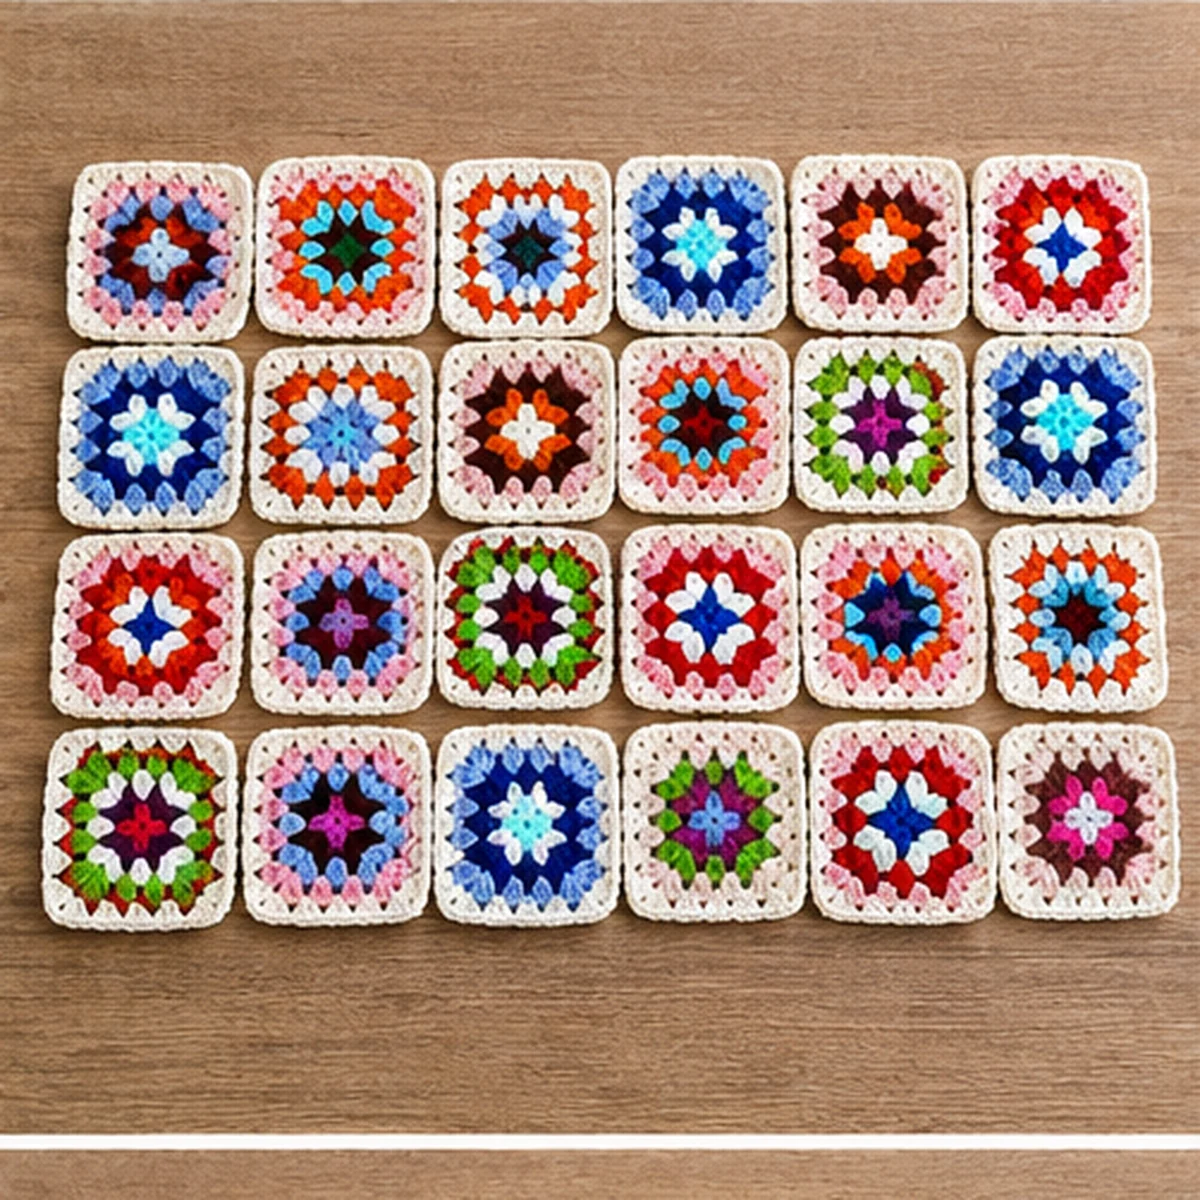
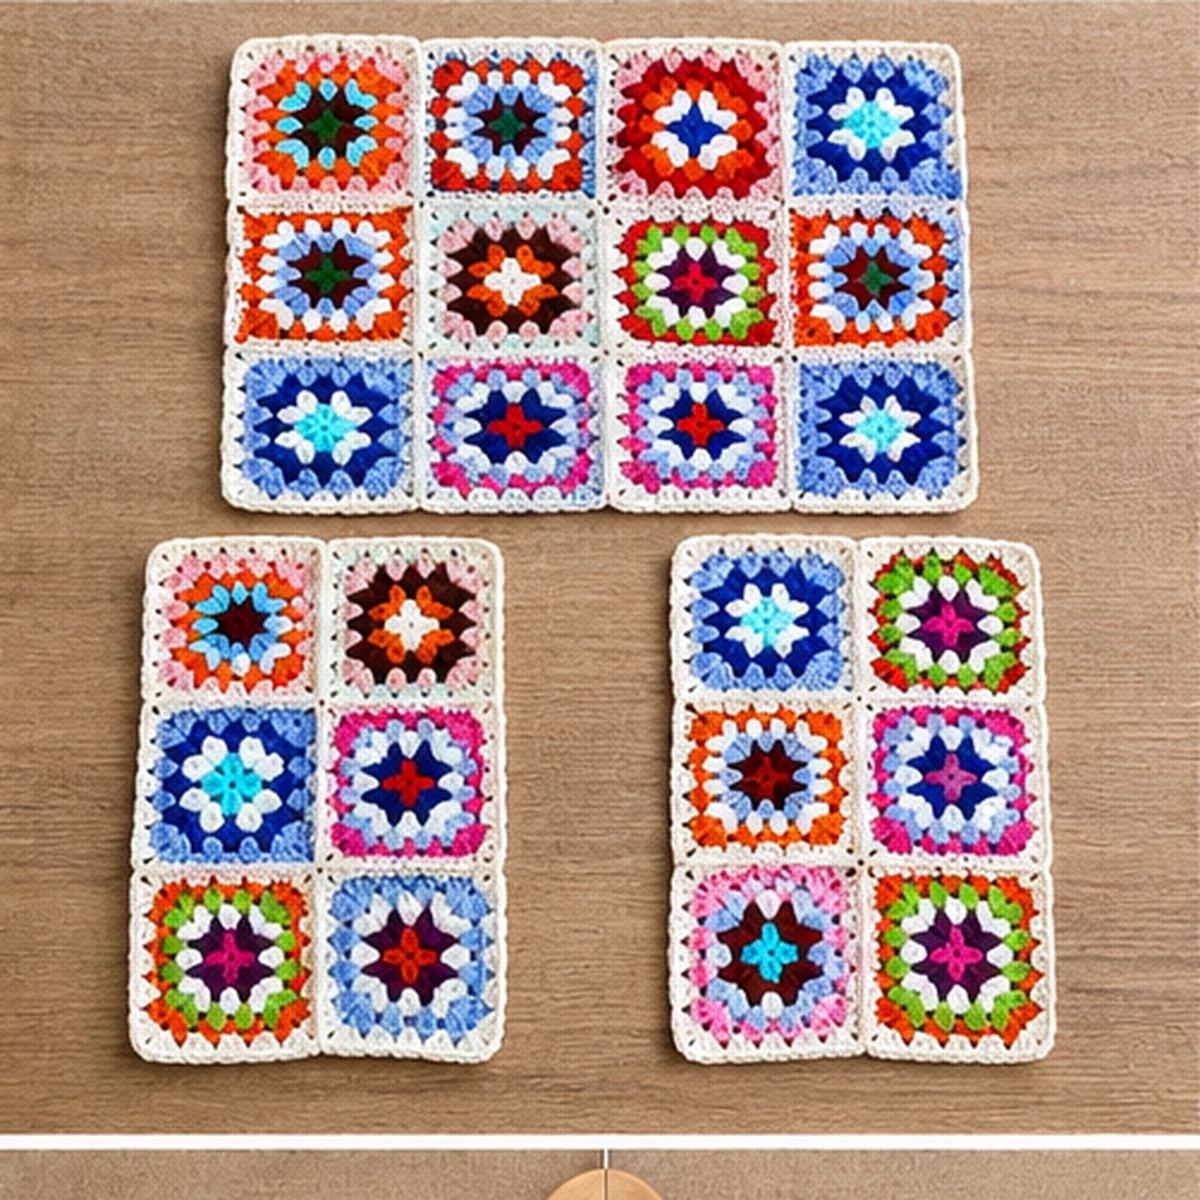
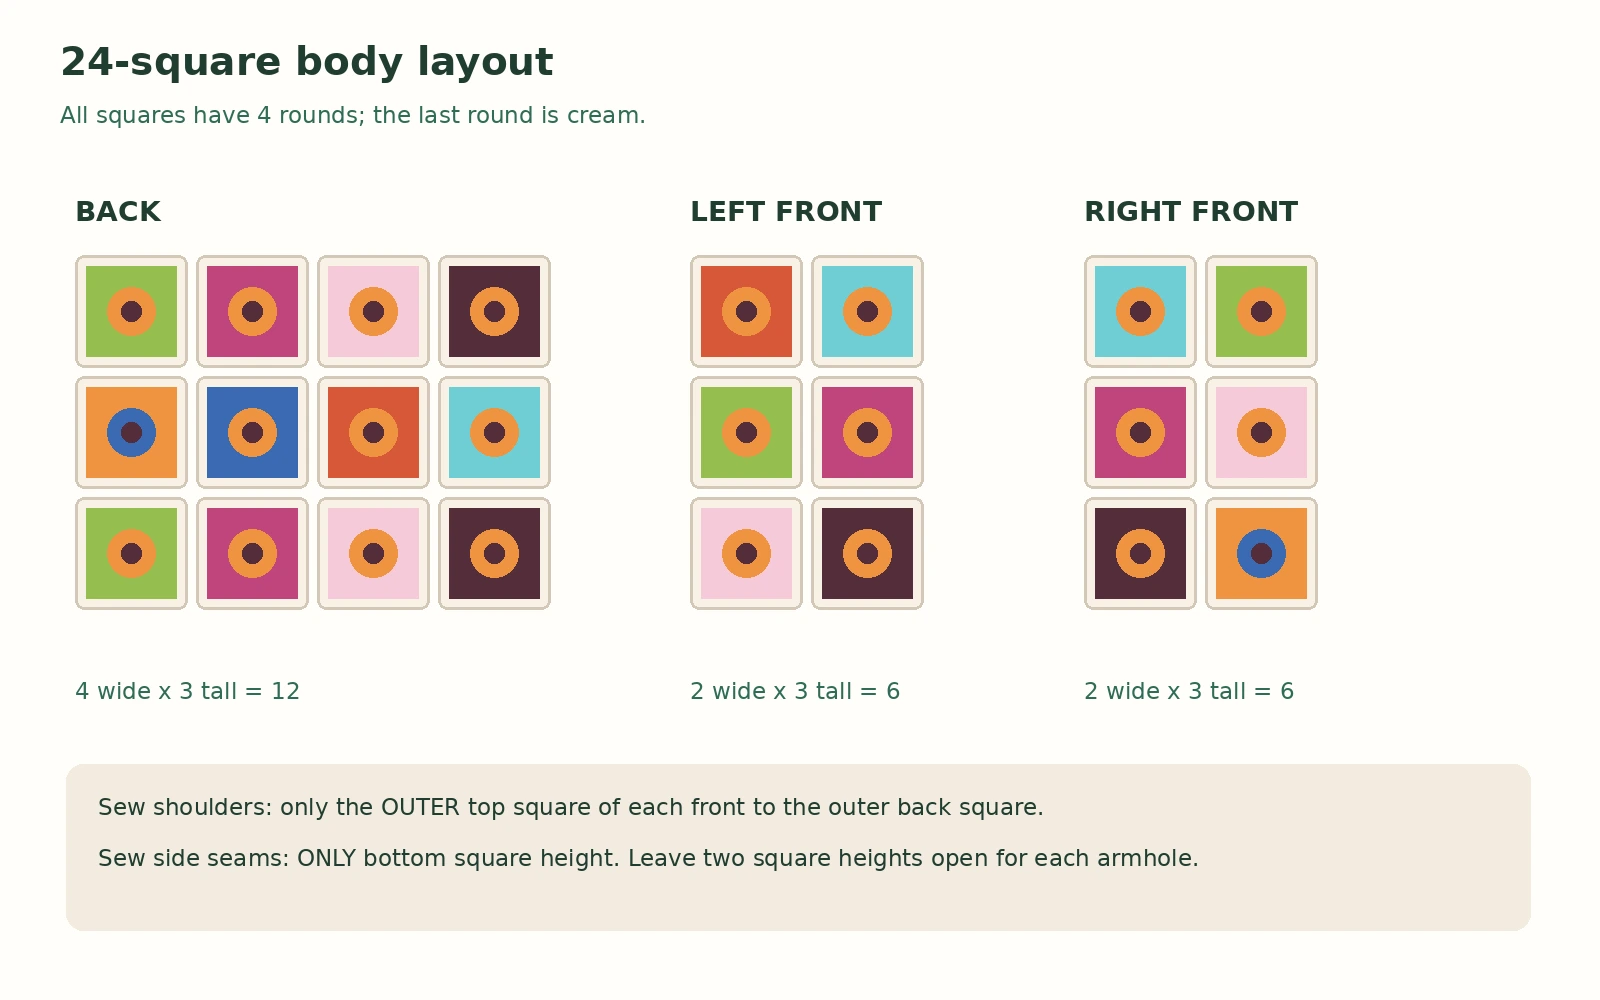
Lay out the squares in three pieces: the back, left front, and right front. The back is four squares across and three squares tall. Each front is two squares across and three squares tall.
| Panel | Layout | Squares |
|---|---|---|
| Back | 4 wide × 3 tall | 12 |
| Left front | 2 wide × 3 tall | 6 |
| Right front | 2 wide × 3 tall | 6 |
| Total | Three panels | 24 |
Step 3. Join the body and leave the armholes
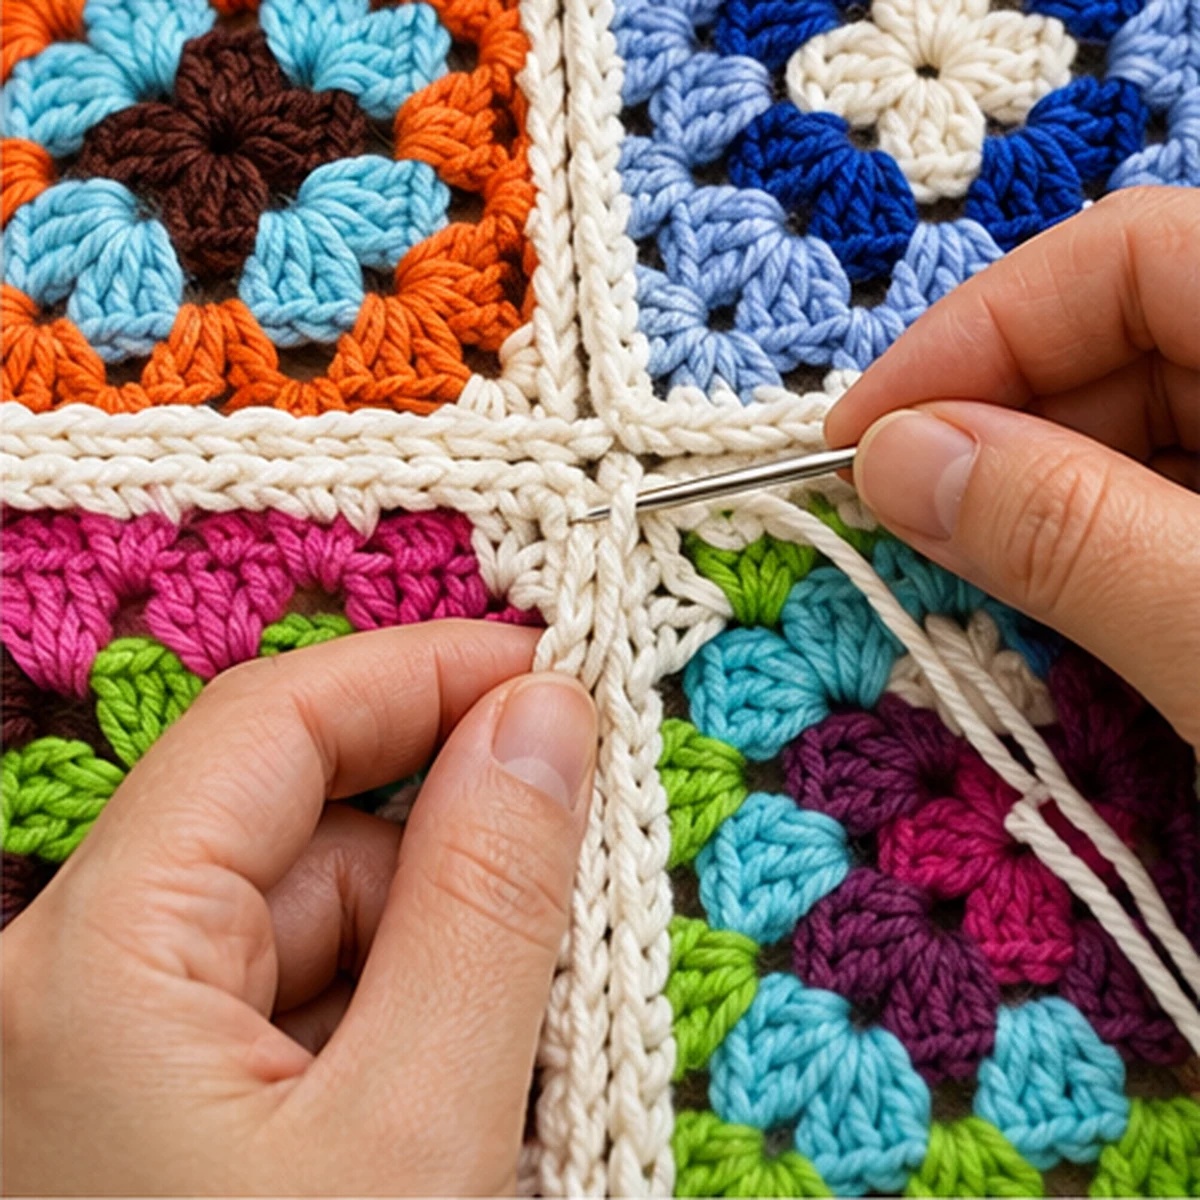
Start by joining the squares within each panel. Place two neighboring squares with right sides together, line up the corner spaces, and use cream yarn to whip stitch through the matching outer loops. Work from one aligned corner to the next without skipping a stitch or pulling the seam tight.
1. Make three panels: Join the four squares in each back row, then join the three rows. Repeat the same method for each 2 × 3 front.
2. Sew the shoulders: Place the fronts on the back, right sides together. Sew the top edge of the OUTER square of the left front to the outermost top back square. Repeat on the right. Do not sew the inner front top squares across the neckline.
3. Leave space for the arms: From each shoulder, leave the upper TWO square heights open along both the front and back side edges.
4. Close the sides: Join ONLY the bottom square-height section of each front side to the corresponding back side. Stop at the bottom of the armhole.
5. Turn right side out: The cardigan is now a cropped vest with two armholes and an open front.
Step 4. Work the long granny-stripe sleeves
In this granny square cardigan crochet pattern, make both sleeves directly from the armholes. This keeps the stripe direction horizontal, like the photograph. You will first make a neat single-crochet pickup round, then work rows of three-double-crochet groups around the sleeve.
Prepare a 64-stitch armhole round
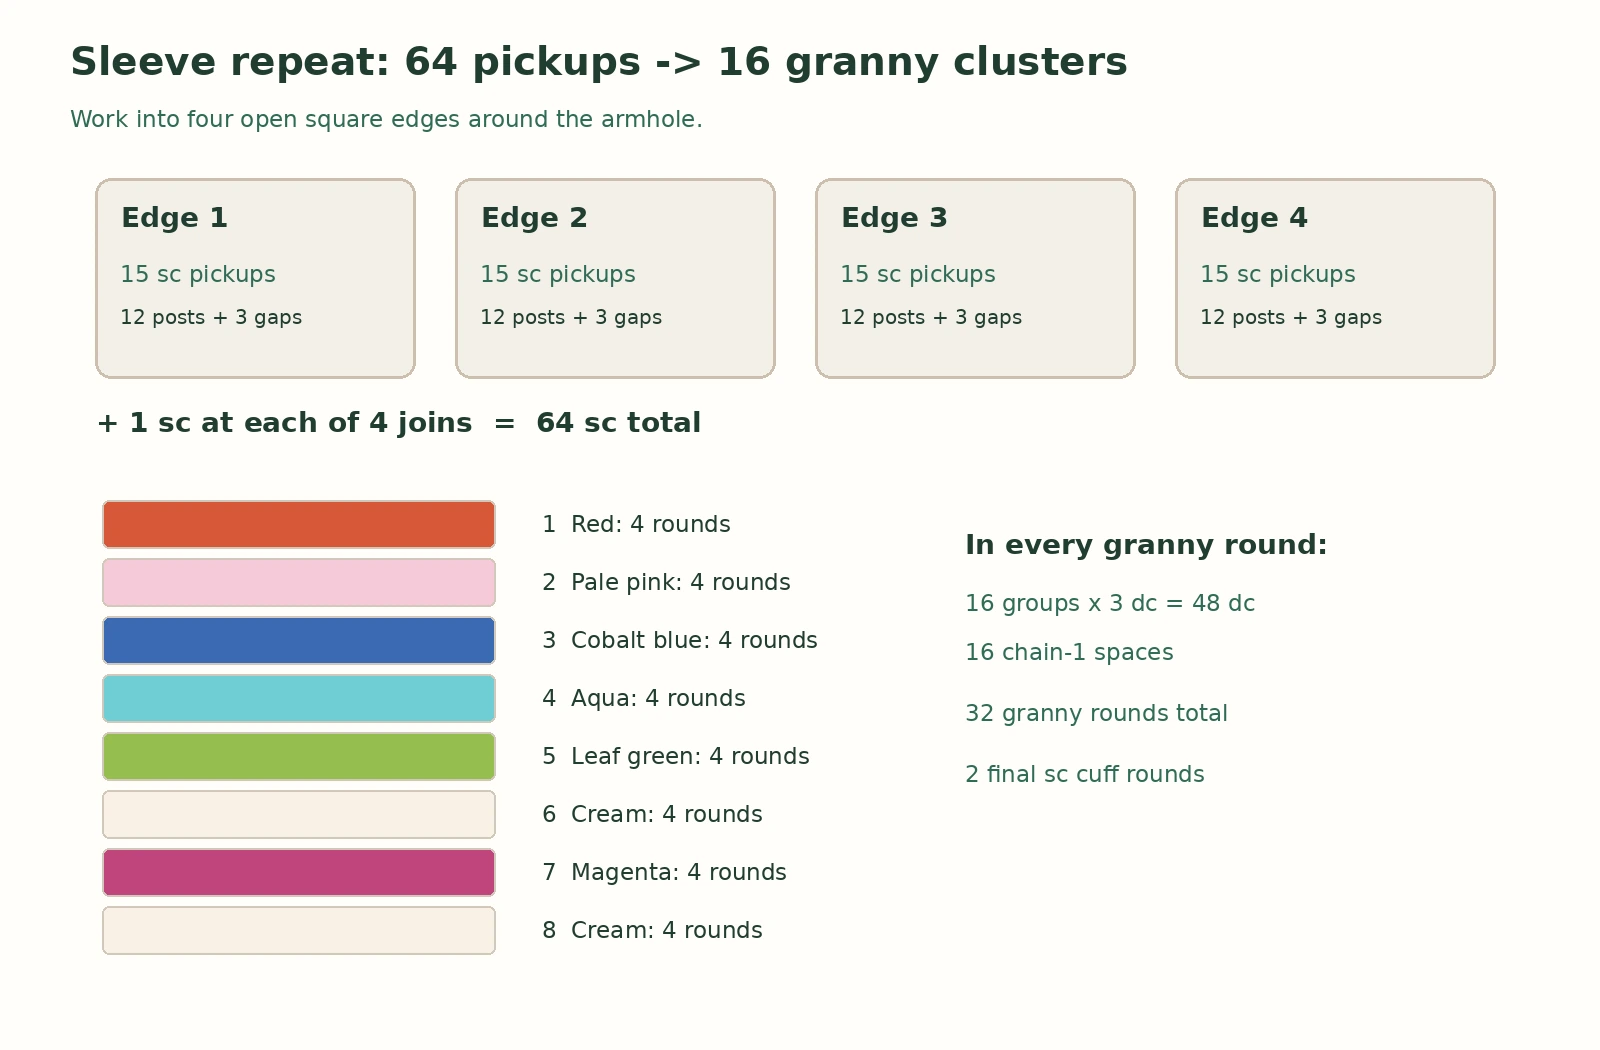
Join red yarn at the underarm. Each armhole has four square-edge sections. On each section, work one sc in each of the 12 dc stitches and one sc in each of the three ch-1 spaces. That makes 15 sc per square edge. Work one extra sc at each of the four joins between square-edge sections.
Sleeve Round 1: 15 sc on each of four square edges, plus 1 sc at each of the four joins. Join with a slip stitch. (64 sc)
Round 2: *Skip the next 3 sc, work 3 dc into the following sc, ch 1.* Repeat from * to * 16 times in all. Join into the first dc. (16 groups, 48 dc, 16 ch-1 spaces)
Rounds 3–33: At the start of each round, move into a ch-1 space. Work (ch 3, 2 dc, ch 1) in that space, then (3 dc, ch 1) in each of the 15 remaining ch-1 spaces. Join into the top of the beginning ch 3. (16 groups, 48 dc, 16 ch-1 spaces per round)
Use four granny rounds per stripe in this order. Fasten off and join the next color in a ch-1 space whenever you change colors.
| Granny rounds | Color |
|---|---|
| 2–5 | Bright red |
| 6–9 | Soft pink |
| 10–13 | Cobalt blue |
| 14–17 | Turquoise / aqua |
| 18–21 | Leaf green |
| 22–25 | Cream |
| 26–29 | Magenta |
| 30–33 | Cream |
Finish the sleeve opening
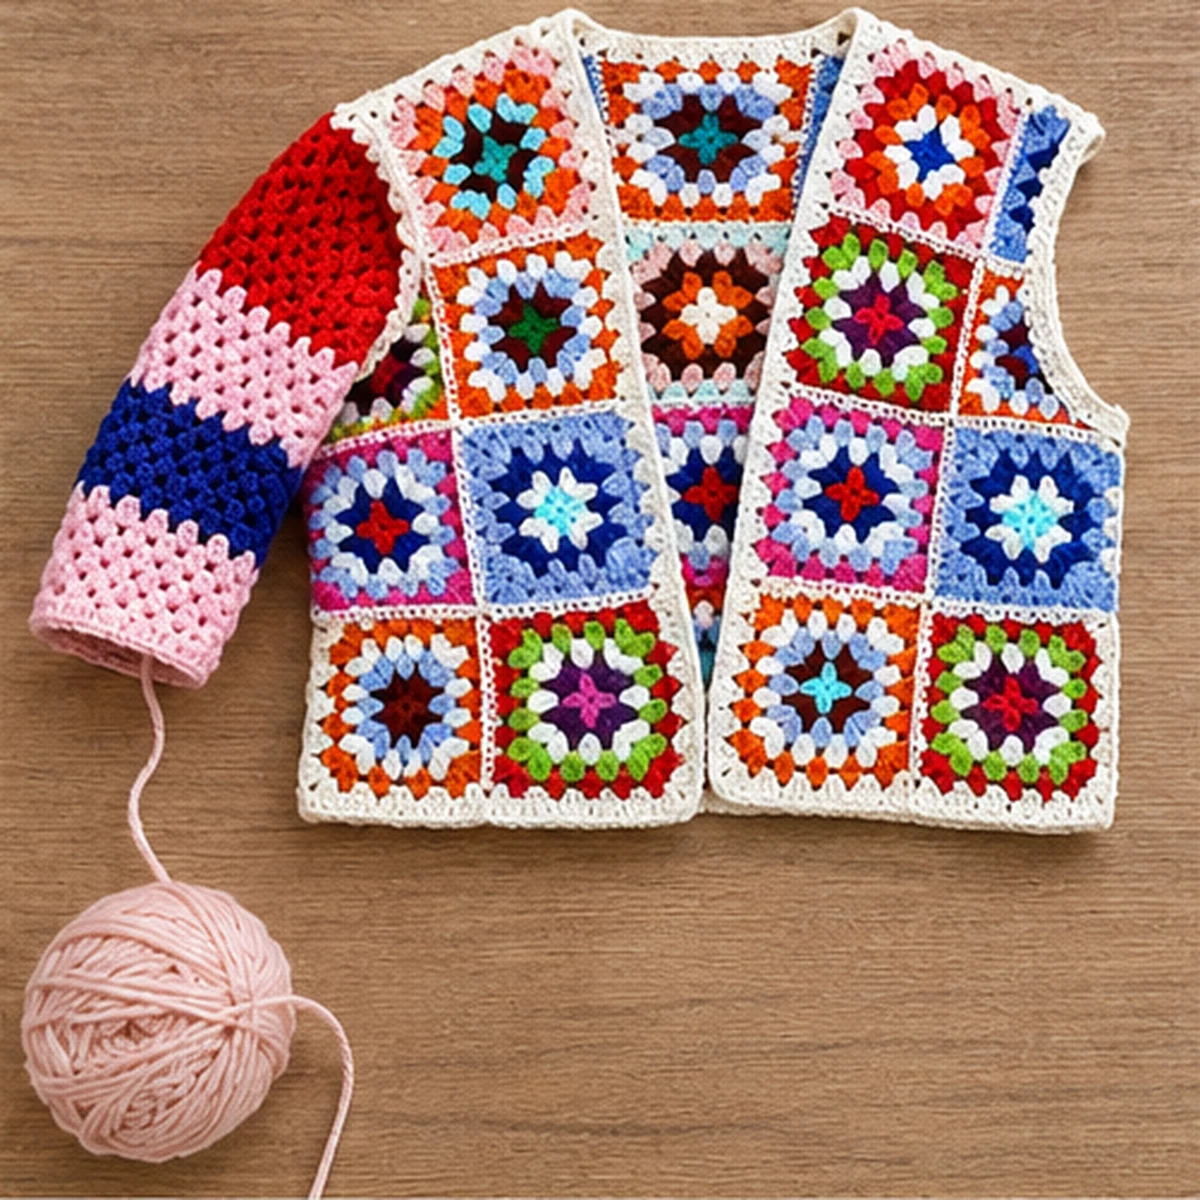
Round 34: With cream, work 1 sc into each of the 48 dc stitch tops and one sc into each of the 16 ch-1 spaces. Join. (64 sc)
Round 35: Work one sc in each stitch and join. (64 sc) Fasten off. This leaves a loose cuff like the photograph. Repeat the whole sleeve pattern on the second armhole, following the same color order.
Step 5. Add the cream border and finish
With the right side facing out, join cream at the bottom of one front opening. Work one round of sc up that front, around the open neckline, and down the opposite front.
Place stitches evenly into the outer edge stitches and gaps. Add a stitch at any corner where the edge would otherwise pull. Do not pull the band so tightly that the fronts curl.
Work a second sc round for a wider, smoother band. Finish the bottom hem with one or two rows of cream sc. Keep the front open; the photograph has no button closure.
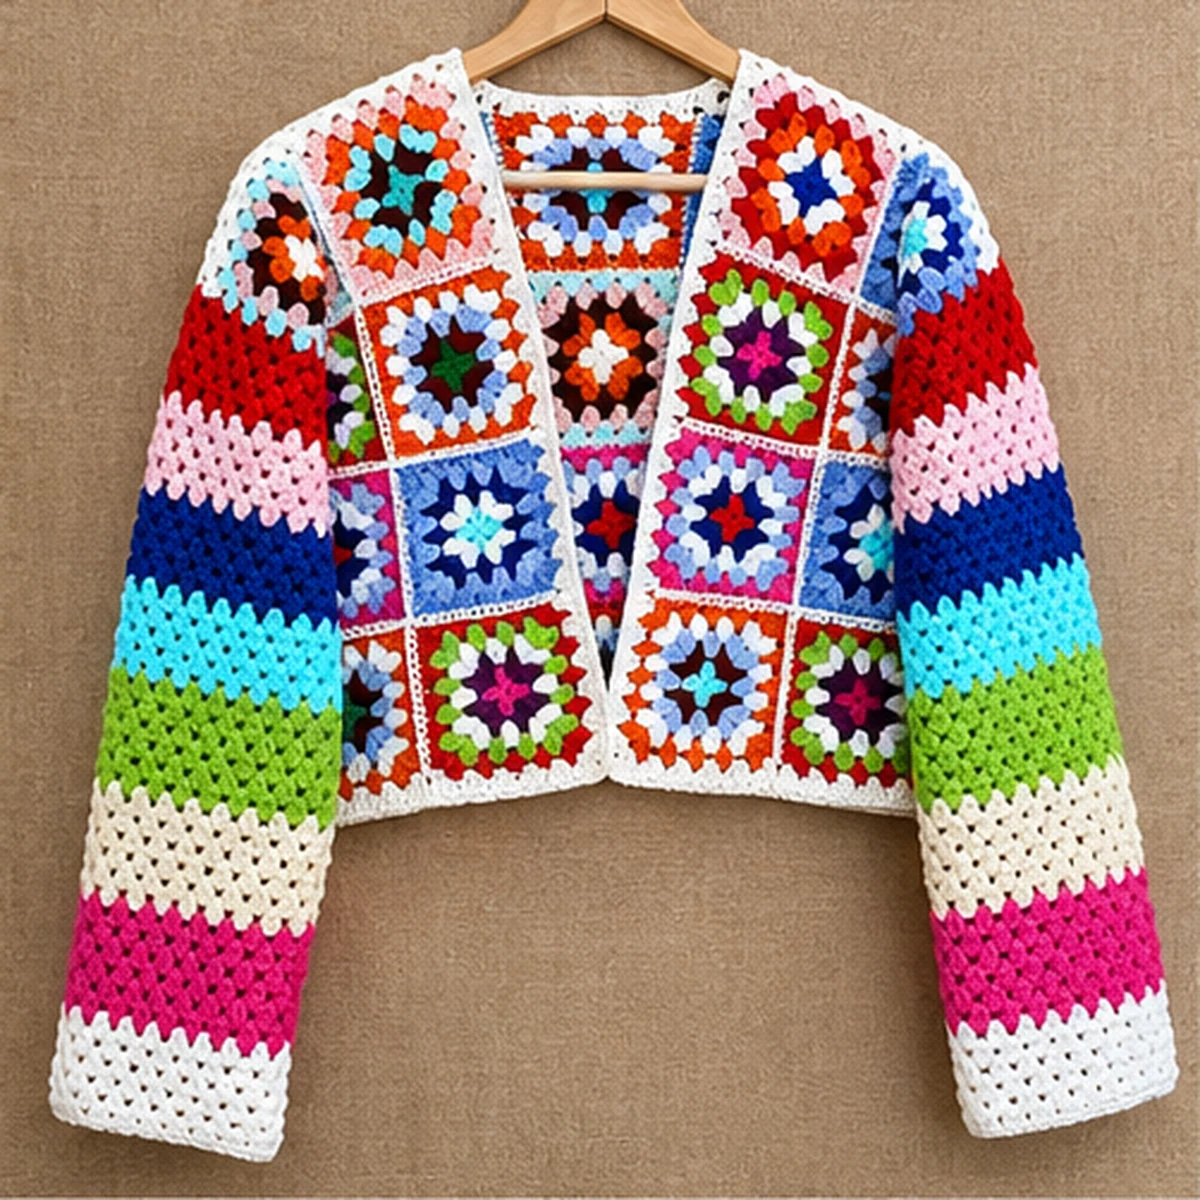
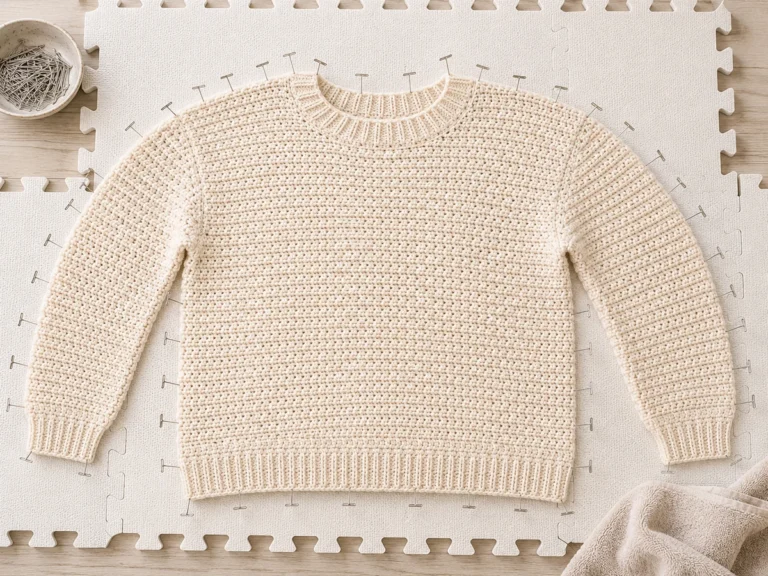
Weave the yarn ends through several stitches on the wrong side. Block gently according to the yarn care label. Let the cardigan dry flat, then try it on and check the shoulders, armholes, and cuff openings.
Fit, size changes, and common problems
For a different bust size: Change the blocked size of the square or add square columns. Since this layout has eight squares around the body, a 5¼ in (13.3 cm) square gives about a 42 in (107 cm) circumference before seams. Recheck the shoulder width, armholes, and sleeve pickup count whenever you change the square size.
For more length: Add a fourth row of body squares. That adds eight squares total: four to the back and two to each front. Keep the same sleeve construction unless the armhole depth also changes.
| If this happens | What to check |
|---|---|
| Squares look uneven | Check 16 groups in Round 4; block every square to the same size. |
| The front neckline pulls | Leave the inner top front edges unseamed and loosen your cream border. |
| The armhole is too small | Recheck the two-square-high opening before picking up any sleeve stitches. |
| The sleeve has extra clusters | Check Round 1 for 64 sc. Every following round must contain 16 groups. |
| The sleeve is too long | Stop after an earlier color band and finish with two sc rounds. |
| The seam is bulky | Use smaller, even whip stitches and avoid catching extra loops of yarn. |
Frequently asked questions
Can a beginner crochet this cardigan?
This granny square cardigan crochet pattern suits a confident beginner who knows chains, double crochet, color changes, and basic sewing. Make one sample square and join two practice squares before starting all 24.
Do the sleeves need separate pieces?
No. They are worked straight from the armholes in rounds, which makes the stripes easier to align on both sides.
Can I use fewer colors?
Yes. Try three colors for the square centers and one cream edging color. Keep the same number of rounds and groups for every square.
Will the finished cardigan look identical to the reference photo?
The color story and overall construction are similar. This is an original simplified pattern, not a verified transcription of the pictured garment. Stitch behavior, fit, and drape still need a handmade sample.
Save this colorful crochet cardigan pattern
Keep this granny square cardigan crochet pattern open while making the squares and sleeves. For help with chains and double crochet, visit the CrochetEco beginner guide. The crochet hook size chart can help if you change yarn.
Free printable granny square cardigan PDF
Want to keep the instructions beside your yarn? Open the free CrochetEco cardigan pattern PDF for an extra reference while you make the colorful squares, assemble the body, and work the striped sleeves.
This granny square cardigan crochet pattern is also explained in full above, so you can follow the steps online without downloading anything.
Download the free cardigan PDFThe document opens from CrochetEco. Check the measurements and stitch counts against this article before beginning your sample.
Editorial note: The stage photos are AI-generated educational illustrations inspired by the supplied image. They are not photographs of a physically crocheted sample. Stitch counts and panel calculations have been checked, but a real garment test is still needed to confirm fit and shaping.

Comments
Leave a Comment