
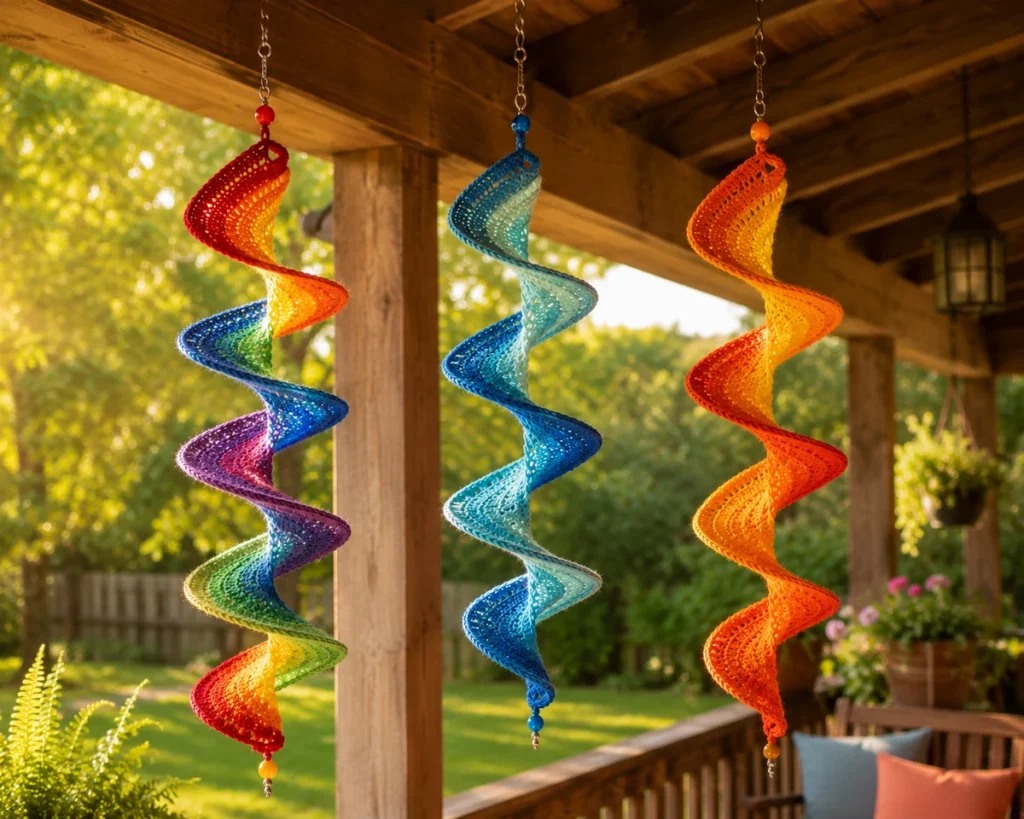
Crochet Wind Spinner Pattern — Free Step-by-Step Guide for Beginners
Make a spinning outdoor decoration from scratch — with a complete free pattern, color ideas, and hanging tips
A reader pointed out that the earlier version of this pattern didn’t produce the spiral shown in the photos, and they were right. The instructions below have been rewritten with the correct method — working three double crochet into every chain, which is what actually forces the strip into a corkscrew. Thank you for flagging it.
A crochet wind spinner pattern is one of the most satisfying outdoor projects you can make in an afternoon. Once you see one hanging in a garden, catching the breeze and turning slowly in the sun, it’s easy to see the appeal. This free crochet wind spinner pattern is built for beginners — no special skills, no complicated shaping. If you can chain and double crochet, you can make one this weekend.
This guide covers a complete free crochet wind spinner pattern with step-by-step instructions, a color guide, assembly and hanging tips, and answers to common beginner questions. It works with any yarn weight, so it’s a great way to use up leftover scraps. New to crochet? Start with our beginner’s crochet guide, and check our hook size chart if you’re unsure which hook to use.
📋 What’s in this guide
- What is a crochet wind spinner — and why does it spin?
- Supplies you need (very simple)
- Free crochet wind spinner pattern — step by step
- How to assemble your wind spinner
- Color combinations that look stunning outdoors
- Where and how to hang your crochet wind spinner
- Frequently asked questions
1. What Is a Crochet Wind Spinner — and Why Does It Spin?
If you’ve scrolled Pinterest or TikTok lately, you’ve probably seen them — colorful yarn spirals hanging from porch roofs, garden fences, and pergolas, turning gently in the breeze. That’s a crochet wind spinner, and it’s become one of the most shared outdoor crochet projects around. A finished spinner is colorful, eye-catching, and costs almost nothing to make.
The Science Behind the Spiral — Why It Curls
Here’s what actually creates the corkscrew, and it’s worth understanding because once you get it you can control how tight or loose your spiral turns out.
You start with a long chain. Then you work three double crochet into every single chain. That means the outer edge of your strip ends up roughly three times longer than the chain it’s attached to.
All that extra fabric has nowhere to go. It can’t lie flat, because the chain spine holding it is far too short. So the strip twists — the chain becomes the inner axis of a helix, and the double crochet stitches fan out around it. That’s your spiral, and it appears on its own within the first ten chains.
The spiral isn’t something you shape. It’s the fabric solving a geometry problem: too much edge, not enough spine. The twist is the only way out.
Hang that spiral from a ring and the air does the rest. Even the draft from someone walking past a porch is enough to start it turning. Heavier yarn builds more momentum, so chunky and bulky weights keep spinning after the breeze stops instead of just twitching.
Why Beginners Like This Pattern
It uses two stitches — chain and double crochet. There’s no shaping, no row counting, and no assembly beyond stringing the strips together. One strip is a single row of crochet, which means you cannot lose your place. Most spinners take 2–4 hours total, start to finish.
Wind spinners photograph and film beautifully, which is part of why they’ve spread so fast on Pinterest and TikTok. They can be made in any color combination, so every maker’s version looks different, and they’re one of the best projects for using up leftover yarn scraps — a good fit for anyone leaning into slower, more sustainable crafting.
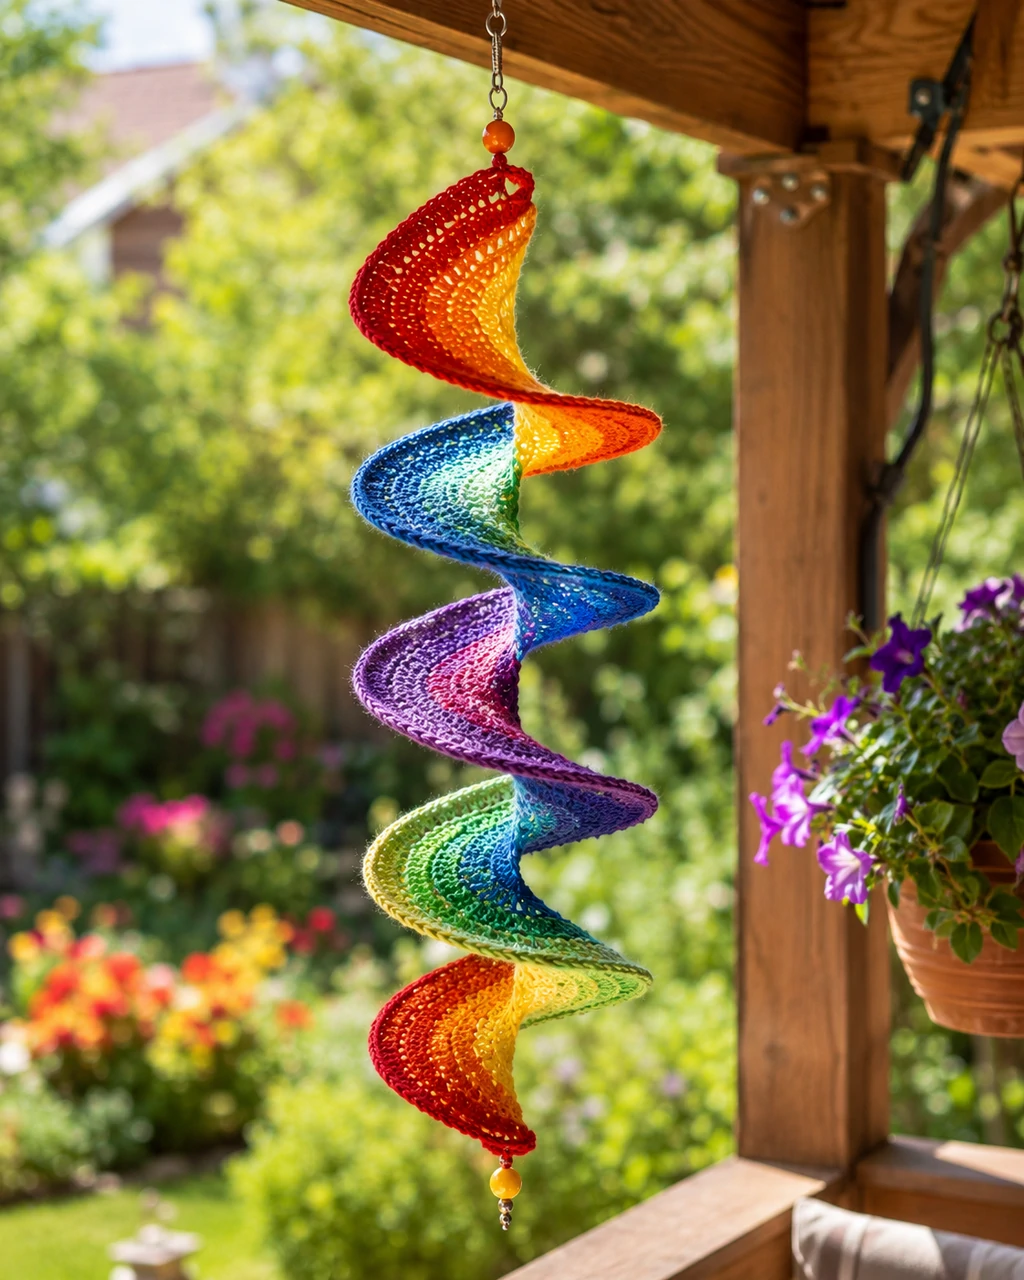
A finished crochet wind spinner — colorful, spinning, and hard to walk past without stopping to look.
2. Supplies for the Crochet Wind Spinner Pattern
One of the best things about this pattern is how few supplies it needs. Most of it you probably already have in your yarn stash, so you can go from “I want to make this” to actually starting in under five minutes.
What You Need
Yarn
Worsted or bulky weight acrylic in bright, outdoor-safe colors gives the most dramatic spin. About 40–50 yards per color strip.
Crochet Hook
5 mm (US H-8) for worsted. Going one size larger creates a more open fabric that spins more easily in a light breeze.
Scissors
Any sharp scissors for clean cuts, and for trimming the fringe tails at the bottom of each strip.
Yarn Needle
For weaving in ends. Use a larger eye that accommodates your yarn weight without splitting the strands.
Metal Ring or Swivel Hook
A 2–3 inch metal ring, or a swivel key ring, to hang all the strips from. A swivel lets the spinner rotate freely in both directions.
Beads (Optional)
Plastic or wooden beads threaded onto the yarn tails add movement and a gentle sound, and help weight the bottom of each strip.
For a spinner that lives outdoors permanently, choose acrylic over cotton or wool. 100% acrylic resists UV fading and water damage far better, and holds bright color through a full season outside. If you plan to bring your spinner indoors over winter, any yarn weight or fiber will work fine.
3. Free Crochet Wind Spinner Pattern — Complete Instructions
Each strip is a single long row. You chain, then work back along the chain putting three double crochet into every stitch. The strip starts twisting almost immediately, and by the time you reach the end it’s a full corkscrew.
Read the note about testing one strip first — it matters, because finished length varies with your tension more than most patterns.
🌀 The Rainbow Wind Spinner — Free Crochet Pattern
Materials
- Worsted weight acrylic yarn — 6 colors
- 5mm (US H-8) crochet hook
- Scissors + yarn needle
- 1 metal swivel ring (2–3 inches)
- Optional: plastic beads for bottom tails
Finished Size
- Each spiral: ~12–14 inches long
- Full spinner: ~24–30 inches tall
- Yarn per strip: ~40–50 yards
- Time per strip: ~20–30 min
- Total project time: 2–4 hours
Project Info
- Total strips: 6 (one per color)
- Skill level: ⭐ Beginner
- One row per strip
- Great for leftover yarn
- UV-safe acrylic recommended
Abbreviations — US Terms
Foundation chain: With your first color, ch 94. Keep the tension loose and even — a tight chain is hard to get three stitches into, and it fights the twist. The chain will look far too long at this stage. That’s correct; the spiral pulls it up to about half its flat length.
The spiral row: Work 3 dc into the 4th ch from the hook. Then work 3 dc into each remaining ch all the way along = 273 dc over 91 chains. This is the entire strip. There is no second row.
Watch it twist: By about the tenth chain you’ll feel the strip start to turn in your hand. Don’t fight it or try to flatten it out — that twist is the whole point. Just keep working along the chain and let it coil.
Hanging loop: At the end of the row, ch 12, then sl st back into the last dc you made to form a loop. This is what you’ll attach to the ring, so give it a tug to check it’s secure.
Fasten off: Cut yarn leaving a 6-inch tail and pull through the last loop. Weave in the tail at the loop end. Leave the tail at the starting end of the chain longer — about 6 inches — for fringe or beads at the bottom.
Measure before making five more: Hold your finished spiral up by its loop and let it hang. Measure it. If it’s shorter than you want, add 20 chains next time; if it’s longer, take 20 off. Get strip one right, then match the other five to it exactly.
Repeat for all colors: Make 6 spirals total, one per color, all with the same chain count. Matching lengths is what makes the finished spinner hang straight instead of lopsided.
Optional — bottom fringe and beads: At the starting tail end of each spiral, tie 3–4 additional 6-inch lengths of yarn as fringe. Thread beads onto each strand and knot to secure. The beads add weight, which genuinely improves the spin.
Finished spiral length depends heavily on your tension, which is why this pattern asks you to measure strip one before committing. A loose crocheter and a tight crocheter working the same 94 chains can end up two or three inches apart. Twenty minutes checking now saves you remaking five strips later.
Controlling How Tight Your Spiral Turns Out
The number of stitches you put in each chain changes the whole character of the spiral. Three is the classic, but it’s worth knowing the others.
| Stitches per chain | Result | Best for |
|---|---|---|
| 2 dc | Loose, open, wavy rather than coiled | A softer look, uses less yarn |
| 3 dc | Classic corkscrew — the pattern above | ✅ Best all-round for a spinner |
| 4 dc | Very tight, dense, almost ruffled | Dramatic but heavy and yarn-hungry |
| 3 hdc | Narrower coil, tighter turns | A slimmer spiral for small spaces |
| 3 tr | Wide, loose, sweeping curls | Large statement spinners |
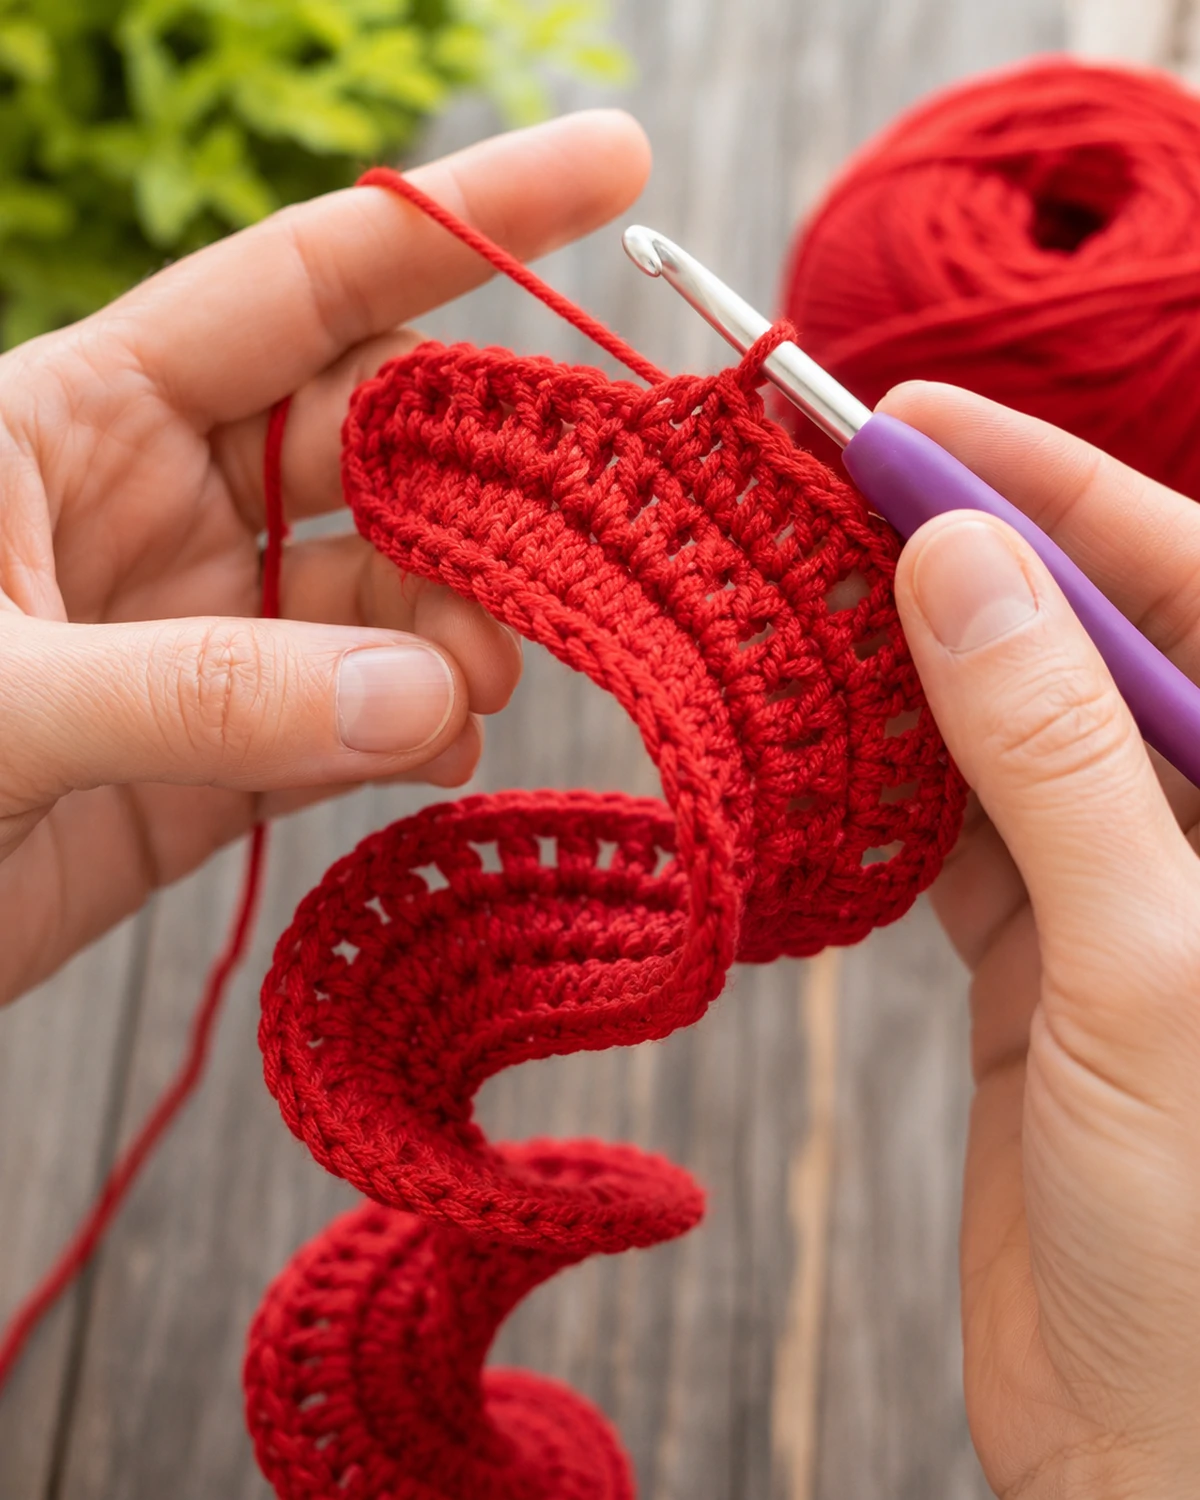
The twist appears within the first ten chains — you’ll feel it turning in your hand long before the strip is finished.
4. How to Assemble Your Crochet Wind Spinner
Once all six spirals are done, assembly is quick — about 15–20 minutes, so you can finish the same day you make the last strip.
Step-by-Step Assembly
Arrange Your Spirals in Color Order
Hang all six spirals off a pencil or a door handle and arrange them in your preferred color order. Seeing them hanging rather than laid flat tells you far more, because that’s how they’ll actually be viewed. For a rainbow spinner, ROY G BIV order (red, orange, yellow, green, blue, violet) gives the most striking result.
Attach Spirals to the Metal Ring
Thread the chain-12 loop at the top of the first spiral onto the metal ring, then use the yarn tail to sew the loop closed around the ring with several firm stitches. Give it a real tug before moving on — this one joint carries the whole spiral’s weight for the entire season. Repeat for all six.
Space Spirals Evenly Around the Ring
Even spacing matters for the spinning effect — you don’t want all six bunched on one side. With six spirals, aim for roughly 60 degrees apart (360 ÷ 6 = 60). Work around the ring in order rather than jumping side to side, and the spacing takes care of itself.
Add the Hanging Cord
Cut a 12–18 inch length of strong yarn, twine, or clear fishing line. Thread it through the top of the metal ring, tie a secure knot, then tie another to form a hanging loop. If you used a swivel key ring instead of a plain one, the spinning will be noticeably smoother, since the swivel lets it rotate without the cord twisting up.
5. Color Combinations That Look Amazing Outdoors
Color is the biggest creative decision in this whole project. Since a spinner is usually seen from a distance, high-contrast combinations read much better than subtle, muted ones.
Most Popular Color Schemes
🌈 Classic Rainbow
Red, orange, yellow, green, blue, purple. The most popular choice — stunning in direct sunlight.
❄️ Ocean Blues
Navy, teal, sky blue, white, aqua, pale blue. Calm and coastal, great for a beach house porch.
🌅 Sunset Glow
Deep orange, burnt orange, gold, yellow, peach, cream. Beautiful in late afternoon light.
🌸 Pink Ombre
Deep pink, hot pink, soft pink, blush, pale pink, white. Soft and romantic for a garden party.
🌿 Forest Green
Dark to pale green ombre. Blends into garden plants and looks elegant among foliage.
⚡ Bold Contrast
Black, white, and one or two bright accents. Modern and graphic, stands out anywhere.
Tips for Choosing Colors That Pop Outdoors
High-contrast combinations — light next to dark, or complementary colors — are more visible at a distance than low-contrast ones. Avoid very similar shades side by side; light blue next to medium blue next to periwinkle tends to look muddy from a few feet away. Alternating bright and light colors, like dark purple next to pale yellow, reads much better across a garden. Background matters too: spinners against a wooden fence suit warm tones, while those against green foliage pop more in cool colors like blue, purple, and white.
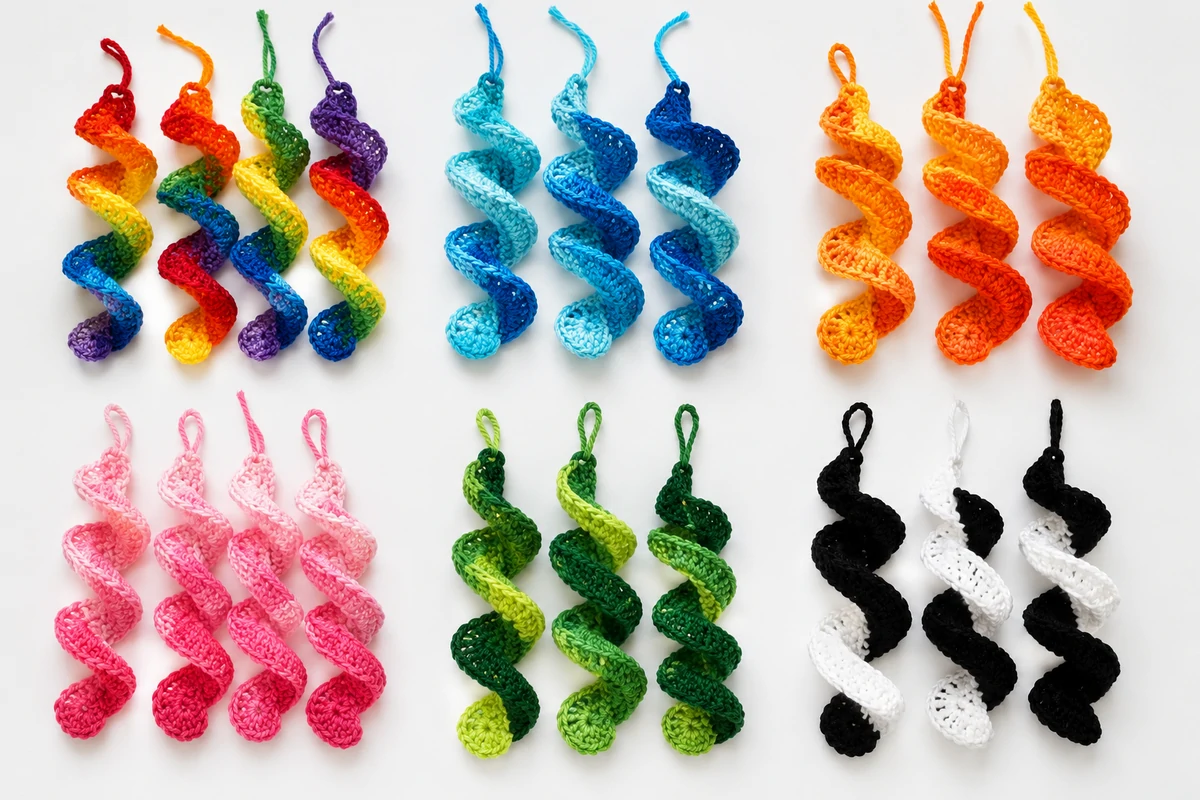
Six color combinations for the same pattern — pick the one that fits your space.
6. Where and How to Hang Your Crochet Wind Spinner
Where you hang it makes a real difference in how well it spins. The right spot has your spinner turning in every light breeze; the wrong spot leaves it still most of the time.
Best Hanging Spots
Front Porch or Covered Patio
Hang from a porch beam or hook above the front steps — a popular spot that catches air movement from foot traffic and door drafts.
Tree Branch
A low branch in an open part of the garden. Open air means steadier wind, so this often gives the most consistent spinning.
Garden Shepherd’s Hook
A tall metal stake with a curved top, so you can place it exactly where you want — a flower bed, a path, a garden entrance.
Window Frame or Curtain Rod
Hang it indoors near an open window for a room decoration that spins gently in the indoor air — good for homes without outdoor space.
Pergola or Gazebo
Hang a few at different heights for a bohemian, festival-style display. Three or five together create real visual impact.
Gift Idea — Ready to Hang
A finished spinner makes a genuinely nice handmade gift — housewarmings, birthdays, or anyone who loves their garden.
Looking for another hanging project with the same boho feel? Our crochet plant hanger that looks like macrame pairs beautifully with a wind spinner on the same porch — one spins, one holds a trailing plant, and together they fill a corner without either one competing for attention.
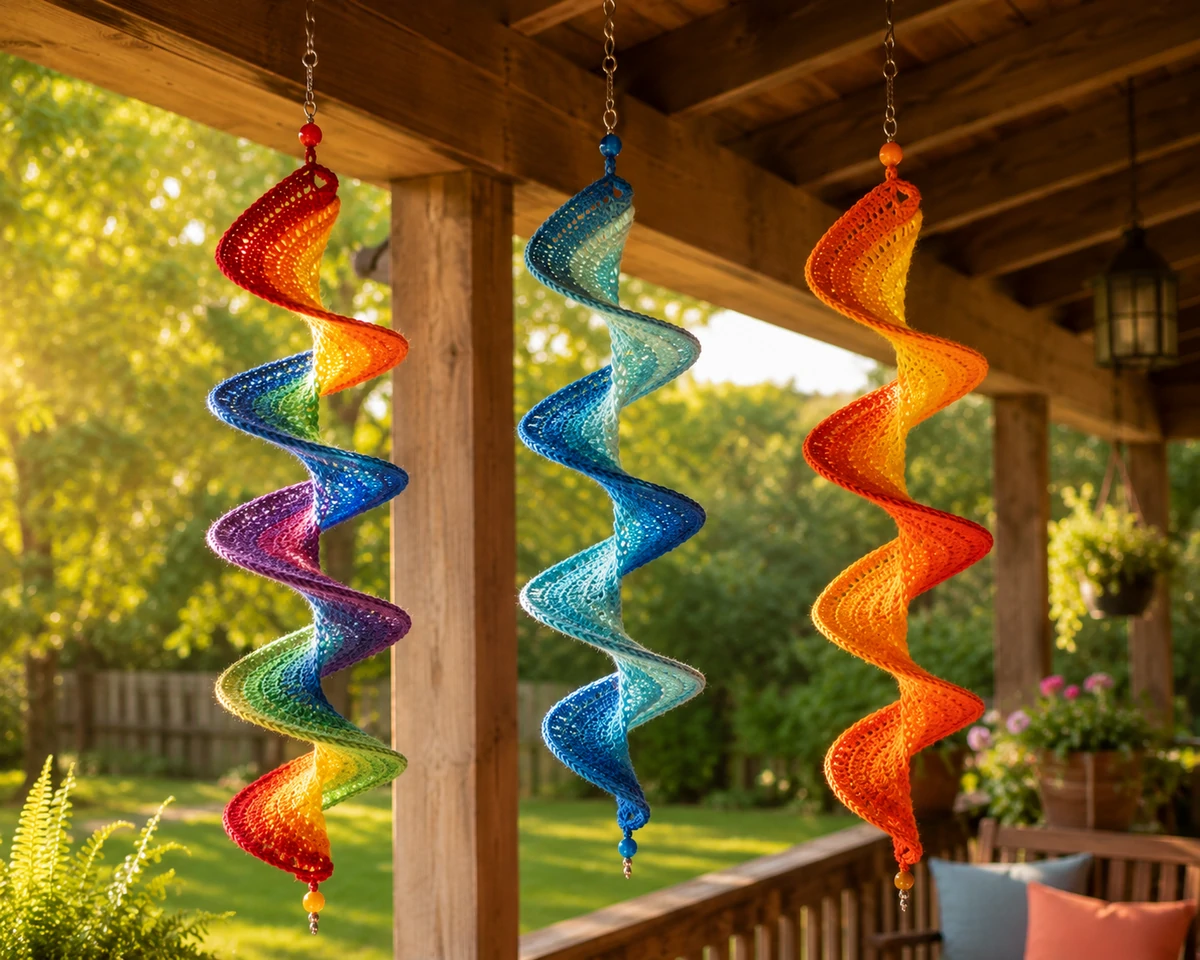
Three spinners together create a stronger porch display than one alone — mix colors and sizes for the best effect.
7. Frequently Asked Questions About the Crochet Wind Spinner Pattern
How does a crochet wind spinner work — why does it spin?
The spiral shape comes from working three double crochet into every chain, which makes the outer edge about three times longer than the chain holding it. That extra fabric can’t lie flat, so the strip twists into a corkscrew with the chain as its inner axis. Hung freely from a ring, that corkscrew catches air from any direction and rotates. Heavier yarn builds more momentum, which is why bulky acrylic gives the most dramatic spin.
My strip isn’t curling. What went wrong?
Almost always too few stitches per chain. You need three double crochet in every single chain — if you’ve been working one stitch per chain, you’ll get a flat strip with no twist at all. Count the stitches along a short section: 10 chains should have 30 double crochet above them. The other cause is a very tight foundation chain, which physically resists the twist.
What yarn is best for an outdoor crochet wind spinner?
100% acrylic is the practical choice for anything living outdoors — it resists UV fading, sheds water, and won’t mold the way natural fibers can. It also holds bright color in direct sun far better than cotton or wool. Any standard acrylic worsted or bulky yarn works well here.
How long does it take to make a crochet wind spinner?
Most beginners finish a 6-strip rainbow spinner in about 2–4 hours of crochet time. Each spiral is a single long row of roughly 273 double crochet, which takes 20–30 minutes, and assembly adds another 15–20 minutes. It’s realistic to finish the whole thing in one afternoon.
Can I make a crochet wind spinner with leftover yarn scraps?
Yes — it’s one of the best projects for that. Each spiral only uses 40–50 yards, so you can mix leftovers from different projects and brands into one scrappy, unique spinner. Mixing weights even adds interest, since thicker spirals spin slightly differently than thinner ones.
How do I make my crochet wind spinner spin better?
Use a swivel key ring instead of a plain one, so the cord doesn’t twist up as it spins. Adding beads or small weights to the bottom of each spiral increases momentum. And hang it somewhere with real air movement — an open garden spot or an airy porch will always out-spin a sheltered corner.
How do I make the spinner longer or shorter?
Change the foundation chain. The finished spiral comes out at roughly half the flat chain length, so 94 chains gives about 12–14 inches. Add 20 chains for a longer spiral, take 20 off for a shorter one. Make one strip and measure it before committing to all six, since tension affects this more than in most patterns.
Can I sell crochet wind spinners made from this free pattern?
Yes. This is an original CrochetEco pattern, and you’re welcome to sell finished spinners at craft fairs, markets, or your own shop. Please don’t republish or resell the written pattern instructions themselves. For more free patterns to browse, our pattern library has the full collection.
Ready to Make Your Crochet Wind Spinner? 🌀
Pick your colors, grab your hook, and get started — your porch is about to look a lot more interesting.
Explore More Free Patterns →
Reader discussion
Reader Comments
Tried this pattern? Share what worked, ask a question, or help another crocheter.
Your turn
Comments are moderated to keep the discussion useful and family-friendly. Please do not post personal information.