
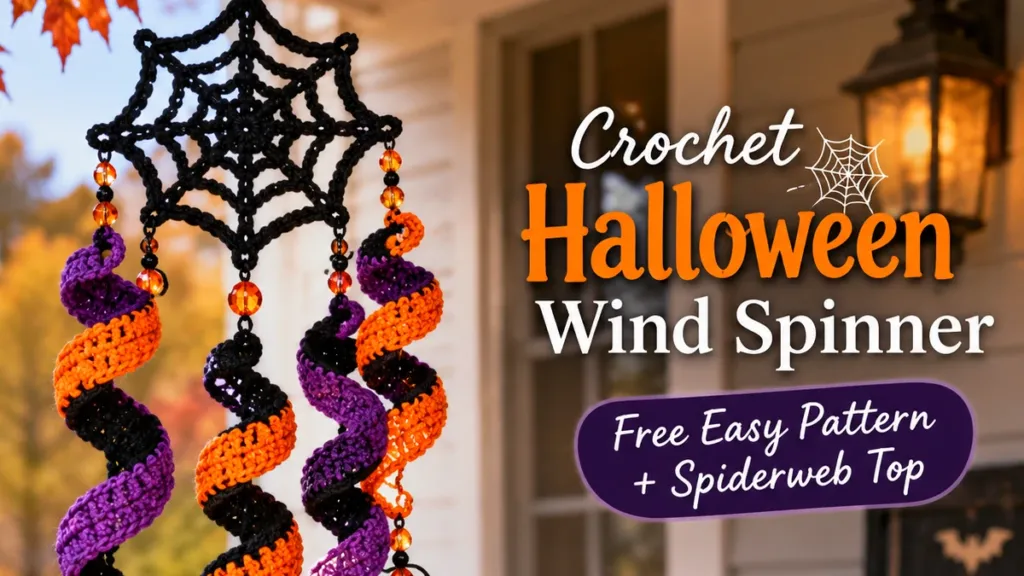
Crochet Halloween Wind Spinner: Free Pattern With a Spiderweb Top
Six corkscrew spirals, a crocheted web instead of a bare ring, and tiny ghosts at the bottom
The spiral method in this pattern has been corrected. The earlier version described increasing one stitch per row, which produces a flat triangle rather than a corkscrew. The spiral actually comes from working three double crochet into every chain — that’s what’s written below.
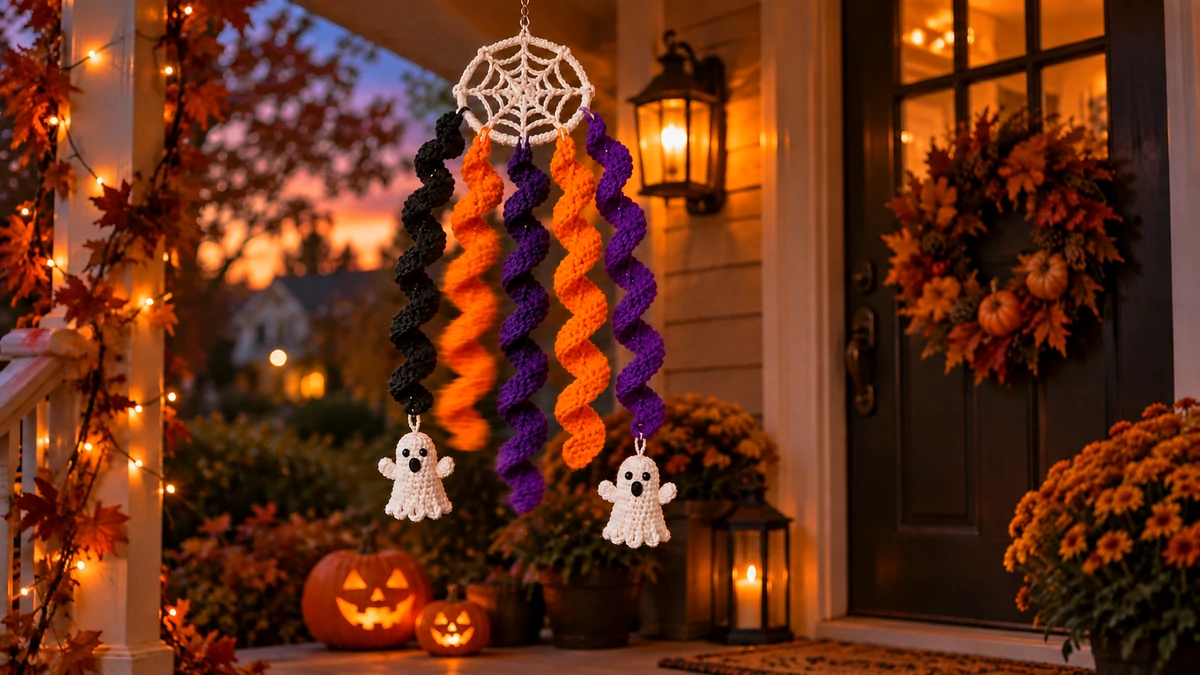
A crochet halloween wind spinner is made from six corkscrew spirals hung from a ring so they turn in the breeze. Each spiral is one long row: you chain, then work three double crochet into every single chain, and the extra fabric forces the strip to twist on its own. This free pattern uses black, orange and purple yarn, adds a crocheted spiderweb at the top instead of a plain metal ring, and takes about three and a half hours total.
A crochet halloween wind spinner is one of those projects that’s all over Pinterest and almost nowhere else. There are dozens of pictures. Almost none of them link to a pattern that actually exists.
That’s the reason for this post. The Halloween version needed a bit more thought than just swapping the yarn to orange. A plain metal ring at the top looks fine on a rainbow spinner. On a Halloween one it looks unfinished — so this pattern replaces it with a small crocheted spiderweb that the spirals hang from.
Everything here uses two stitches: chain and double crochet. If you’ve made a scarf, you can make this. And if you’ve already made my rainbow wind spinner, you’ll recognise the spirals and can skip straight to the web.
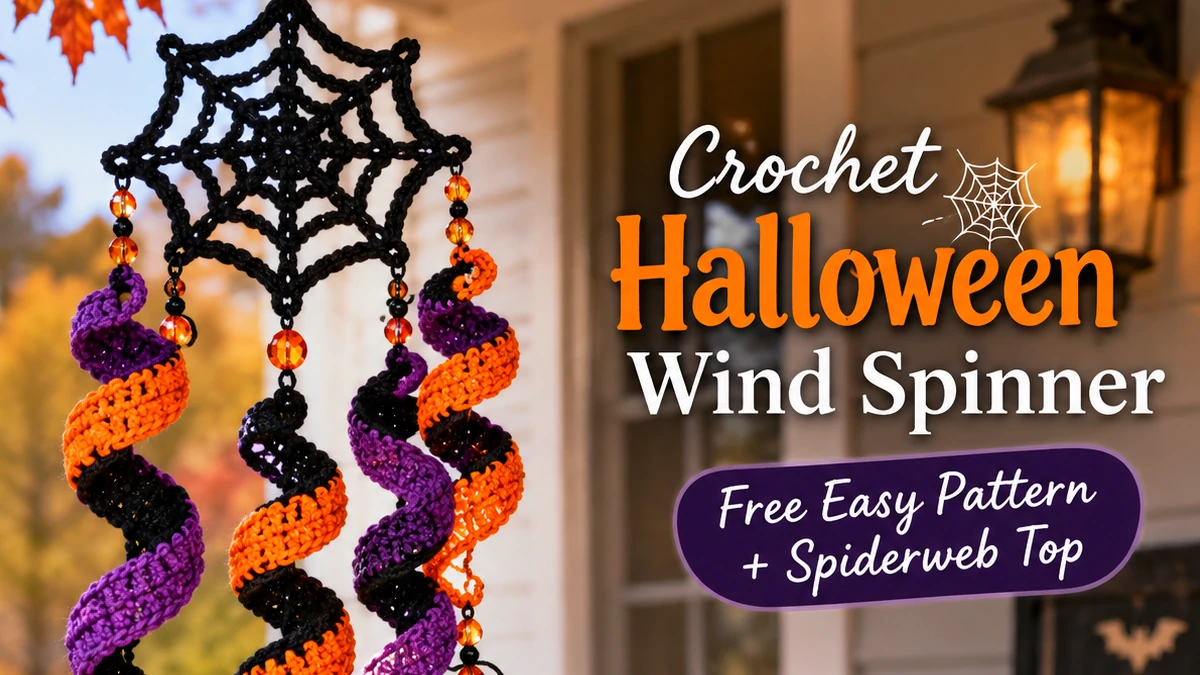
The finished spinner — six corkscrew spirals, a crocheted web at the top, and two ghosts weighting the bottom.
📋 What’s in this guide
- How does a crochet halloween wind spinner actually spin?
- What you need
- Abbreviations and gauge
- Part 1 — The spiderweb top
- Part 2 — The six corkscrew spirals
- Part 3 — The mini ghosts
- Part 4 — Putting it together
- Which Halloween colors actually work
- Where to hang it so it spins
- What goes wrong (and how to fix it)
- Frequently asked questions
1. How Does a Crochet Halloween Wind Spinner Actually Spin?
Worth understanding before you start, because once you get it the whole pattern makes sense and you can control exactly how tight your spirals turn out.
You start with a long chain. Then you work three double crochet into every single chain. That means the outer edge of the strip ends up about three times longer than the chain holding it together.
All that extra fabric has nowhere to go. It can’t lie flat, because the chain spine is far too short for it. So the strip twists — the chain becomes the inner axis of a helix, and the double crochet fans out around it. That’s the corkscrew, and it starts appearing within the first ten chains.
You’ll feel it turning in your hand long before the strip is finished. There’s no point in the pattern where you have to shape it — the fabric does the work because the geometry leaves it no choice.
Hang that corkscrew from a ring and the air does the rest. Even the draft from someone walking past a porch is enough to start it turning.
Does the yarn weight matter?
Yes, more than you’d expect. Heavier yarn builds momentum, so it keeps spinning after the breeze stops instead of just twitching. Worsted is the sweet spot — light enough to catch a gentle draft, heavy enough to keep going. Bulky spins more dramatically but eats yarn fast.
Thin yarn is the one to avoid. A spinner in DK or lighter looks limp and barely moves. If you’re unsure what weight you’re holding, the Craft Yarn Council yarn weight system is the standard every US label follows — worsted is size 4.
2. What You Need for a Crochet Halloween Wind Spinner
Yarn — 3 Colors
Worsted weight acrylic in black, orange and deep purple. About 40–50 yards per spiral, so roughly 100 yards per color for two spirals each.
White Yarn (Small Amount)
About 20 yards total for the spiderweb and the mini ghosts. Any leftover white works.
5 mm Hook (H/8)
Standard for worsted. Go up to 5.5 mm if your tension is tight — a stiff chain resists the twist.
Metal Ring, 2–3 Inches
The web is worked around this. A swivel key ring is better than a plain one — it stops the hanging cord twisting up.
Pinch of Stuffing
Only for the mini ghosts. A scrap of white yarn stuffed inside works just as well.
Yarn Needle & Scissors
For weaving in ends and sewing the spiral loops onto the web ring. A blunt yarn needle saves your fingers.
This lives outside for a month. Acrylic handles sun and damp far better, keeps its color, and dries fast if it gets rained on. Cotton fades and goes limp. If you have glow-in-the-dark yarn, use it for the ghosts — it genuinely works, and a porch spinner that glows faintly at trick-or-treat time is worth the effort.
Unsure which hook goes with your yarn? Our crochet hook size chart covers every weight.
3. Abbreviations and Gauge
US terms used throughout
ch = chain · sc = single crochet · dc = double crochet · sl st = slip stitch · inc = increase (2 sc in the same stitch) · dec = decrease · MR = magic ring · st(s) = stitch(es) · FO = fasten off
Gauge: nothing here has to fit anything, so don’t worry about matching a swatch. What does matter is using the same chain count for all six spirals — otherwise the spinner hangs lopsided. And make one spiral first to check its finished length before committing to the other five.
4. Part 1 — The Spiderweb Top
This is the part that makes it a Halloween spinner rather than a regular one with Halloween colors. It’s a small web worked directly around the metal ring, so the ring disappears and the spirals look like they’re hanging from the web itself.
It takes about twenty minutes and it’s the piece people notice first.
🕸️ Spiderweb Medallion — Free Pattern
Materials
- White or grey worsted yarn
- 5 mm hook
- 1 metal ring, 2–3 inches
Yarn Needed
- About 12 yards
- Leftovers are fine
Details
- Time: 20 minutes
- Level: ⭐ Beginner
- Worked around the ring
Cover the ring. Join white yarn to the metal ring with a slip knot. Work sc all the way around the ring itself, packing the stitches close so no metal shows. You’ll fit roughly 40–50 sc depending on ring size. Sl st into the first sc to close.
Mark six anchor points. Divide your stitch count by six and note the positions. If you have 48 sc, that’s every 8th stitch. These six points are where the web spokes and later the spirals attach.
The spokes. Sl st to the first anchor point. Ch 10, then sl st into the anchor point directly opposite (three positions around). Pull it snug but not tight — the yarn should lie straight across the ring without deforming it. Repeat twice more so you have three chains crossing the centre, making six spokes radiating out.
Secure the middle. Where the three chains cross in the centre, they’ll be loose. Take your yarn tail and sew through all three crossing points several times to bind them together. This is what stops the web sagging when the spirals are attached.
The web rings. Join yarn to the centre. Ch 4, sl st around the nearest spoke. Ch 4, sl st around the next spoke. Continue around all six spokes, then sl st to close — that’s your inner web ring. Work a second ring the same way but with ch 6, further out along the spokes.
Finish. FO and weave the end into the ring covering, not the web itself, so it doesn’t show. The web should look slightly irregular. Real webs are, and a perfectly even one looks like a doily.
It’s tempting to pull the spoke chains tight, thinking a taut web looks better. Don’t — it bends the metal ring into an oval and the whole spinner hangs crooked. Keep the spokes just barely taut. They need to hold their shape, not fight the ring.
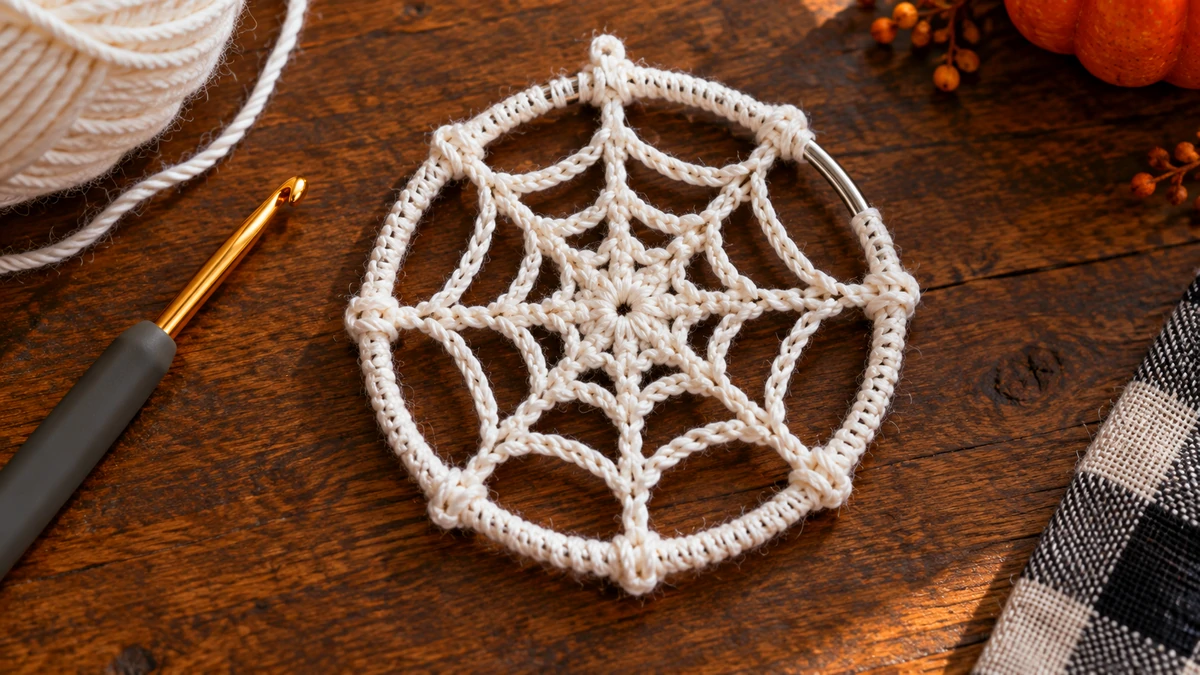
Six spokes and two web rings. Notice it isn’t perfectly even — that’s deliberate, and it’s what stops it looking like a doily.
5. Part 2 — The Six Corkscrew Spirals
Here’s the bulk of the work. Six spirals, two in each color. Each one is a single long row of double crochet, which takes about 25 minutes.
The rhythm is dead simple: three double crochet into every chain, all the way along. No rows to count, no place to lose. You can do it while watching something.
🌀 Corkscrew Spiral — Free Pattern (make 6)
Materials
- Worsted acrylic — black, orange, purple
- 5 mm hook
- Scissors, yarn needle
Per Spiral
- ~40–50 yards yarn
- One row, 273 dc
- ~25 minutes
Finished
- About 12–14 inches long
- Level: ⭐ Beginner
- Make 2 per color
Foundation chain. Ch 94. Keep it loose and even — a tight chain is hard to get three stitches into, and it physically resists the twist. The chain will look far too long at this stage. That’s correct; the spiral pulls it up to roughly half its flat length.
The spiral row. Work 3 dc into the 4th ch from the hook. Then work 3 dc into each remaining ch all the way along = 273 dc over 91 chains. This is the entire spiral. There is no second row.
Watch it twist. By about the tenth chain you’ll feel the strip start to turn in your hand. Don’t fight it or try to flatten it — that twist is the whole point. Keep working along the chain and let it coil.
Hanging loop. At the end of the row, ch 12, then sl st back into the last dc you made to form a loop. This is what attaches to the web ring, so give it a real tug to check it’s secure.
Fasten off. Cut yarn leaving a 6-inch tail and pull through the last loop. Keep this tail — you’ll use it to sew the loop closed around the ring. Leave a 6-inch tail at the starting end of the chain too, for attaching a ghost or a bead.
Measure before making five more. Hold your finished spiral up by its loop and let it hang. Measure it. If it’s shorter than you want, add 20 chains next time; if it’s longer, take 20 off. Get spiral one right, then match the other five to it exactly.
Make five more. Two black, two orange, two purple, all with the same chain count. Matching lengths is what makes the finished spinner hang straight instead of lopsided.
Finished length depends heavily on your tension, which is why this pattern asks you to measure spiral one first. A loose crocheter and a tight crocheter working the same 94 chains can end up two or three inches apart. Twenty-five minutes checking now saves you remaking five spirals later.
Controlling How Tight Your Spirals Turn Out
| Stitches per chain | Result | Best for |
|---|---|---|
| 2 dc | Loose, open, wavy rather than coiled | Softer look, uses less yarn |
| 3 dc | Classic corkscrew — the pattern above | ✅ Best all-round |
| 4 dc | Very tight, dense, almost ruffled | Dramatic but heavy and yarn-hungry |
| 3 hdc | Narrower coil, tighter turns | A slimmer spiral for small spaces |
| 3 tr | Wide, loose, sweeping curls | Large statement spinners |
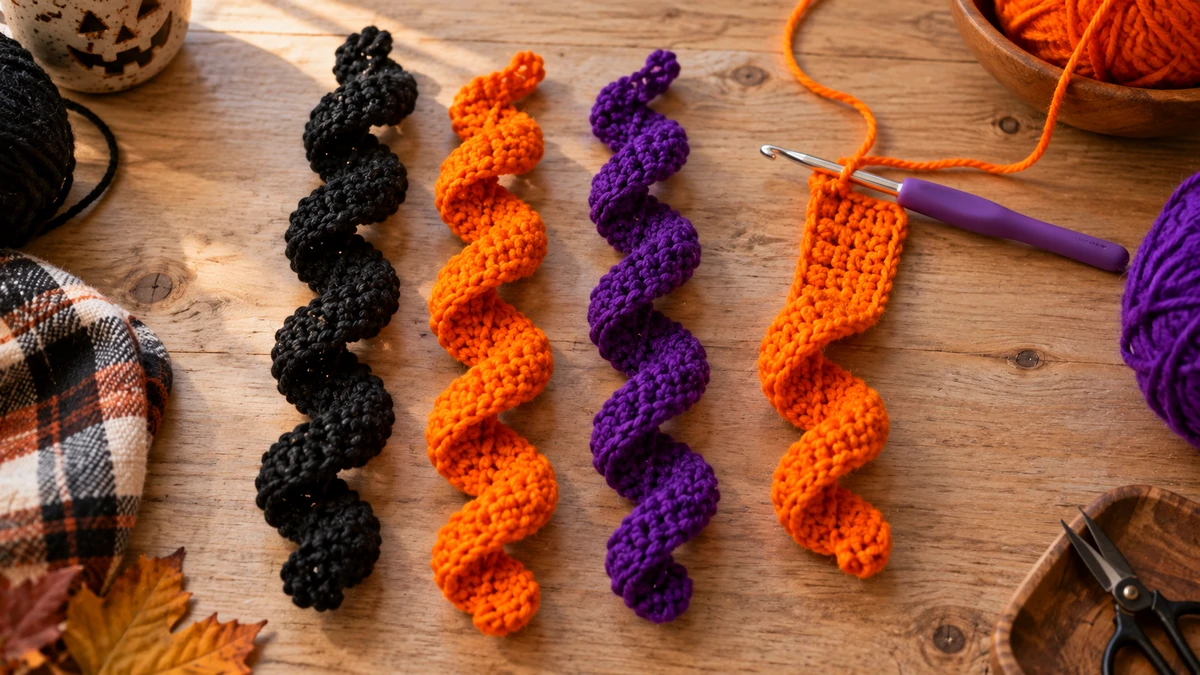
Three finished spirals beside one still on the hook. The twist appears within the first ten chains, long before the row is done.
6. Part 3 — The Mini Ghosts
Two small ghosts hanging at the bottom of the black spirals. They add weight, which improves the spin, and they’re the detail that makes people smile.
Each one takes about fifteen minutes.
👻 Mini Ghost — Free Pattern (make 2)
Materials
- White or glow-in-the-dark yarn
- 4 mm hook (tighter than the spirals)
- Pinch of stuffing
Yarn Needed
- ~8 yards each
- Scraps work fine
Finished
- About 1.5 inches tall
- Time: 15 min each
- Level: ⭐⭐ Easy
Head. MR, 6 sc. R2: inc×6 = 12. R3–5: sc×12. Use the smaller 4 mm hook here so the stuffing doesn’t peek through the stitches.
Stuff lightly. Add a small pinch of fiberfill — just enough to round the head out. Over-stuffing makes the ghost look like a golf ball.
The wavy bottom. R6: (sc in next 2 sts, 3 dc in next st) ×4. Those clusters of three double crochet push outward and create the classic wavy ghost hem. Sl st to join.
Hanging loop. Ch 12 from the top of the head, sl st back down the chain, then sl st into the head to make a firm loop. FO and weave in.
The face. With black yarn and a yarn needle, sew two small vertical stitches for eyes and a tiny oval for a mouth. Keep them low on the head, not centred — it reads as a face more clearly that way, and slightly wonky eyes look better than perfect ones.
7. Part 4 — Putting It Together
Everything’s made. This takes about twenty minutes.
Lay it out before you sew anything
Hang all six spirals off a pencil or a door handle and arrange them in the order you want: black, orange, purple, black, orange, purple. Seeing them hanging rather than laid flat tells you far more, because that’s how they’ll actually be viewed. Alternating gives the best effect when it spins, because the colors blur into each other rather than clumping.
Attach the spirals to the web ring
Thread the chain-12 loop at the top of the first spiral onto the covered ring at one of your six anchor points. Then use the yarn tail to sew the loop closed around the ring with several firm stitches. Give it a real tug — this one joint carries the whole spiral’s weight for the entire month.
Repeat at each anchor point, working around the ring rather than jumping side to side. That keeps the spacing even without measuring.
Add the ghosts
Tie a ghost to the bottom tail of each black spiral using its hanging loop. Don’t put ghosts on all six — two is the right number. Six looks cluttered and the extra weight slows the spin down noticeably.
Hanging cord
Cut 15 inches of strong yarn or clear fishing line. Thread it through the top of the ring, knot it, then knot again to form a loop. If your ring is a swivel type, you’re done — if not, add a swivel clip at the top. Without one, the cord winds tighter and tighter until the spinner stops turning, then unwinds and does it again.
Web 20 minutes, six spirals about 2.5 hours, two ghosts 30 minutes, assembly 20 minutes. Roughly three and a half hours all in — comfortably a weekend project, or three evenings if you’d rather.
8. Which Halloween Colors Actually Work
Halloween has a narrow color palette, and it’s easy to end up with something that looks muddy from a distance. A spinner is usually seen from ten feet away or more, so contrast matters more than the exact shades.
| Combination | Effect | Verdict |
|---|---|---|
| Black + orange + purple | Classic, high contrast, reads instantly | ✅ Best all-round |
| Black + white + grey | Ghostly, monochrome, modern | ✅ Very striking |
| Purple + lime green + black | Bright, cartoonish, kid-friendly | ✅ Great for a party |
| Cream + rust + sage | Soft, muted, fits neutral decor | ✅ For subtle homes |
| Black + dark purple only | Too dark — reads as a black blur | ❌ Skip |
| Orange + red + burgundy | All similar warmth, no contrast | ❌ Muddy |
Photograph your yarn balls side by side, then switch the photo to black and white on your phone. If two of them look the same shade of grey, they’ll blur together when the spinner turns. Swap one for something much lighter or darker. Ten seconds, saves a whole project.
9. Where to Hang Your Crochet Halloween Wind Spinner So It Actually Spins
A spinner in the wrong spot just hangs there. The right spot has it turning most of the day.
Covered porch beam. The best all-round choice. Sheltered from rain, but catches the draft every time someone opens the front door — which on Halloween night is constantly.
Open tree branch. Most consistent airflow, so the most spinning. But fully exposed to weather, so bring it in if a storm’s coming.
Above the front door. Directly in the trick-or-treat path. Kids notice it, and it moves every time the door opens.
Indoors near a window. Works better than people expect. Room air currents are enough to keep a light spinner turning slowly, and it lasts indefinitely inside.
Where not to hang it: a sheltered corner with no airflow, or anywhere it’ll knock against a wall as it turns. The second one is the more annoying discovery.
If you want a second hanging project for the same porch, our crochet plant hanger works well alongside it — one spins, one holds a plant, and together they fill a corner properly.
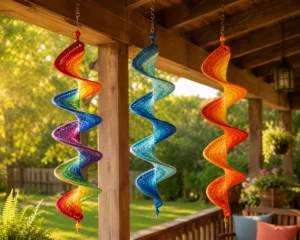
A covered porch beam is the best spot — sheltered from rain, but catching a draft every time the front door opens.
10. What Goes Wrong (and How to Fix It)
The spirals barely curl
Almost always too few stitches per chain. You need three double crochet in every single chain — if you’ve been working one stitch per chain, you’ll get a flat strip with no twist at all. Count a short section: 10 chains should have 30 double crochet above them. The other cause is a very tight foundation chain, which physically resists the twist.
It hangs crooked
Almost always unequal spiral lengths. Hang all six side by side and compare. If one is short, remake it with a longer chain — unpicking a row of 273 double crochet is more painful than starting over.
It spins one way, then stops and unwinds
Classic cord-twist problem. You need a swivel. Without one, the hanging cord winds up until it physically can’t turn any further, then spins back. A cheap swivel clip from a hardware store fixes it completely.
The web sags under the spirals
The centre join wasn’t secured enough. Take white yarn and sew through the crossing point again, six or seven passes. It should feel solid before you attach any spirals to it.
The colors look like a dark blur outdoors
Not enough contrast between shades. This is the one that’s genuinely hard to fix after the fact — remaking two spirals in a much lighter color is the only real solution. Do the black-and-white photo test before you start next time.
11. Frequently Asked Questions
How long does a crochet Halloween wind spinner take to make?
About three and a half hours in total. The spiderweb top takes 20 minutes, each of the six corkscrew spirals takes roughly 25 minutes, the two ghosts take 15 minutes each, and assembly is another 20. It splits easily across two or three evenings since each piece is finished separately.
Can a complete beginner make this pattern?
Yes. The spirals use only chain and double crochet, worked as a single row with no shaping and nowhere to lose your place. The spiderweb is chains and slip stitches. Only the ghosts need a magic ring, and you can skip them entirely and use beads for weight instead if you’d rather.
Why aren’t my strips curling into spirals?
You need three double crochet in every single chain, not one. That’s what makes the outer edge three times longer than the chain, and it’s the only thing that forces the twist. Count a short section — ten chains should carry thirty double crochet. A very tight foundation chain also resists curling, so keep it loose.
Will it survive being outside for October?
In acrylic and under cover, yes — a porch or covered patio is fine for a full month. Acrylic resists sun fading and dries quickly if it gets damp. Bring it in before heavy storms, and don’t use cotton, which goes limp and fades outdoors.
Why won’t my wind spinner spin?
Three usual causes. Not enough weight at the bottom, so add beads or the ghosts. No swivel at the top, so the cord winds up and stops it. Or it’s hanging somewhere with no airflow — a sheltered corner won’t move it no matter how well it’s made.
Can I make it without the spiderweb top?
Absolutely. Thread the six spiral loops straight onto a plain metal ring and it works exactly the same. The web is decorative — it just hides the metal and makes the spinner read as Halloween rather than generic. It only takes 20 minutes if you change your mind.
How do I make the spirals longer or shorter?
Change the foundation chain. The finished spiral comes out at roughly half the flat chain length, so 94 chains gives about 12–14 inches. Add 20 chains for longer, take 20 off for shorter. Make one and measure it before committing to all six, since tension affects this more than in most patterns.
How much yarn does the whole thing use?
Roughly 240 to 300 yards for the six spirals at 40–50 yards each, plus about 12 yards for the web and 16 for both ghosts. Around 300 yards total, which for standard worsted skeins means one skein of each main color with plenty spare.
Can I sell spinners made from this pattern?
Yes. This is an original CrochetEco design and you’re welcome to sell finished spinners at markets, craft fairs or your own shop. Please don’t republish or resell the written pattern instructions themselves. If you want more seasonal patterns to browse, Ravelry’s Halloween crochet collection is one of the largest searchable libraries online.
Final Thoughts
The reason so many Halloween wind spinner pictures online don’t lead anywhere is that people generate the image before working out whether the thing can actually be made. This one can. Six spirals, a small web, two ghosts, and about three and a half hours.
Start with one spiral tonight, just to feel it twist by the tenth chain. That’s the moment this project sells itself. Everything after it is repetition, and you’ll have it hanging on the porch by the weekend.
Want the Rainbow Version Too? 🌀
The original spinner pattern — same corkscrew technique, six bright colors, and a good one to make first.
Rainbow Wind Spinner →


Reader discussion
Reader Comments
Tried this pattern? Share what worked, ask a question, or help another crocheter.
Your turn
Comments are moderated to keep the discussion useful and family-friendly. Please do not post personal information.