
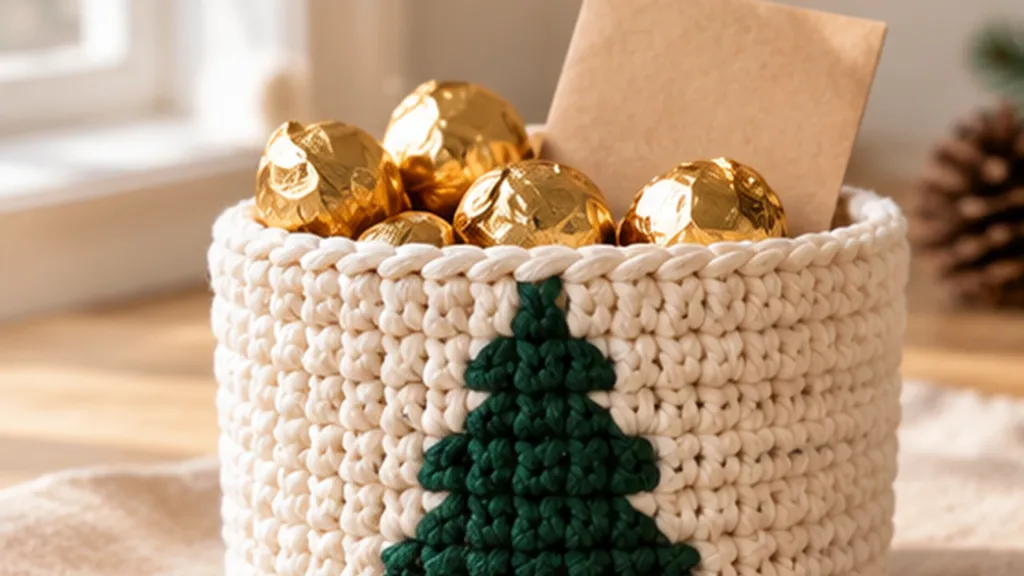
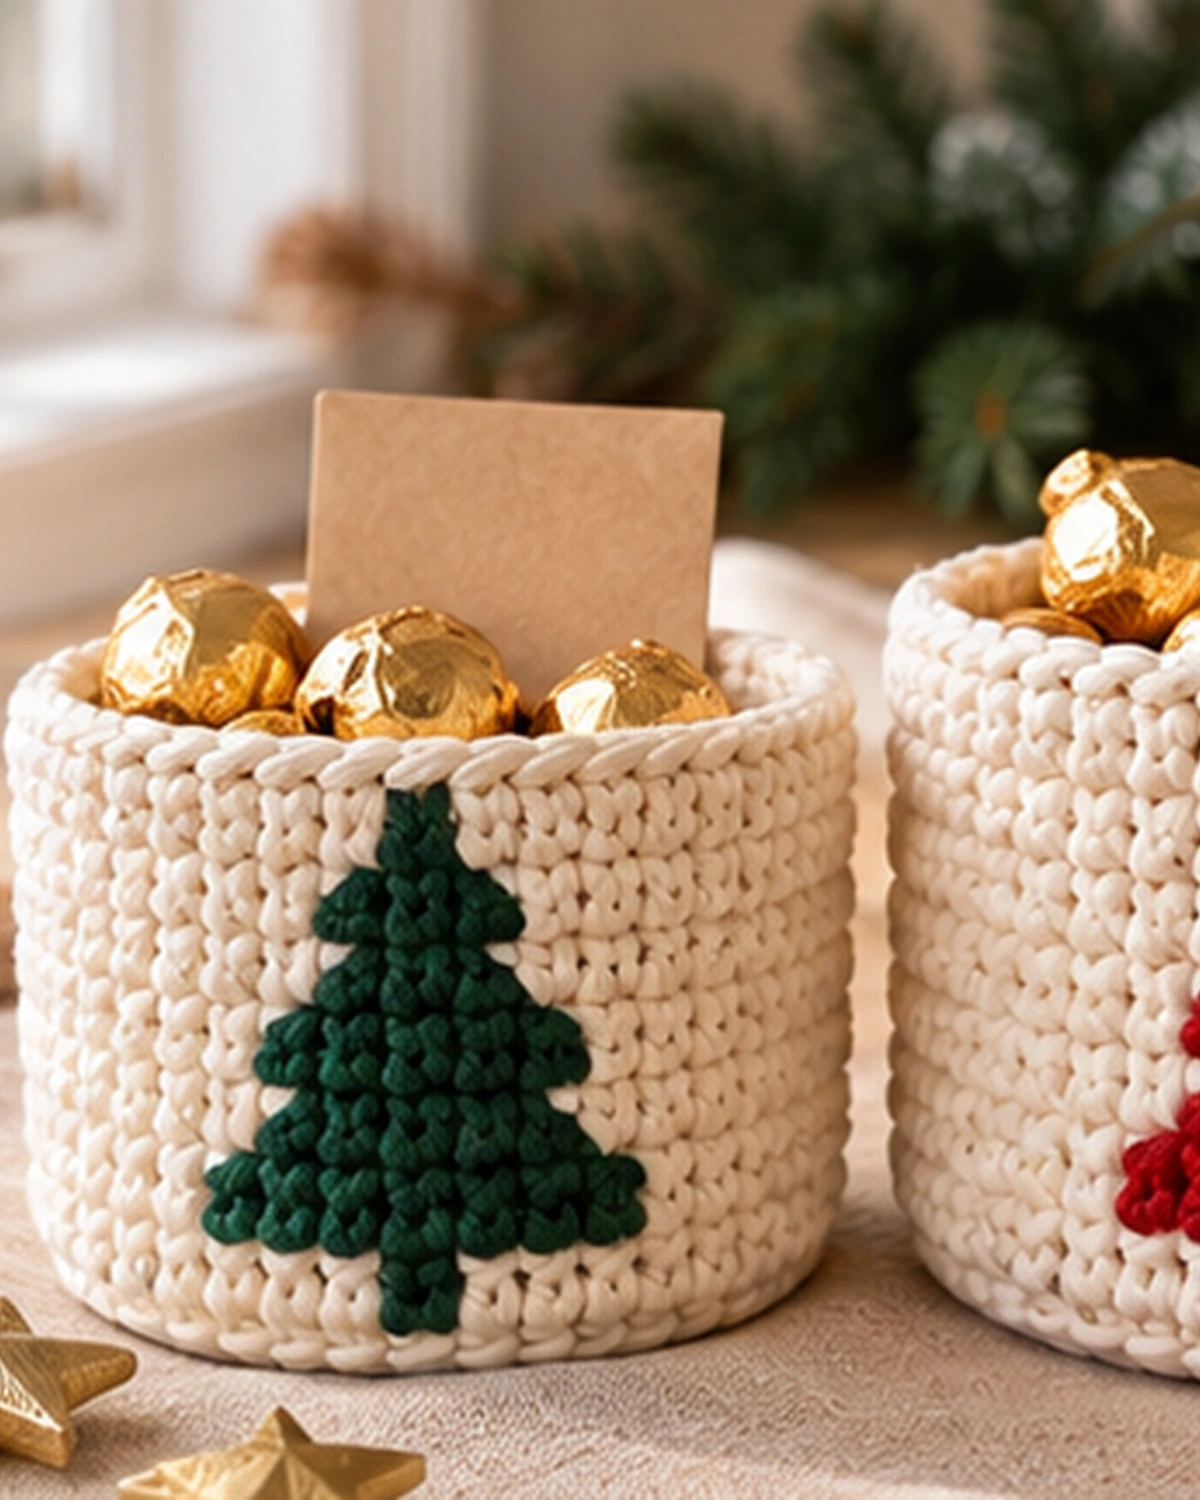
This crochet Christmas basket is a small gift basket made from cotton cord, with a tree on each side. You need single crochet in rounds and a magic ring. The trees use one new stitch, the waistcoat stitch. You’ll learn it step by step below.
It’s sized for a small gift, so you can skip the wrapping paper. There are two sizes and a chart for the trees. The two tricky parts, waistcoat stitch and color changes, each get a photo.
Tiered Tree Gift Basket
Free pattern from CrochetEco
- Cord
- 3 mm cotton, cream + red or green
- Hook
- 5 mm (H-8)
- Gauge
- 14 sc = 4 in
- Level
- Advanced beginner
On this page
Pick your size
The small size holds a small LED candle jar or a few treats. The large size fits a mug or a small plant pot.
| Size | Stitches in the sides | Finished size |
|---|---|---|
| Small | 60 | About 5.5 in wide, 4.5 in tall (14 x 11.5 cm) |
| Large | 72 | About 6.5 in wide, 4.5 in tall (16.5 x 11.5 cm) |
What you need
| Size | Cream cord | Tree color |
|---|---|---|
| Small | About 120 to 140 m (130 to 155 yd) | About 15 to 20 m (16 to 22 yd) |
| Large | About 150 to 180 m (165 to 200 yd) | About 20 to 25 m (22 to 27 yd) |
- 3 mm cotton cord (also sold as macrame cord) in cream, plus red or green for the trees. Twisted cord and braided cord both work. Many cords come on 100 m spools, so you will need two spools of cream for either size.
- 5 mm (H-8) crochet hook
- 1 stitch marker (a small clip that marks a stitch)
- Large-eye yarn needle and scissors
Tip: Cord does not stretch like yarn. If your hook keeps getting stuck in the waistcoat stitch, try a 5.5 mm (I-9) hook for the sides only. If the sides start to lean out, go back to 5 mm. See our cord basket bag guide for more tips on working with cord.
Abbreviations and gauge
This pattern uses US crochet terms.
Show the abbreviations
| Short form | Meaning |
|---|---|
| sc | single crochet |
| inc | increase: 2 sc in the same stitch |
| BLO | back loop only |
| ws | waistcoat stitch (see below) |
| sl st | slip stitch |
| st(s) | stitch(es) |
Gauge: Gauge is how many stitches fit in a set size. For this basket, 14 sc make about 4 in (10 cm). You do not need a test square. You check the base after the last increase round.
How to do the waistcoat stitch
The waistcoat stitch is a single crochet worked into the middle of the stitch below, not into its top loops. Each stitch looks like a small V, and the Vs stack in neat columns. The fabric comes out dense, so the cord walls do not flop.
- Look at the stitch below. From the front, it looks like a V with two legs.
- Insert your hook through the middle of the V, between the two legs, from front to back. Go in just in front of the back bar, which is the strand of cord behind the V.
- Yarn over (wrap the cord over your hook) and pull up a loop. You have 2 loops on the hook.
- Yarn over and pull through both loops. That is one waistcoat stitch.
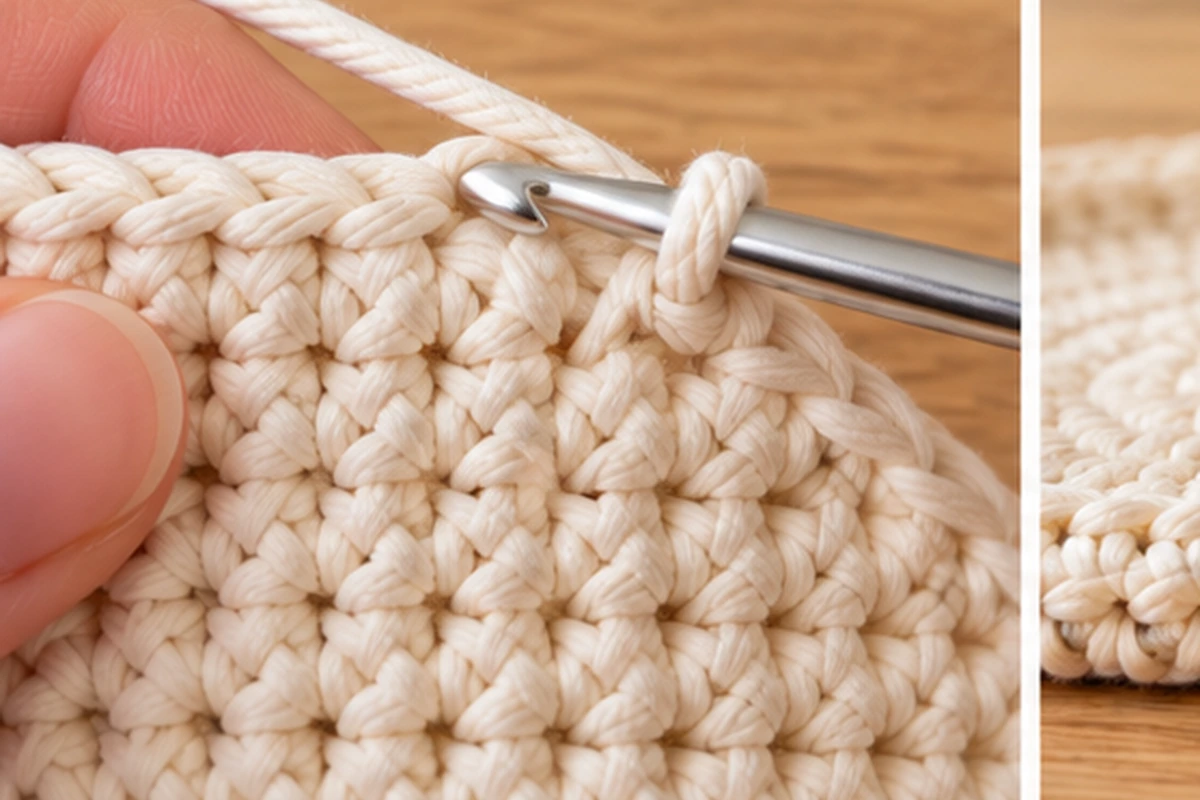
Tip: Keep the loop on your hook a little loose before you start the next stitch. A tight loop makes the next V hard to open.
Crochet Christmas basket pattern, round by round
Show my size
Before you start
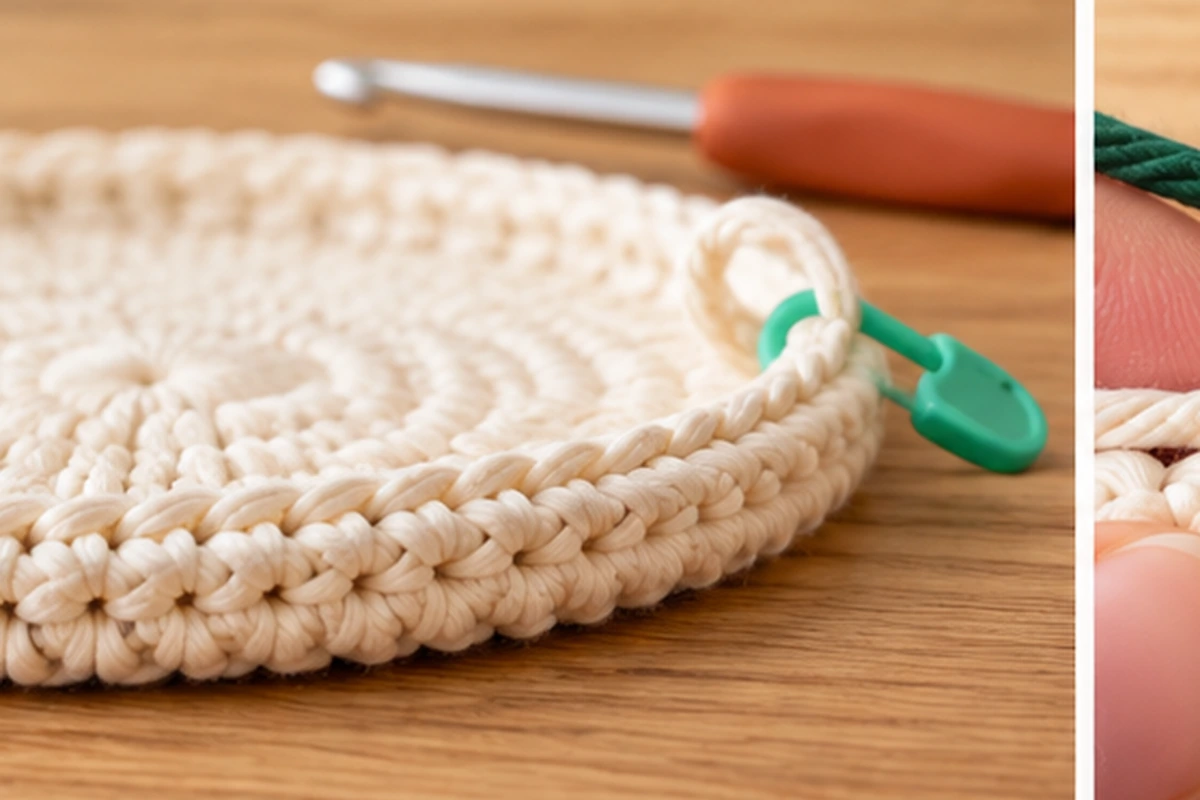
- The basket is worked from the bottom up, in a spiral. Do not join the rounds and do not turn, so there is no seam line up the side.
- Put the marker in the first stitch of each round, and move it up every round.
- The number on the right is your stitch count at the end of the round.
The base
The base is a flat circle. Each round adds 6 stitches. If the magic ring is new to you, see our magic ring tutorial first.
Check the base
Lay the base flat and measure across the middle. The small base should be about 5.5 in (14 cm). The large base should be about 6.5 in (16.5 cm).
Is the base wavy, or does it curve up like a bowl? A wavy base has stitches that are too loose, so try a 4.5 mm (7) hook. A base that cups like a bowl is too tight, so try a 5.5 mm (I-9) hook.
Turning the corner
The sides now start to stand up, because the turning round is in the back loop only. That first waistcoat round is awkward. It gets easier from side round 2.
The trees (tree chart)
The next 11 rounds make two trees, on opposite sides of the basket. Chart round 1 is side round 2, and chart round 11 is side round 12. Every stitch is a waistcoat stitch. Each round has two equal parts, so you work the same thing twice.
Key: A square with a V is the tree color (red or green). A plain square is cream. The dashed box shows one tree, 9 stitches wide. The chart shows the middle 15 stitches of each half of the round. All other stitches are cream. Read each round right to left (left-handed: left to right). Round 1 is at the bottom.
How to change colors
- Work the last cream stitch before the tree until 2 loops are on the hook.
- Drop cream. Yarn over with the tree color and pull it through both loops.
- Work the tree stitches. Change back to cream the same way, on the last tree stitch.
- Lay the color you are not using on top of the round below. This is the carried strand. Work your stitches over it, so there are no loose strands inside.
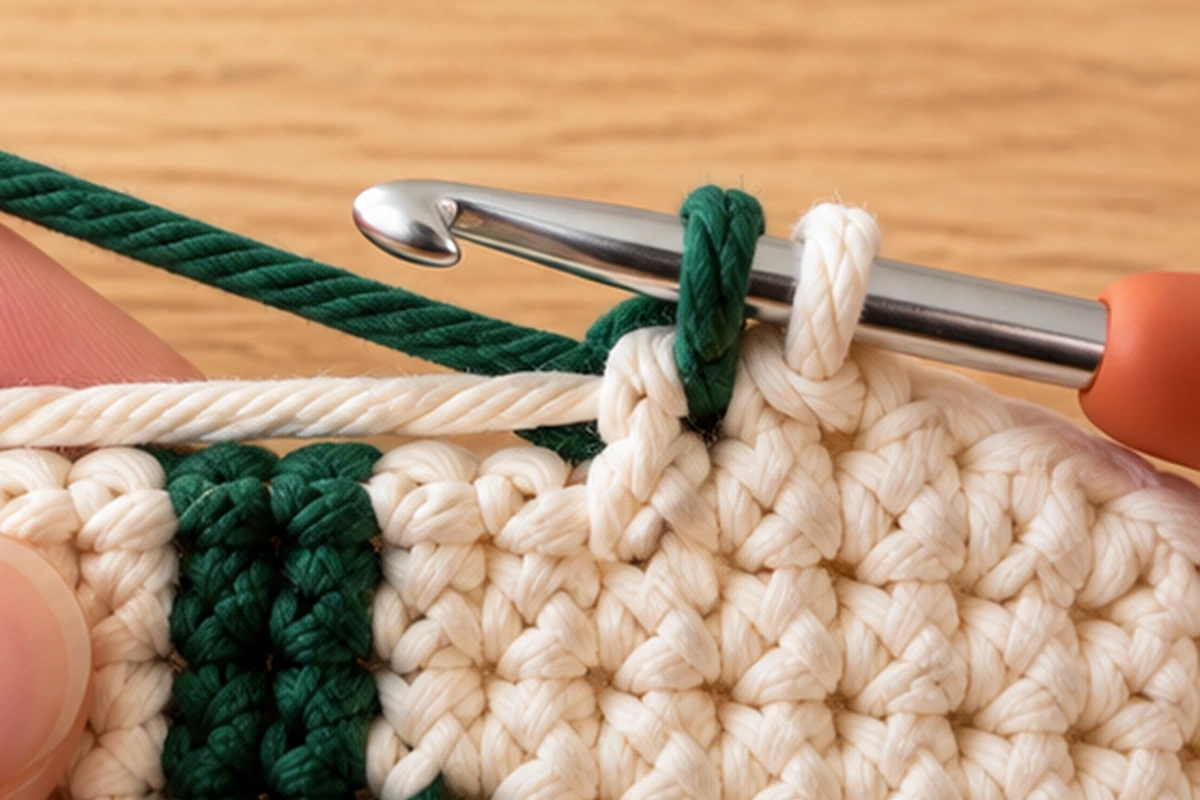
Our guide on how to crochet with multiple colors shows this color change with photos.
Tip: Insert the hook just in front of the back bar of the V. Your stitch then closes around the carried strand without splitting it, and the strand stays hidden.
Read only your size, or pick it at the top of the pattern to hide the other one.
Cut the tree color after Chart round 11 and leave a 6 in (15 cm) tail. You will hide it at the end.
Last rounds and finishing
Cut the cord and pull the tail through the loop. With the needle, pass it under both loops of the next stitch, then back down into the last slip stitch. This hides the small jump where the last round ends. Then weave in all the ends: sew each one through a few stitches on the inside so it is hidden.
To clean the basket, wipe small spots with a damp cloth. For a full wash, hand wash in cool water and let it dry standing up.
What to put inside
These all fit the small basket:
- A folded Christmas card standing up at the back
- Wrapped chocolates, cookies in a bag, or tea bags
- A small wooden or paper ornament
- A soft bed of cotton or tissue paper to hold everything up
Safety: Cotton cord burns. Never light a candle while it sits inside a crochet basket. Use a battery LED candle, or take a real candle out before you light it.
If something looks wrong
The sides lean out instead of standing up
The turning round needs the back loop only. If you worked into both loops, the corner stays soft. Also check that you did not add any stitches after the base.
The carried color shows between the stitches
Keep the carried strand flat on the top of the round below. Keep it a little loose, but not hanging. If it is too tight, the tree pulls in and bunches up. Insert the hook just in front of the back bar of the V. Then you will not catch the carried strand.
The trees lean to one side
Waistcoat stitch in a spiral always leans a little. Insert the hook in the same place in every V, just in front of the back bar. This keeps the lean small and even, so the tree still looks straight.
The trees are not opposite each other
A stitch was missed or added. Count each round of the tree section. Every round should have 60 stitches (small) or 72 stitches (large).
Common questions
Can I make it with regular yarn instead of cord?
Two strands of medium-weight cotton yarn (number 4 on the label) held together work. So does one strand of bulky cotton (number 5). Check that the base matches the size in the table, and change the hook if it does not.
How do I make the basket stiffer?
Use a hook one size smaller, and the basket will come out a little smaller too. A braided cord is firmer than a twisted one. You can also put a circle of cardboard in the bottom.
Can I make only one tree?
Work the first half of each chart round as written. In the second half, work all the stitches in cream. Keep carrying the tree color around the whole round, so it is in place for the next round.
How long does it take?
Plan for a few evenings for the small size. Waistcoat stitch in cord is slower than plain single crochet, and the color changes take extra time.
Save this pattern for laterPin it, so you can find the tree chart when you start.
Save to PinterestNext projectLiked carrying colors here? The tapestry bobble heart uses the same trick.
Tapestry crochet bobble stitch
Reader discussion
Reader Comments
Tried this pattern? Share what worked, ask a question, or help another crocheter.
Your turn
Comments are moderated to keep the discussion useful and family-friendly. Please do not post personal information.