
Biology Crochet Patterns: 3 Easy Free Science Designs
Make a DNA bookmark, a neuron keychain, and a cell coaster with simple crochet stitches.
Biology crochet patterns can be simple and fun. This guide gives you three small science projects with basic stitches, clear steps, and materials that are easy to find.
You can make a DNA double helix bookmark, a neuron keychain, and a cell coaster. Each project is small, useful, and beginner friendly. Most can be finished in about an hour or less.
They also make easy handmade gifts for biology students, teachers, science fans, and lab friends.
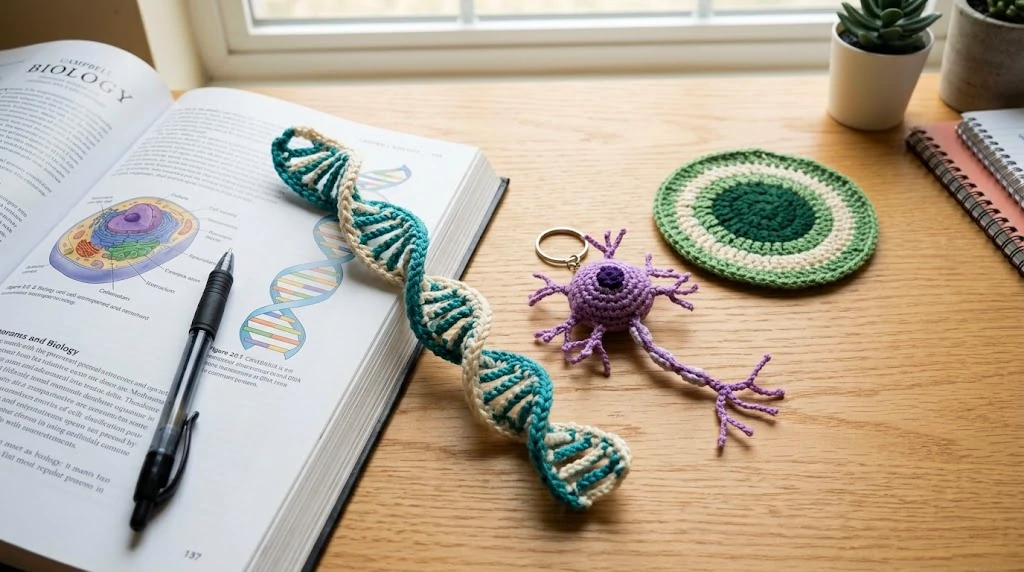
Three easy biology crochet patterns: a DNA bookmark, neuron keychain, and cell coaster.
📋 What’s in this guide
- Why these biology crochet patterns are easy
- What you need for all three
- Abbreviations and gauge
- Free Pattern 1 — DNA double helix bookmark
- Free Pattern 2 — Neuron keychain
- Free Pattern 3 — Cell coaster
- Easy color ideas
- Gift ideas for science fans and students
- Common mistakes
- Frequently asked questions
1. Why These Biology Crochet Patterns Are Easy
Many biology shapes are easy to turn into crochet. A cell can start as a flat circle. A neuron can start as a small round body with yarn branches. A DNA model can use two long strands joined with short rungs.
That makes these projects good for beginners. You will mostly use chains, single crochet, a magic ring, and a few basic increases and decreases.
Who these patterns are for
These projects can work for teachers, students, lab workers, or anyone who likes science crafts. A teacher can use a soft model in class. A student can make one as a quick study-break project. The finished pieces also look nice on a desk or bookshelf.
A crochet model gives students something they can hold and look at from different sides. It can be a simple extra tool next to a textbook diagram.
If you are brand new to crochet, start with our beginner’s guide first. The patterns below are easier if you already know how to chain and single crochet.
2. What You Need for These Biology Crochet Patterns
Yarn
Worsted weight (size 4) cotton or acrylic yarn. You will need about 30 to 60 yards for each project.
Crochet Hook
Use a 4 mm (G/6) hook for the bookmark and coaster. Use a 3.5 mm (E/4) hook for the neuron.
Fiberfill Stuffing
You only need a small amount for the neuron. If you do not have fiberfill, you can use a little scrap yarn.
Keyring or Split Ring
Use a small keyring for the neuron. A clean ring from an old keychain also works.
Yarn Needle & Scissors
Use these to weave in ends and join the small pieces.
Stitch Markers
These help you mark the start of a round on the neuron and coaster.
If you are not sure which hook to use, see our crochet hook size chart for a quick guide. The Craft Yarn Council yarn weight system can also help you read yarn weight labels used in US patterns.
Cotton is a good choice for the coaster because it handles moisture well and blocks flat. For the bookmark and neuron, cotton or acrylic can both work. Use the yarn you already have if the size is close.
3. Abbreviations and Gauge
US crochet terms used in all three patterns
ch = chain · sc = single crochet · hdc = half double crochet · dc = double crochet · sl st = slip stitch · MR = magic ring · inc = increase (2 sc in same stitch) · dec = decrease · st(s) = stitch(es) · FO = fasten off
Gauge does not need to be exact. These are small projects, not fitted clothing. Keep your stitches fairly firm so the shapes hold. Use the finished size as a simple guide.
4. Free Pattern 1 — DNA Double Helix Bookmark 🧬
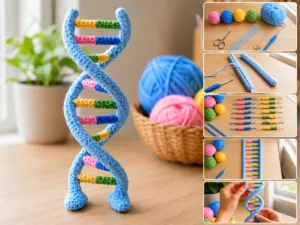
This DNA bookmark is one of the easiest biology crochet patterns in the guide. You make two long strands, connect them with short rungs, and twist the finished piece into a helix shape.
It also works as a real bookmark, so it is an easy small gift for a student or science teacher.
🧬 DNA Double Helix Bookmark — Free Pattern
Materials
- Worsted cotton in 2 colors
- 4 mm (G/6) hook
- Yarn needle, scissors
Yarn Needed
- ~25 yards backbone color
- ~10 yards rung color
Finished Size
- About 18 cm long
- Time: 45 minutes
- Level: ⭐ Beginner
First backbone strand. With color A, ch 61. Sc in the 2nd ch from hook and in each ch across = 60 sc. FO, leaving a 15 cm tail. Keep your tension even so the finished helix twists neatly.
Second backbone strand. Repeat step 1 exactly. Make both strands the same length. Lay them side by side and check them before the next step.
Position the strands. Lay them flat on a table, parallel, about 3 cm apart. Pin the ends if you can, or place a small object on each end to keep the strands still.
Make the base pairs. With color B, join to the top of strand 1. Ch 6, sl st into the matching stitch on strand 2. FO. This makes one rung. Repeat every 5 stitches until you have 11 rungs.
Twist the helix. Hold both ends and twist one end a full turn away from you, then a second turn. Two full turns work well for an 18 cm bookmark. Hold the twist in place for the next step.
Set the twist. Sew the top ends of both strands together with the yarn tails, and do the same at the bottom. This holds the twist in place. Lightly wet the bookmark, shape it, and let it dry flat.
Optional tassel. Ch 20 from the top join, then sl st back down for a firm cord, and add a small tassel. The tassel can hang over the top of the book.
A real DNA helix has about 10 base pairs in each full turn. If you want a more detailed look, make 20 rungs and twist the bookmark two full turns. The 11-rung version is lighter and easier for a bookmark.
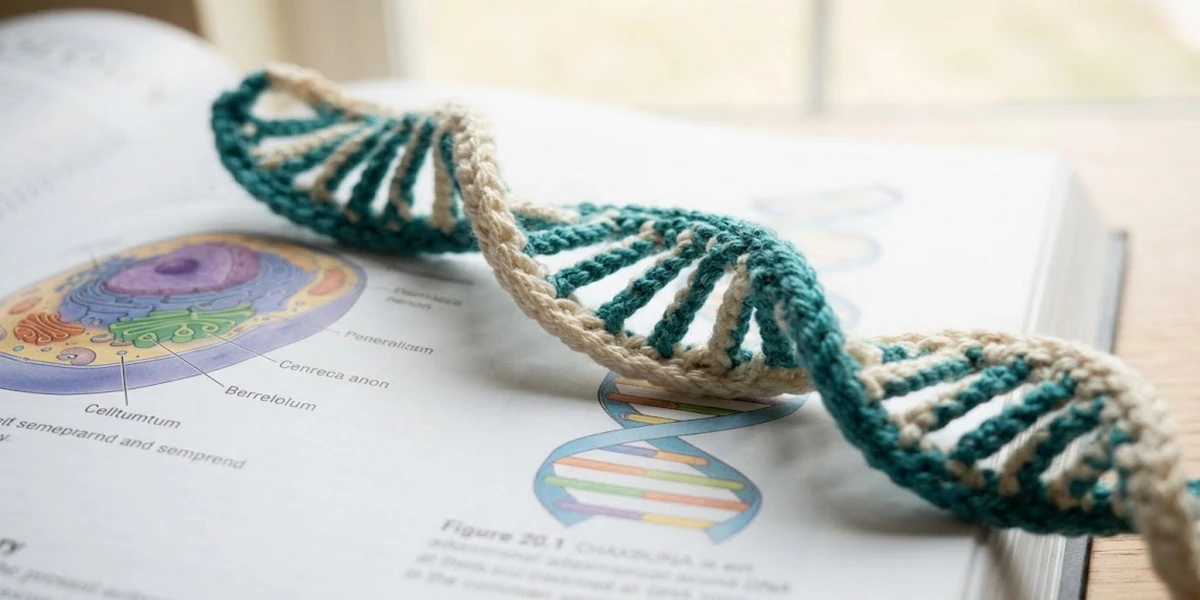
A simple crochet DNA double helix bookmark made with two yarn colors.
5. Free Pattern 2 — Neuron Keychain 🧠
This neuron is one of the small biology crochet patterns you can finish in about an hour. It starts with a stuffed round body, then you add short yarn branches and one longer chain for the axon.
It makes a fun keychain and can also be used as a simple classroom model.
🧠 Neuron Keychain — Free Pattern
Materials
- Worsted yarn, 1 main color
- 3.5 mm (E/4) hook
- Pinch of fiberfill
- Small keyring
Yarn Needed
- ~30 yards total
- Optional: 5 yards accent
Finished Size
- Body ~4 cm across
- Time: 1 hour
- Level: ⭐⭐ Easy
Cell body (soma). MR, 6 sc. R2: inc×6 = 12. R3: (sc, inc)×6 = 18. R4–6: sc×18. R7: (sc, dec)×6 = 12. Add a small amount of stuffing. Keep the body firm, but do not overfill it. R8: dec×6 = 6.
Close the body. FO leaving a long tail. Thread it through the front loops of the remaining 6 stitches and pull tight to close. Keep the long tail for the next step.
The axon. Rejoin yarn at the closed end. Ch 25, then sl st back along the chain to the body. This makes a firmer cord. Keep it longer than the small cell body so the neuron shape is easy to see.
Axon terminals. At the far end of the axon, work three short branches: ch 5, sl st back 4, then sl st into the axon end. Repeat twice more. These small branches represent the axon terminals.
Dendrites. On the opposite side of the cell body, join yarn and make 5 branches: ch 8, sl st back 7, sl st into the body, then move 2 stitches along and repeat. Make the branches a little different in length. Try 6 to 10 chains so the shape looks more natural.
Attach the keyring. Thread the keyring onto one dendrite before you fasten off, or sew a small loop at the top of the cell body. Weave in the loose ends neatly.
This pattern has small parts and long yarn branches, so it is not a toy for babies or toddlers. If you make a classroom version for young children, keep the branches short and secure every part well.
6. Free Pattern 3 — Cell Coaster 🔬
This cell coaster is one of the quickest biology crochet patterns in this guide. It uses one flat circle for the cell and a smaller circle for the nucleus.
It is also a good project for practicing flat crochet circles.
🔬 Cell Coaster — Free Pattern
Materials
- Worsted cotton in 2–3 colors
- 4 mm (G/6) hook
- Yarn needle, scissors
Yarn Needed
- ~20 yards cytoplasm color
- ~8 yards nucleus color
Finished Size
- About 10 cm across
- Time: 30 minutes
- Level: ⭐ Easiest
Nucleus. With the darker color, MR, 6 sc. R2: inc×6 = 12. R3: (sc, inc)×6 = 18. Sl st to join, FO leaving a long tail for sewing. This makes the nucleus, about 4 cm across.
Cytoplasm — the main body. With the lighter color, MR, 6 sc. R2: inc×6 = 12. R3: (sc, inc)×6 = 18. R4: (sc×2, inc)×6 = 24. R5: (sc×3, inc)×6 = 30. R6: (sc×4, inc)×6 = 36.
Cell membrane edge. R7: sc×36 through back loops only. The back-loop round gives the edge a clear line for the cell membrane. Sl st to join, FO.
Attach the nucleus. Place the nucleus a little off-center on the main circle. Sew it down around the edge with the yarn tail from step 1.
Optional organelles. With a third color, you can add three or four small oval shapes with surface slip stitches. These can represent mitochondria. Keep them simple so the coaster does not look too busy.
Block it flat. Lightly wet the finished coaster, shape it flat, and let it dry. This helps the coaster sit neatly on a table.
Check your increase count first. For this pattern, each round adds 6 stitches. If the coaster still cups upward, your tension may also be tight. Our guide on why crochet curls has more tips.
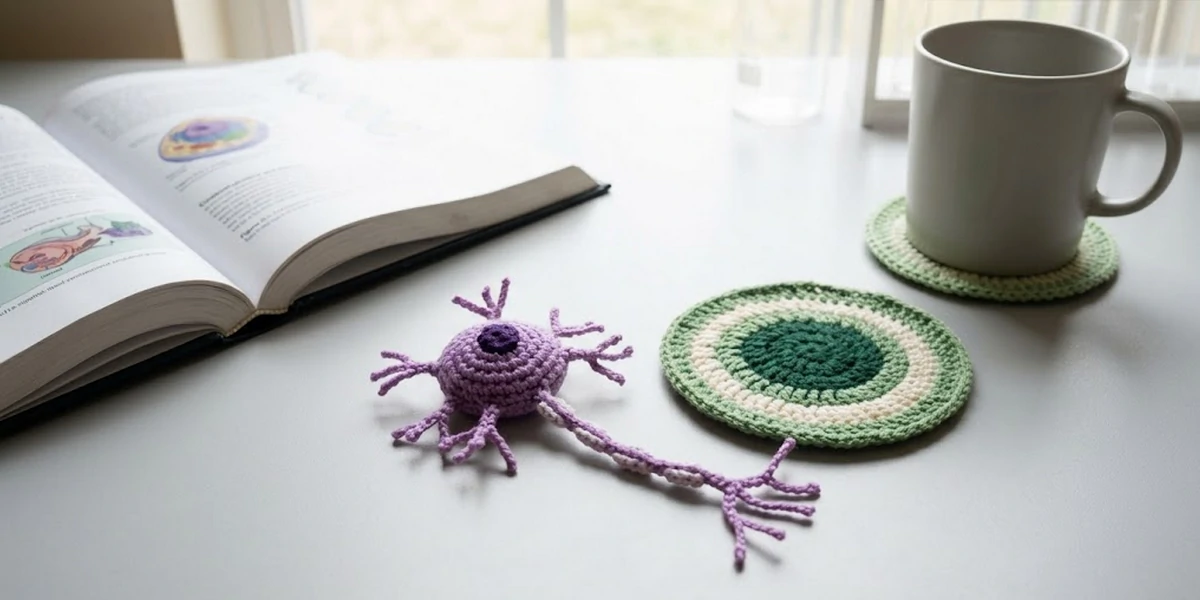
A crochet neuron keychain and a flat crochet cell coaster.
7. Easy Color Ideas
There is no one official color system for biology crochet patterns. You can use any colors you like. If you want a familiar science-class look, the ideas below are an easy place to start.
| Structure | Color idea | Why it works |
|---|---|---|
| DNA backbone | Blue or teal | A cool color gives the strands a clean look |
| DNA base pairs | Red, yellow, green | Use a few bright colors for contrast |
| Neuron cell body | Purple or pink | Purple or pink is easy to see against a light background |
| Cytoplasm | Pale green or cream | A light color keeps the center details easy to see |
| Nucleus | Dark blue or purple | A darker center stands out from the main circle |
| Mitochondria | Orange or red | A warm accent color adds contrast |
Your project does not need to match a textbook. Pick colors you enjoy. The shape is what makes each piece easy to recognize.
8. Gift Ideas for Science Fans and Students
These biology crochet patterns are easy to turn into simple handmade gifts.
For a biology teacher: make a small set of cell coasters and add a neuron for the desk or classroom.
For a student: make the DNA bookmark. It is light, useful, and easy to keep inside a textbook.
For a graduation gift: add the neuron keychain to a small gift bag or set of new keys.
For a science desk: make a set of cotton cell coasters for coffee or tea mugs.
For more science crochet ideas, see our science-themed crochet patterns guide with more project ideas.
9. Common Mistakes With Biology Crochet Patterns
Uneven DNA strands
If the two strands are different lengths, the helix can twist unevenly. Count both strands and compare them before you add the rungs.
Over-stuffing the neuron
Use only a small amount of stuffing. Too much can stretch the stitches and make the filling show through. Stop when the body holds its round shape.
Uniform dendrites
Make the dendrite branches a little different in length. Try 6 to 10 chains. Small changes make the neuron look more natural.
A coaster that won’t lie flat
Check that you are adding 6 stitches in each new round. Then lightly wet the coaster, shape it flat, and let it dry.
Too many organelles
Keep the extra details simple. Three or four small shapes are enough. Too many details can make the coaster look crowded.
10. Frequently Asked Questions
Are these biology crochet patterns suitable for beginners?
Yes. The cell coaster and DNA bookmark use basic stitches. The neuron also uses a magic ring, increases, and decreases. If you know the basic crochet stitches, you can work through all three patterns.
How long does each biology crochet pattern take?
The cell coaster takes about 30 minutes, the DNA bookmark about 45 minutes, and the neuron about one hour. Your time may be a little different depending on your crochet speed.
Can I use these as classroom teaching props?
Yes. They can be used as simple classroom models next to normal lessons and diagrams. For young children, keep all yarn branches short and secure, and do not use the neuron as a baby or toddler toy.
What yarn works best for science crochet projects?
Cotton is a good choice for the coaster because it handles moisture and blocks well. Cotton or acrylic can work for the bookmark and neuron. Smooth yarn is easier to see than very fuzzy yarn.
How do I make the DNA helix more scientifically accurate?
A real DNA helix has about 10 base pairs in each full turn. For a more detailed version, make 20 rungs and twist the finished piece two full turns.
Can I sell items made from these patterns?
Yes. You may sell finished items made from these CrochetEco patterns. Please do not copy, republish, or sell the written pattern instructions themselves.
Final Thoughts
These biology crochet patterns use simple shapes and basic stitches. They are small projects, so you can practice without using much yarn.
If you want the easiest start with these biology crochet patterns, make the cell coaster first. Then try the DNA bookmark and the neuron keychain. Use the colors you like and adjust the small details as you go.
More Science Crochet Patterns 🔬
Find more simple science crochet ideas, including projects inspired by physics and astronomy.
Explore Science Crochet →
Reader discussion
Reader Comments
Tried this pattern? Share what worked, ask a question, or help another crocheter.
Your turn
Comments are moderated to keep the discussion useful and family-friendly. Please do not post personal information.