
Why Is My Crochet Curling? 6 Causes and How to Fix Each One
Find out what is causing the curl in seconds — then fix it, even on a project you already finished
If you are asking why is my crochet curling, you are in good company. It happens to almost everyone, usually on a first scarf or blanket, and it is almost always one of six things.
The good news: curling is a symptom, not a disaster. Once you know which of the six is causing yours, the fix takes minutes. And if the project is already finished, you can still flatten it — we cover that too.
Start with the quick diagnosis table below. Look at where your work curls, and it will send you straight to the cause.
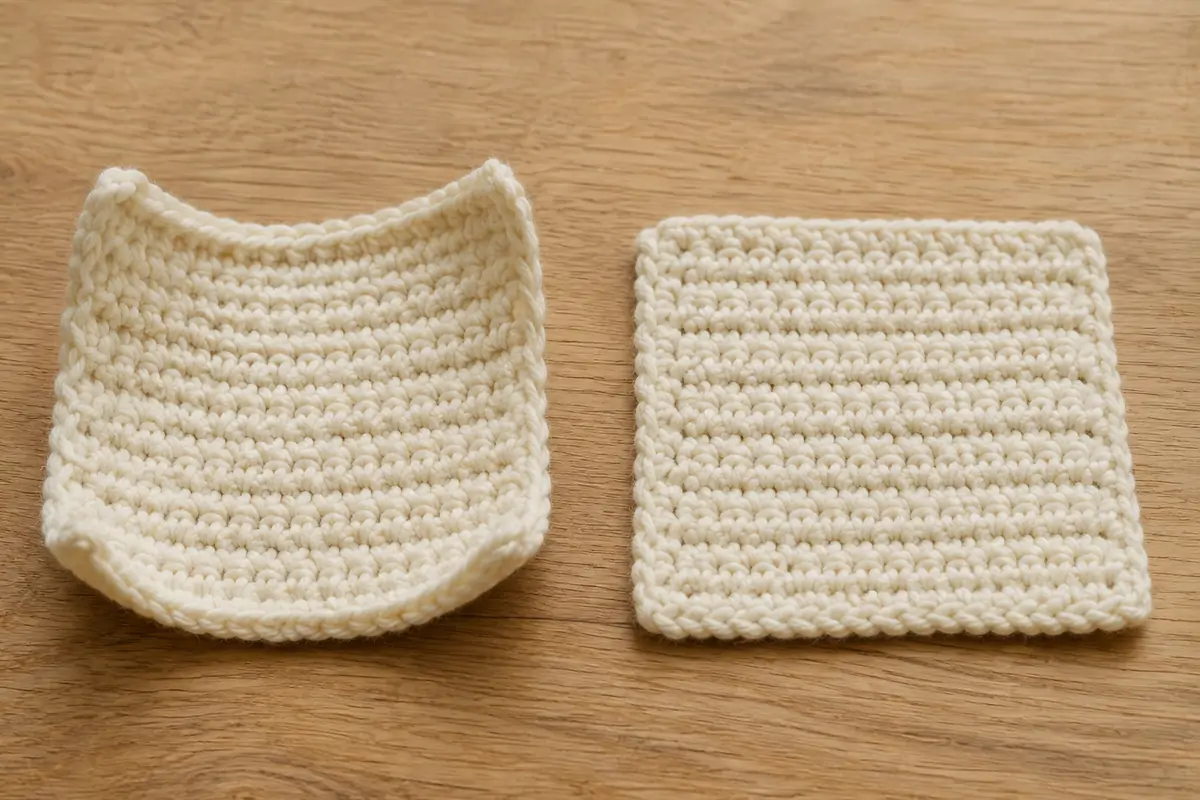
Two crochet swatches showing why crochet is curling compared to one lying flat
📋 What’s in this guide
- Quick diagnosis — where is it curling?
- Cause 1 — Your tension is too tight
- Cause 2 — Your foundation chain is too tight
- Cause 3 — Your hook is too small
- Cause 4 — Wrong number of increases in the round
- Cause 5 — Your stitch count is drifting
- Cause 6 — The stitch itself curls
- How to fix a finished project by blocking
- The border trick
- How to prevent it next time
- Frequently asked questions
Quick Diagnosis: Where Is It Curling?
Lay your work flat on a table and look at it. The direction of the curl tells you the cause.
| What you see | Most likely cause | Go to |
|---|---|---|
| Only the bottom edge curls up | Foundation chain too tight | Cause 2 |
| Both side edges pull inward | Tension too tight | Cause 1 |
| The whole piece rolls like a tube | Hook too small, or the stitch type | Causes 3 and 6 |
| A flat circle turns into a bowl | Too few increases | Cause 4 |
| A flat circle ruffles and waves | Too many increases | Cause 4 |
| It was flat, then started curling | Stitch count drifting | Cause 5 |
Wet your swatch, pat it flat, and let it dry. If it stays flat, the fabric is fine and you only needed blocking. If it curls again as it dries, one of the six causes below is at work. This two-minute test saves a lot of frogging.
Cause 1 — Your Tension Is Too Tight
This is the number one answer to why is my crochet curling, and it affects nearly every beginner. Tight stitches have less yarn in them. Less yarn means less give, and the fabric pulls in on itself at the edges.
You can feel it before you see it. If you are wrestling the hook into each stitch, or your hand aches after twenty minutes, your tension is too tight.
How to tell for certain
Try to slide the hook under a stitch you made three rows ago. If it goes in easily, your tension is fine. If you have to force it, it is too tight.
Another sign: hold the fabric up to a window. Loose, even crochet lets a little light through between stitches. Tight crochet looks solid, almost like felt.
The fix: Do not try to “crochet looser” by concentrating — that rarely lasts more than a row. Instead, go up one hook size. It forces bigger stitches without changing how you hold the yarn.
Tension is a habit, not a skill. It relaxes on its own after a few projects. Until then, a bigger hook does the work for you.
Cause 2 — Your Foundation Chain Is Too Tight
If only the bottom of your work curls up, the chain is the problem. Almost everyone chains tighter than they crochet. The bottom edge then has less stretch than everything above it, so it pulls the whole piece into a curve.
You will notice this most on scarves and blankets, where the chain is long enough for the difference to show.
Two fixes, both easy
Option A — bigger hook for the chain. Make your foundation chain with a hook one or two sizes larger, then switch back to your normal hook for row 1. Nothing else changes.
Option B — foundation single crochet. This skips the chain entirely. You make the chain and the first row at the same time, so the bottom edge has exactly the same stretch as every other row. It takes ten minutes to learn and solves the problem permanently.
Quick test: Stretch your finished chain gently. Then stretch row 3. If the chain stretches noticeably less, that is your culprit.
Cause 3 — Your Hook Is Too Small for the Yarn
Every yarn label suggests a hook size. That suggestion is a starting point, not a rule — it assumes average tension, and most people are not average.
A hook that is too small makes dense, stiff fabric. Dense fabric curls. It also uses far more yarn than the pattern expects, which is why some people run out halfway through a blanket.
Finding your real hook size
Make three small swatches with three different hooks — the label size, one size up, and two sizes up. Lay all three flat and pick the one that drapes nicely and lies still.
That is your hook size for that yarn. Write it on a sticky note and keep it in the yarn bag.
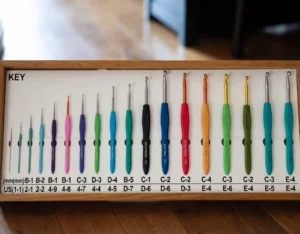
The fix: Use the hook that gives flat fabric, not the one printed on the label. Our crochet hook size chart shows the standard starting size for every yarn weight.
Amigurumi is meant to be tight. When you make a toy, you deliberately use a smaller hook so the stuffing does not show through the stitches, and the fabric curling into a cup shape is exactly what you want. Tight is only a problem on flat projects.
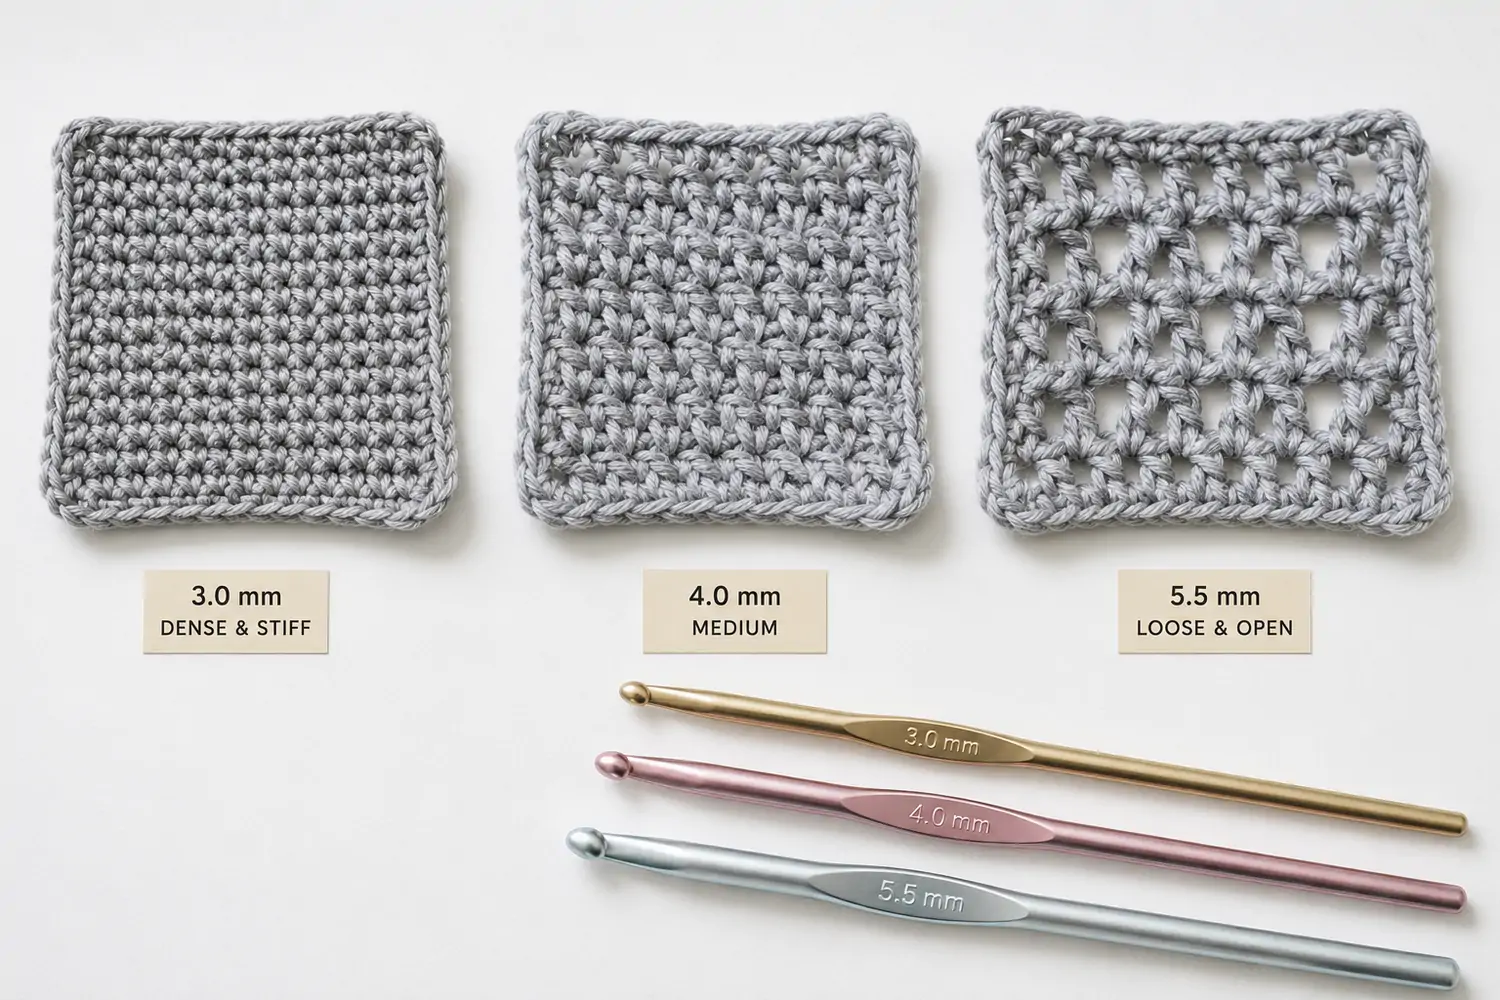
Three crochet swatches made with different hook sizes showing which one stops crochet curling
Cause 4 — The Wrong Number of Increases in the Round
This one only applies to circles: coasters, mandalas, doilies, the base of a bag. A flat circle needs a specific rate of growth. Get it wrong in either direction and the circle stops being flat.
The rule for single crochet is simple. Round 1 has 6 stitches. Every round after that adds exactly 6 more.
| Round | Stitch count | Pattern |
|---|---|---|
| 1 | 6 | 6 sc in magic ring |
| 2 | 12 | inc in every stitch |
| 3 | 18 | (sc, inc) around |
| 4 | 24 | (sc 2, inc) around |
| 5 | 30 | (sc 3, inc) around |
Reading the shape
Bowl or taco shape? Not enough increases. The outside edge is too small for the middle, so the edges lift. Add one or two extra increases spread evenly around the next round.
Wavy, ruffled, lettuce edge? Too many increases. The outside edge has too much fabric for the middle, so it ripples. Work one round with no increases at all and it will settle.
The fix: Count your stitches at the end of every round. Different stitches need different rates — double crochet circles usually need 12 increases per round, not 6. If you are new to circles, our guide on how to crochet a circle walks through the maths.
Cause 5 — Your Stitch Count Is Drifting
Sometimes a project starts flat and only curls after ten or fifteen rows. That is usually not tension at all — it is a stitch count that has quietly changed.
Two things cause it. Either you are working an extra stitch into the turning chain at the end of rows, which adds stitches and makes the piece widen and ripple. Or you are missing the last stitch of each row, which removes stitches and pulls the edges in.
Catching it early
Count your stitches at the end of every row for the first ten rows of any project. It feels tedious for about three rows, then becomes automatic.
Even faster: put a stitch marker in the first and last stitch of row 1. Move them up as you go. If your row does not start and end at the markers, you know immediately.
The fix: Frog back to the last row you know was correct. It is faster than trying to hide the error, and the edge will be straight.
Cause 6 — The Stitch Itself Curls
Some stitches curl no matter what you do. This is not a mistake. It is how the fabric is built, and the answer is to plan for it rather than fight it.
| Stitch | Curls? | What to do |
|---|---|---|
| Single crochet | Slight, at the sides | Bigger hook, or a border |
| Half double crochet | Very little | Usually fine as is |
| Double crochet | More than sc | Border, or block it |
| Back loop only | Yes, noticeably | Expected — block or border |
| Waistcoat / knit stitch | Strongly | Almost always needs a border |
| Granny stitch | Almost never | The open gaps keep it flat |
Yarn fibre matters here too. Cotton holds whatever shape you block it into. Acrylic springs back toward its original shape, so acrylic curls are stubborn and usually need a border rather than blocking alone.
How to Fix Crochet That Is Already Finished
You do not have to start over. Blocking flattens most curling, and it is the single most underused technique in crochet.
For cotton, wool, and natural fibres — wet blocking
Soak the piece in cool water for about fifteen minutes. Squeeze out the water gently — never wring it. Roll it in a towel and press to remove more moisture. Then pin it flat, stretched slightly into shape, on a blocking mat or a thick towel. Leave it until completely dry, which usually takes a day.
Cotton takes blocking beautifully and holds it for a long time.
For acrylic — steam blocking
Pin the piece flat first. Set your iron to steam and hold it two to three centimetres above the fabric. Let the steam pass through without touching. Move slowly across the whole piece, then leave it pinned until cold.
Acrylic is a plastic. Direct heat melts the fibres, which flattens them permanently and leaves a hard shiny patch that cannot be repaired. Always hover, never touch. If you can smell anything at all, stop immediately.
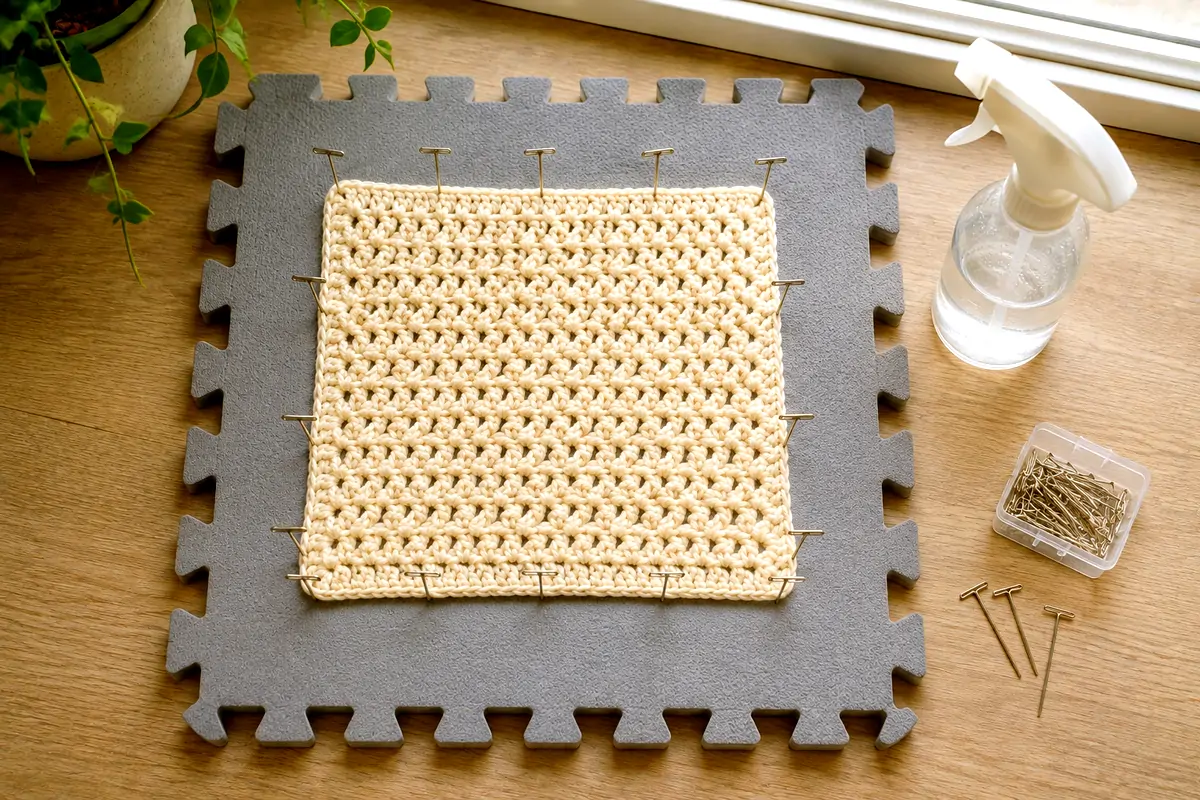
Crochet square pinned flat on a blocking mat to stop it from curling
The Border Trick — When Blocking Is Not Enough
For acrylic, and for stitches that curl by nature, a border does what blocking cannot. It adds weight and structure around the outside, and the edge stops rolling.
Work two or three rounds of single crochet or half double crochet all the way around the piece, putting three stitches into each corner so it stays square. Use a hook one size larger than the body of the project so the border does not pull tighter than the fabric it is holding.
If a plain border is not enough, add a final round of reverse single crochet — sometimes called crab stitch. It is worked backwards, right to left, and creates a firm twisted rope edge. On a stubborn blanket it is often the thing that finally settles the edges.
A corner needs to turn 90 degrees. One stitch pulls it tight and rounds the corner off. Three stitches give it enough fabric to turn cleanly and lie flat. Two works for half double crochet; three is standard for single crochet.
How to Stop Crochet Curling Next Time
Five habits that prevent the problem before it starts.
Make a swatch. Ten stitches, ten rows. Look at it. If the swatch curls, the blanket will curl — and you have saved yourself forty hours.
Chain with a bigger hook. One size up on the foundation chain, then switch back. This alone fixes a large share of curling problems.
Count for the first ten rows. Errors that start early get worse. Errors caught in row 4 cost you three rows.
Plan the border from the start. Set aside yarn for it. A border is not a repair — on many stitch patterns it is part of the design.
Stop when your hand hurts. Tension tightens as hands tire, so the last hour of a long session is where most uneven fabric comes from.
Frequently Asked Questions
Why is my crochet curling at the bottom only?
Your foundation chain is tighter than the rest of your stitches, so the bottom edge has less stretch and pulls the piece into a curve. Make the chain with a hook one or two sizes larger, then switch back to your normal hook for the first row. Foundation single crochet removes the problem entirely.
Will blocking fix curling permanently?
On cotton and wool, usually yes — those fibres hold the shape you block them into for a long time. On acrylic the effect is weaker and can relax over months, so acrylic projects often need a border as well as steam blocking.
Does a bigger hook always stop crochet from curling?
It fixes curling caused by tight tension or dense fabric, which covers most cases. It will not fix a wrong increase rate in a circle, a drifting stitch count, or a stitch pattern that curls by design. Use the diagnosis table above to find out which problem you actually have.
Why does my crochet circle look like a bowl?
There are not enough increases. A flat single crochet circle needs 6 extra stitches in every round. If you have fewer, the outer edge is too small for the centre and the sides lift. Add increases evenly on the next round and the circle will flatten out.
Is it normal for a crochet blanket to curl?
Slightly, at the edges, before it is finished — yes, especially in double crochet or back loop only. Strong curling is not normal and points to tension or the foundation chain. Almost every blanket looks better with a two or three round border, whether it curls or not.
Should I frog my project or keep going?
Do the wet test first. Dampen a section, pat it flat, and let it dry. If it stays flat, keep going and block at the end. If it curls straight back as it dries, frog it now — the problem will only get more visible as the piece grows.
Final Thoughts
Curling looks like a skill problem, but it almost never is. It is a mismatch between your hook, your tension, and the stitch you chose — and all three are easy to adjust.
Start with the wet test. If the fabric stays flat, you only ever needed blocking. If it curls again, work down the six causes in order. One of them will be yours, and the fix will take less time than you spent worrying about it.
New to Crochet? Start Here 🧶
Every stitch, hold, and habit explained from the very beginning — with pictures.
Beginner’s Guide →
Reader discussion
Reader Comments
Tried this pattern? Share what worked, ask a question, or help another crocheter.
Your turn
Comments are moderated to keep the discussion useful and family-friendly. Please do not post personal information.