
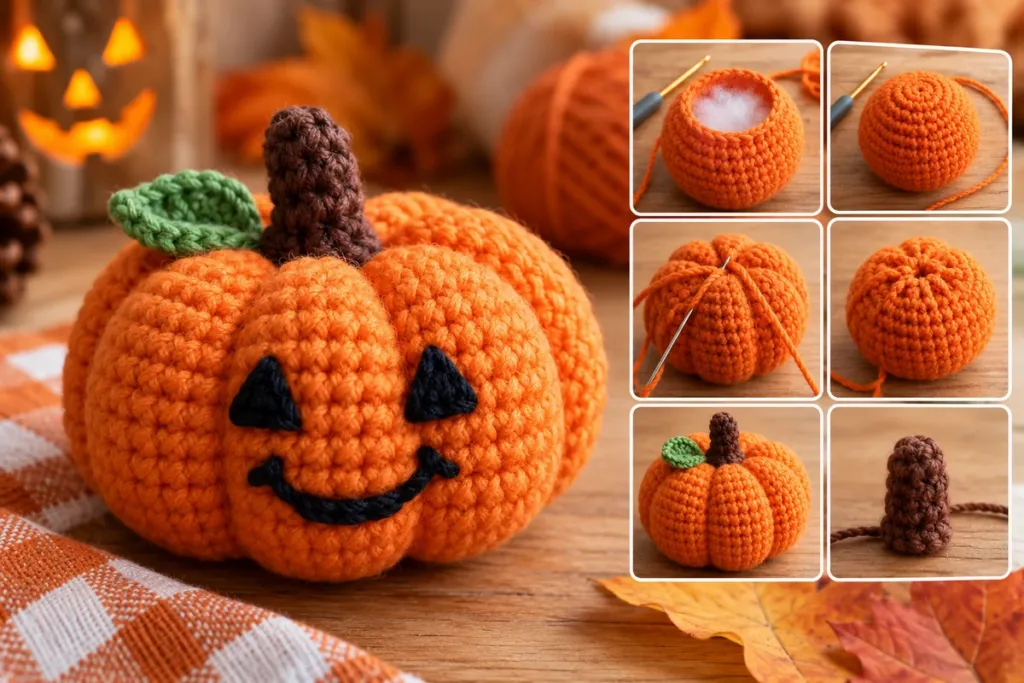
Make a small soft pumpkin that fits in your hand. It uses basic single crochet, a little stuffing, and easy shaping at the end.
If you searched for crochet halloween fidget toy pattern free, this little pumpkin is an easy place to start. It is soft, small enough to hold in one hand, and made with basic crochet stitches.
You crochet one round shape, add a little stuffing, close the top, and then wrap yarn around the outside to make the pumpkin ridges. There are no arms, legs, or several small pieces to sew together.
I kept the instructions short and clear so you can stop after every round, check your stitch count, and know exactly where you are.
What’s in this guide
Crochet Halloween Fidget Toy Pattern Free: Quick Details
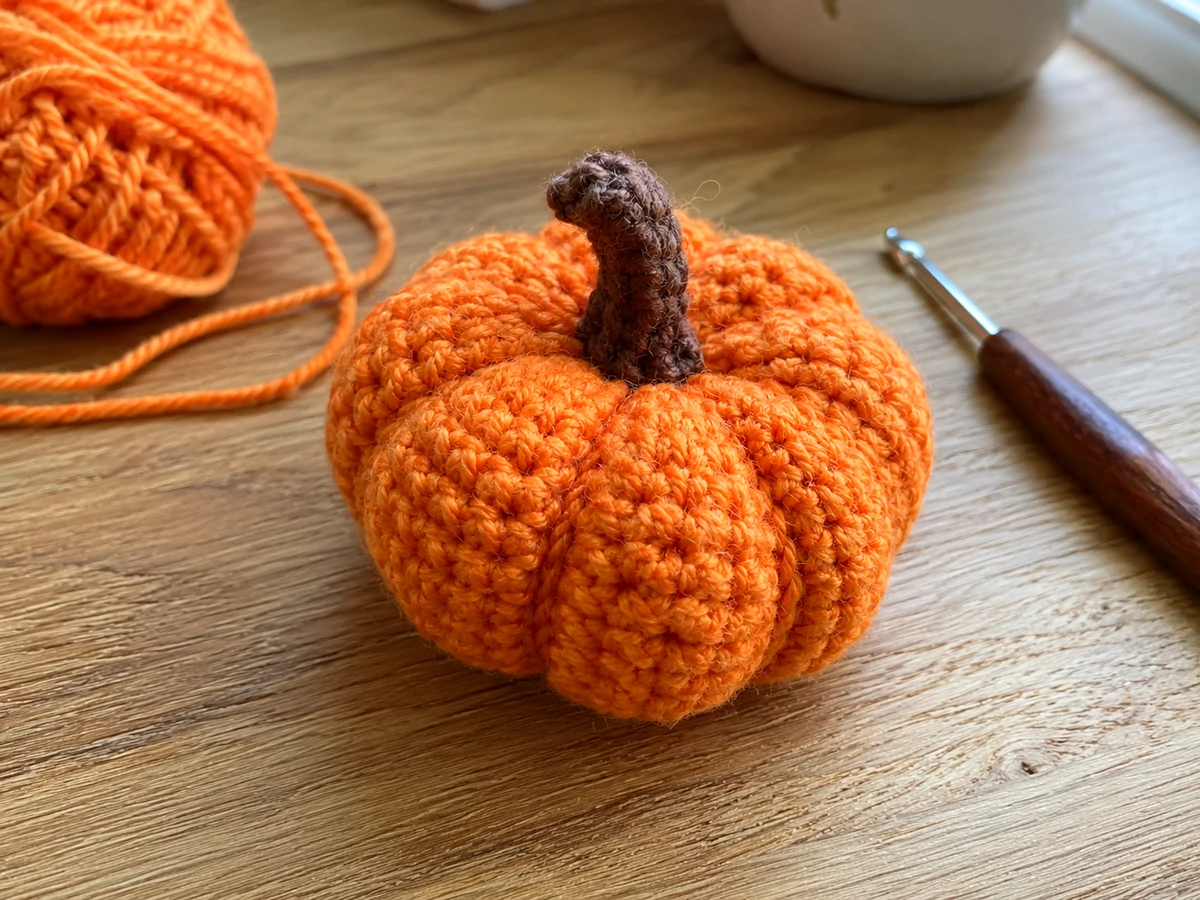
This pattern makes one small pumpkin squish. The main part is worked in continuous rounds, starting with 6 stitches and growing to 30 stitches.
After the straight middle rounds, you decrease back down, add the stuffing, and close the opening. The pumpkin shape does not come from complicated stitches. It comes from the strands wrapped around the outside at the end.
That is one reason this crochet halloween fidget toy pattern free project works well for someone who has already learned single crochet but has not made many small stuffed projects yet.
Small-child note: If you are making this for a child, use yarn embroidery for the face instead of plastic eyes or loose decorations. Secure all yarn ends well and supervise young children while they use it.
2. What You Need
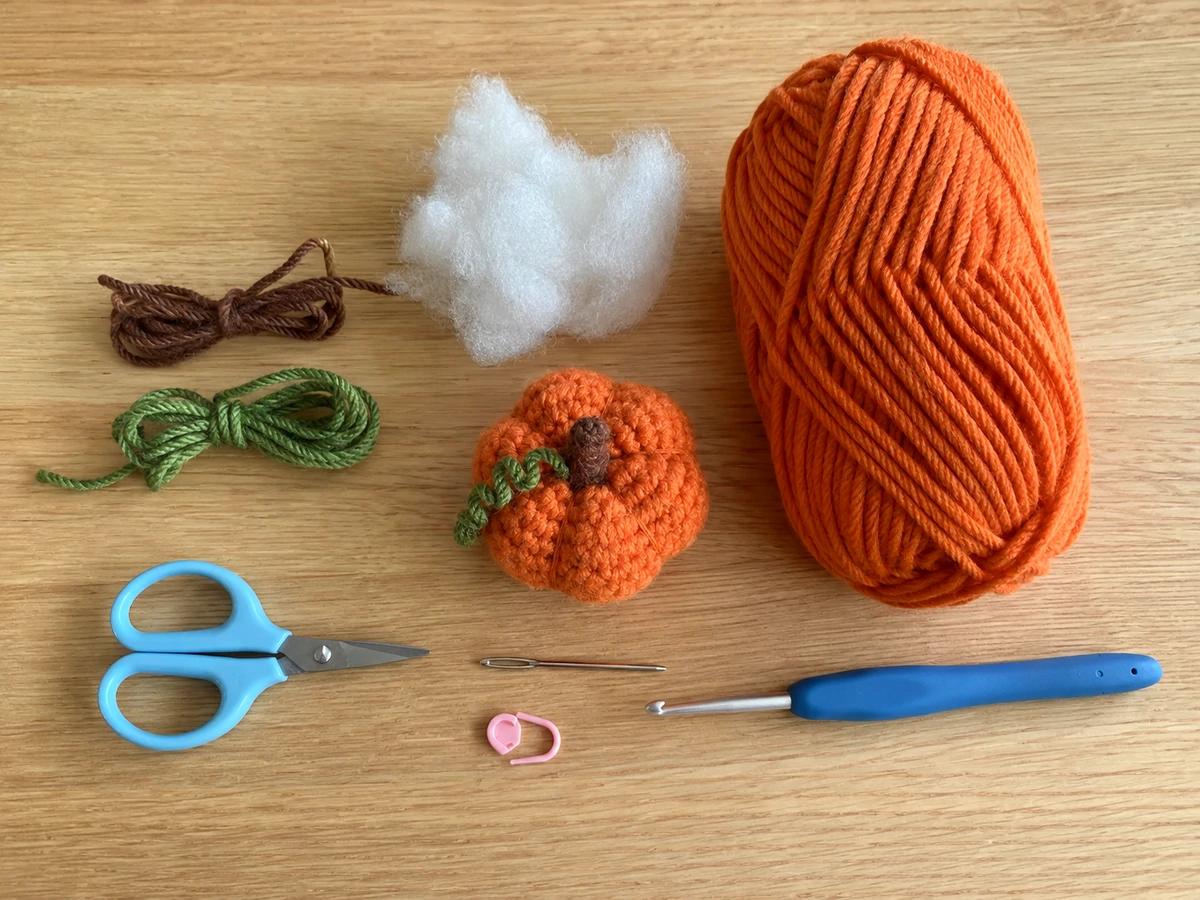
Smooth cotton or acrylic yarn is easiest to see while you work. Worsted weight is also called size 4 yarn.
If you are not sure which yarn you have, the Craft Yarn Council yarn weight system shows the standard yarn categories used in US patterns.
3. Crochet Terms and Pattern Notes
US crochet terms used below
MR = magic ring · sc = single crochet · inc = 2 single crochet in the same stitch · dec = single crochet decrease · st / sts = stitch / stitches · sl st = slip stitch · ch = chain · FO = fasten off
Work in continuous rounds
Do not join at the end of each round. When you finish the last stitch of one round, move straight into the first stitch of the next round.
Put your stitch marker in the first stitch. Move it up each time you start a new round.
Count before you move on
Your increase counts: 6 → 12 → 18 → 24 → 30. If your number does not match, fix that round before starting the next one.
New to a magic ring? Use the CrochetEco magic circle tutorial first.
You can also chain 2 and work the first 6 single crochet stitches into the second chain from your hook.
4. Free Crochet Halloween Pumpkin Fidget Pattern
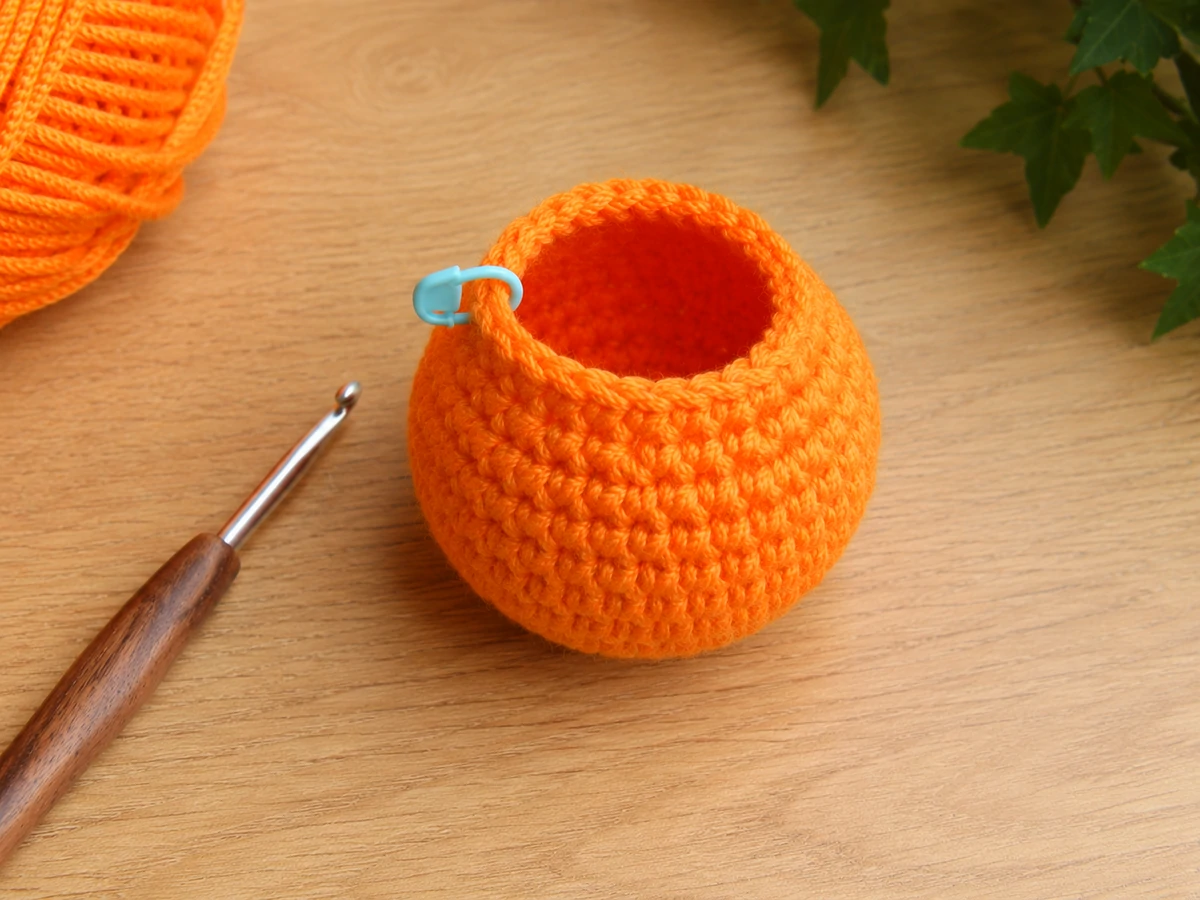
Start with orange yarn. The bottom and top of the pumpkin are made with simple increases and decreases. The five middle rounds stay at 30 stitches.
Pumpkin Body
Keep your stitches close enough that the white stuffing will not show through the finished pumpkin.
Make a MR. Work 6 sc into the ring. (6)
Inc in every stitch around. (12)
[Sc in next st, inc in next st] 6 times. (18)
[Sc in next 2 sts, inc in next st] 6 times. (24)
[Sc in next 3 sts, inc in next st] 6 times. (30)
Sc in every stitch around. (30 in each round)
[Sc in next 3 sts, dec] 6 times. (24)
[Sc in next 2 sts, dec] 6 times. (18)
5. Add the Stuffing and Close the Top
This part changes how the finished toy feels, so do not rush to fill it completely.
Add small pieces of stuffing
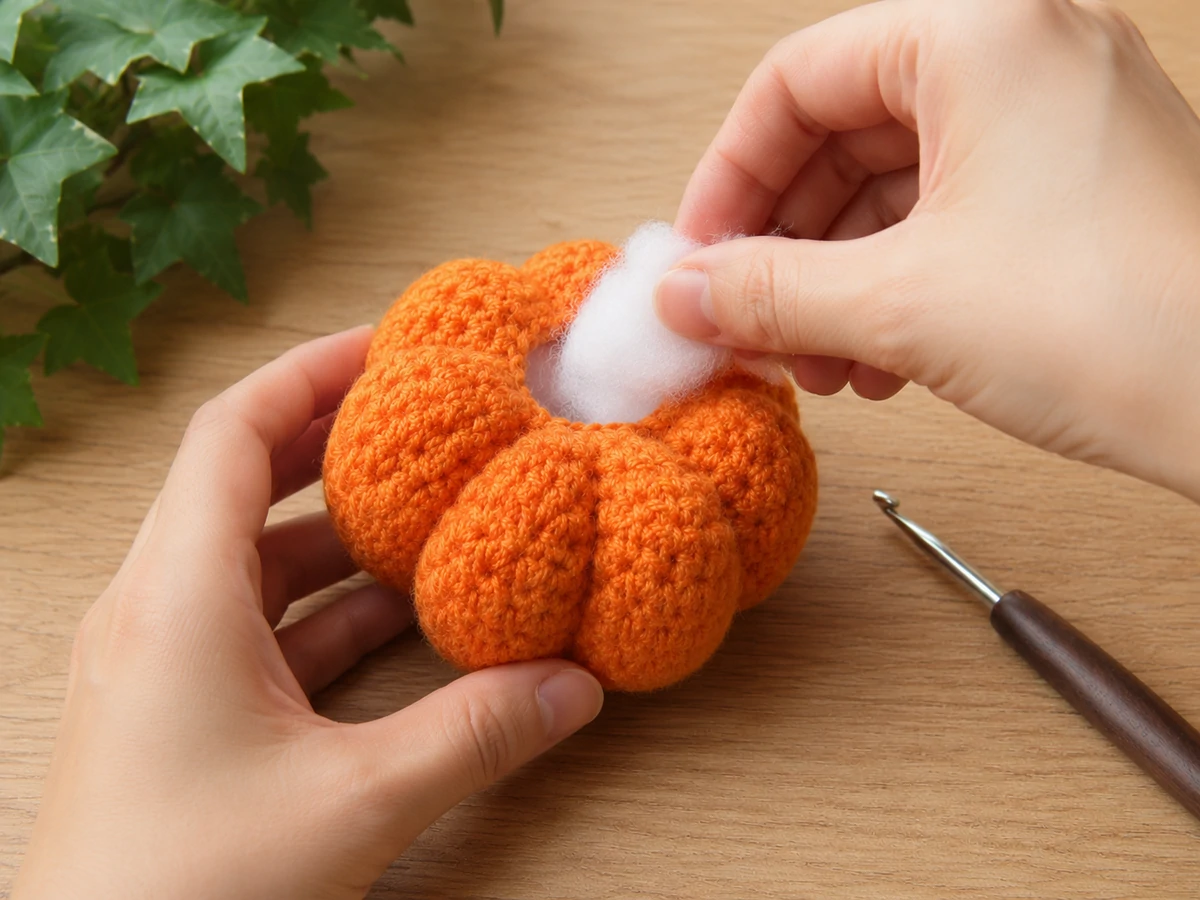
Pull off a small piece of fiberfill and place it inside. Add another small piece, then squeeze the pumpkin.
Working with small pieces helps you fill the sides without making one hard lump in the middle.
Do a squeeze test
Press the pumpkin between your fingers. It should spring back but still feel soft.
If it feels hard, take some stuffing out now. It is much harder to fix after the top is closed.
Close the Pumpkin
[Sc in next st, dec] 6 times. (12)
Dec 6 times. (6)
Fasten off and leave a long orange tail. If you plan to use the same yarn for all the pumpkin ridges, leave about 50 to 60 inches so you have enough yarn to work around the whole pumpkin.
Thread the tail onto your yarn needle. Pass the needle through the front loop of each of the final 6 stitches.
Pull slowly until the opening closes. Make one small securing stitch, but do not cut the tail.
6. Shape the Pumpkin Ridges
Right now the project looks more like a small orange ball. The next few wraps are what turn it into a pumpkin.
Go through the center
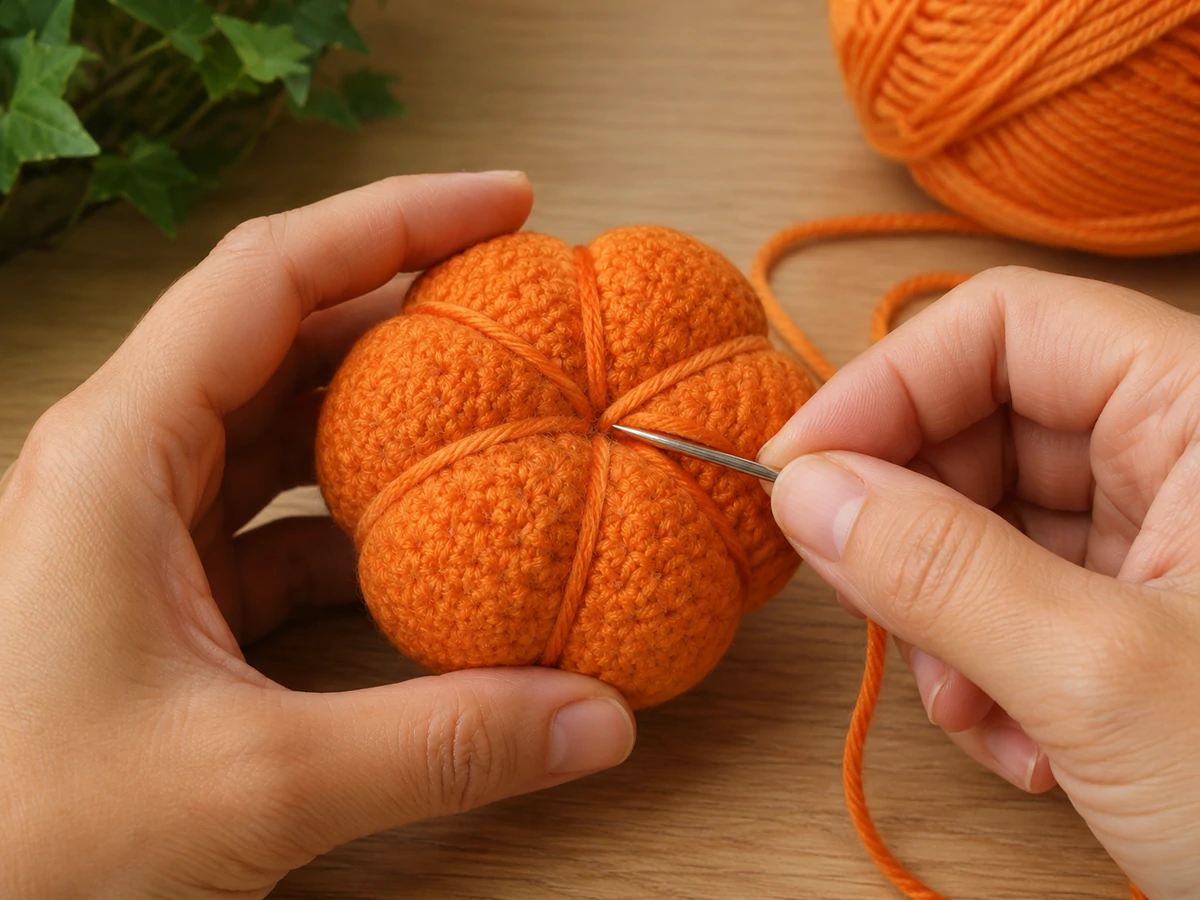
Push the needle from the top center straight through the pumpkin and bring it out at the bottom center.
Bring the yarn around the outside
Bring the yarn back up along the outside of the pumpkin. Put the needle through the center again.
Pull gently. You should see one small groove form in the side.
Keep moving around
Repeat the same step in a new spot. Try to leave about the same amount of space between each wrap.
Make 5 or 6 sections around the pumpkin.
Keep the ridges soft
Do not pull until the yarn digs deep into the crochet. A light pull is enough to show the shape.
The pumpkin should still feel soft when you squeeze it.
Easy fix: If one section is much wider than the others, do not start over. Move the next wrap slightly closer to the wide section.
7. Add a Small Stem and Halloween Face
Make the stem
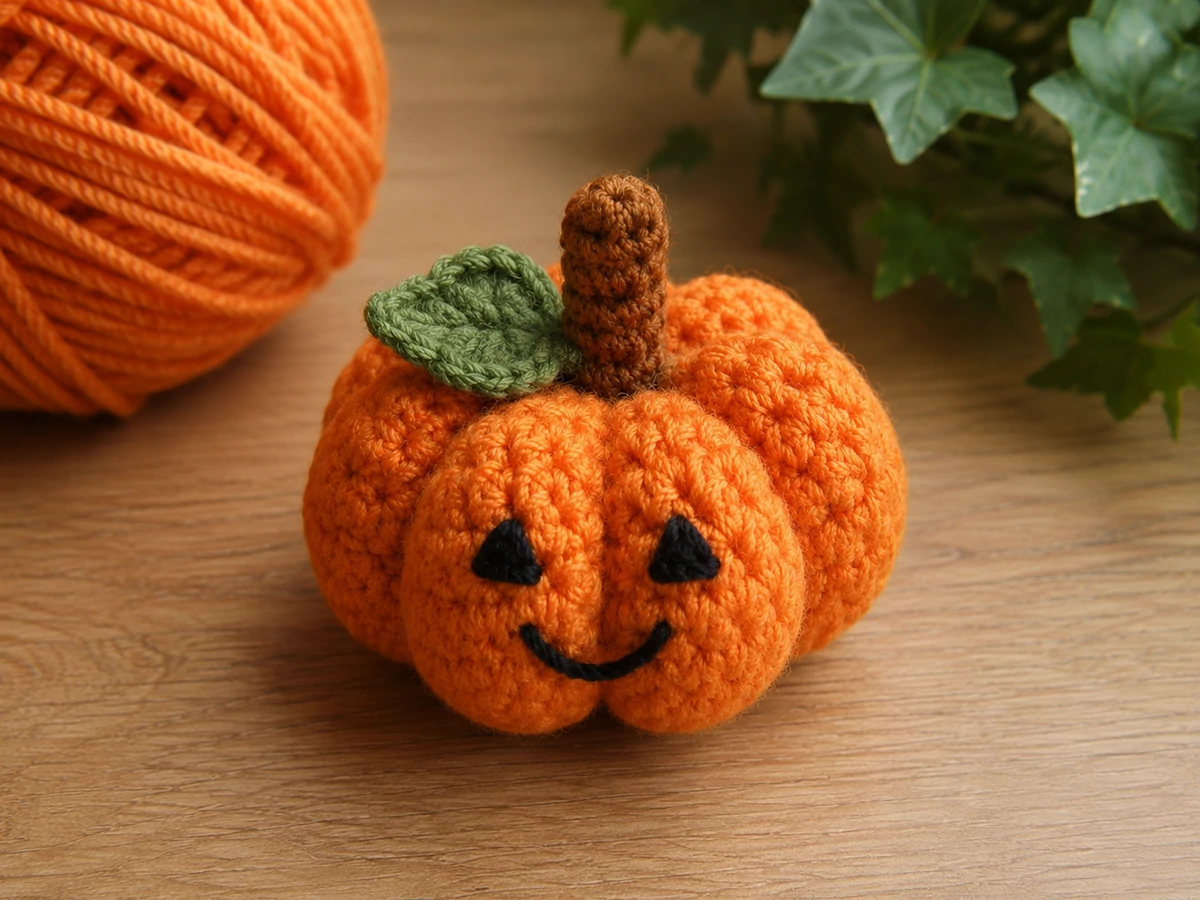
Join a small piece of brown yarn at the top center.
Ch 5. Sl st in the second chain from your hook, then sl st in each remaining chain.
Sl st back into the top of the pumpkin. Fasten off and weave the ends into the pumpkin.
Add a tiny green leaf if you want one
Join green yarn beside the stem. Ch 4.
Sl st in the second chain from the hook, sc in the next chain, and hdc in the last chain. Sl st back into the pumpkin and fasten off.
Keep the face simple
A face is optional. The pumpkin works as a fidget without one.
For a Halloween version, thread black yarn onto your yarn needle. Make two small triangle eyes and a short stitched mouth.
Do not worry if both eyes are not exactly the same. Small differences are normal on a handmade piece.
8. Make Your Pumpkin Softer or Firmer
There is no single right amount of stuffing. Use the feel you like.
| If you want… | Try this |
|---|---|
| Very soft | Use less fiberfill and keep the shaping wraps loose. |
| More bounce | Add a little more fiberfill before Round 13. |
| More texture | Make 6 clear pumpkin ridges. |
| A flatter pocket shape | Use less stuffing and gently pull the center in. |
For this project, I would stop before the pumpkin feels packed. You should still be able to press the center with two fingers.
9. Common Mistakes and Easy Fixes
White stuffing shows between the stitches
Your crochet fabric is probably too loose. Try a slightly smaller hook or make your single crochet stitches firmer.
The round does not have the right number of stitches
Do not try to hide the extra or missing stitch in the next round. Go back to the mistake and fix it.
Your main counts are 6, 12, 18, 24, and 30.
The pumpkin is too hard to squeeze
Too much fiberfill is the usual cause. Remove a little before you finish the last two rounds.
The pumpkin becomes flat after shaping
The outside yarn wraps are too tight. Loosen them until you have visible ridges without crushing the center.
There is still a hole at the top
Pass your needle through the front loops of all 6 final stitches and pull them together like a drawstring.
10. Crochet Halloween Fidget Toy Pattern Free FAQ
Is this crochet halloween fidget toy pattern free for beginners?
Yes. You need to know single crochet, a simple increase, and a decrease. The pumpkin ridges are made with a yarn needle after the crochet part is finished.
What can I use if I cannot make a magic ring?
Ch 2 and work 6 sc into the second chain from your hook. Then start Round 2 as written.
What yarn works best?
Smooth worsted weight cotton or acrylic both work. Acrylic usually feels a little softer, while cotton can make the stitches look more defined.
Can I use chenille yarn?
Yes, but the pumpkin will be larger and it can be harder to see the individual stitches. Smooth worsted yarn is easier for a first try.
How much should I stuff the pumpkin?
Add enough to hold the round shape, but stop while you can still squeeze it easily. A firmly packed pumpkin will not feel much like a soft fidget.
Do I have to add the Halloween face?
No. Leave the face off for a simple fall pumpkin. The crochet and shaping stay exactly the same.
Can I make a bigger pumpkin?
The easiest way is to use thicker yarn and the hook size that works with that yarn. This keeps the basic pattern simple.
Final Thoughts
This crochet halloween fidget toy pattern free project is small enough to make from leftover yarn and simple enough to repeat once you understand the round counts.
Make your first one in orange and keep the stuffing soft. After that, try cream, purple, green, or black yarn for a different Halloween look.
The main thing is not to rush the shaping. A few loose, even wraps give the pumpkin its ridges while keeping the middle soft enough to squeeze.
More Free Crochet Patterns
Looking for another easy project? Browse more step-by-step patterns in the CrochetEco pattern library.
Browse the Pattern Library
Reader discussion
Reader Comments
Tried this pattern? Share what worked, ask a question, or help another crocheter.
Your turn
Comments are moderated to keep the discussion useful and family-friendly. Please do not post personal information.