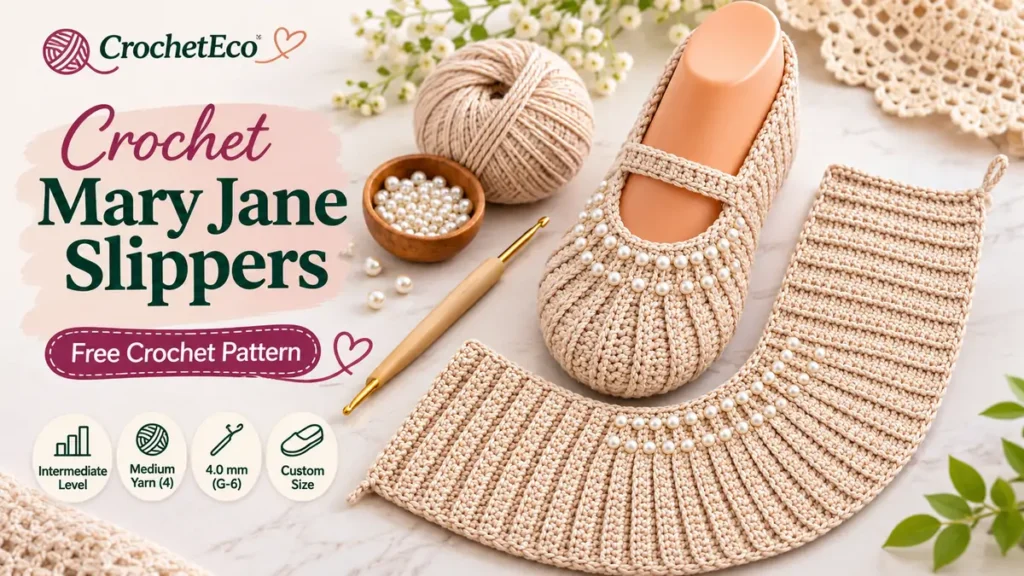
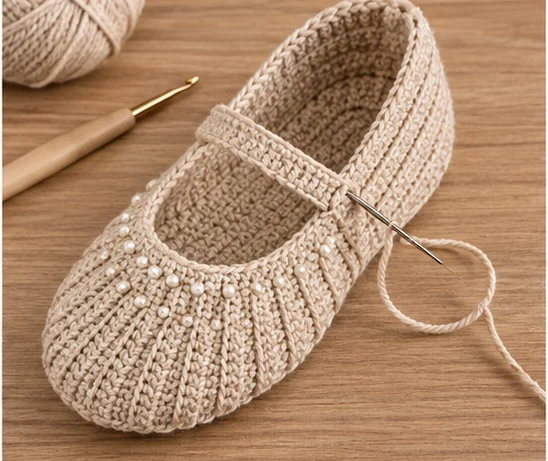
This free crochet Mary Jane slippers pattern makes soft ballet-style house shoes with a rounded toe, an open instep, and a narrow strap. Work the toe in rounds, extend the sides and sole in rows, close the heel, then add a strap. Cream cotton-blend yarn gives the slippers a simple look; a few pearls can be added for an adult-only decorative version.
- Skill level
- Intermediate beginner
- Yarn weight
- 4 Medium / worsted
- Yarn used
- Smooth beige cotton-blend, quantity from a swatch
- Hook
- 4.0 mm (US G-6), adjust for gauge
- Construction
- 10–40 hdc toe; 28-stitch flat heel section
- Finished size
- Adjust to foot length; no tested fixed size
- Sample gauge
- 16 hdc × 12 rows = 4 in (10 cm), target only
- Time
- Estimated 5–8 hours per pair; untested
Materials, gauge and fit
Choose a smooth worsted cotton-blend yarn with enough give for a house slipper. Use a 4 mm hook as a starting point, plus a blunt yarn needle, stitch markers, scissors, and a measuring tape. Keep both slippers in the same yarn and tension. For the optional pearl decoration, use securely sewn craft pearls on adult slippers only.
Make a larger-than-4-inch swatch in half double crochet. A planning gauge of 16 hdc stitches and 12 rows over 4 inches (10 cm) gives a useful starting point. This gauge has not been confirmed by a handmade sample. Measure your foot from heel to longest toe, then compare that length with the work before you sew the heel. The fabric should fit without crushing the toes.
If yarn labels are confusing, the Craft Yarn Council weight guide explains category 4 yarn.
US abbreviations and stitch notes
MR: magic ring; ch: chain; hdc: half double crochet; sc: single crochet; sl st: slip stitch; inc: two hdc in one stitch; st: stitch.
To make hdc: yarn over, insert hook, draw up a loop, yarn over and pull through all three loops. Do not count turning chains as stitches in flat rows.
Step 1. Crochet the rounded toe
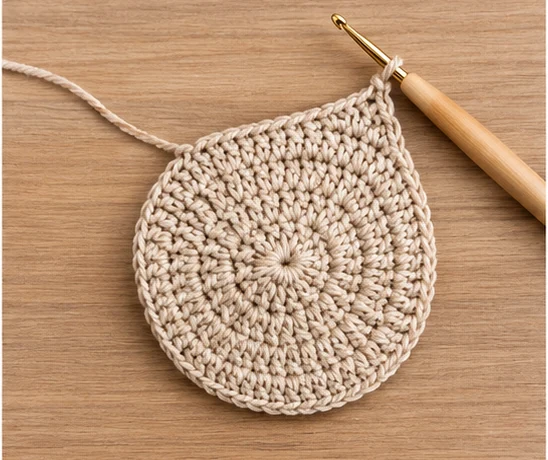
Make the toe as a small tube with a rounded closed front. Work continuously and move your stitch marker into the first stitch of each round. Start a second slipper in exactly the same way.
Round 1: Work 10 hdc in a magic ring. Tighten the opening. (10 hdc)
Round 2: Work 2 hdc in every stitch. (20 hdc)
Round 3: *Hdc in next st, 2 hdc in next st.* Repeat from * to * 10 times. (30 hdc)
Round 4: *Hdc in next 2 sts, 2 hdc in next st.* Repeat 10 times. (40 hdc)
Rounds 5–9: Hdc once in every stitch, without increasing. (40 hdc each round)
Step 2. Leave the instep open and work the sole and sides
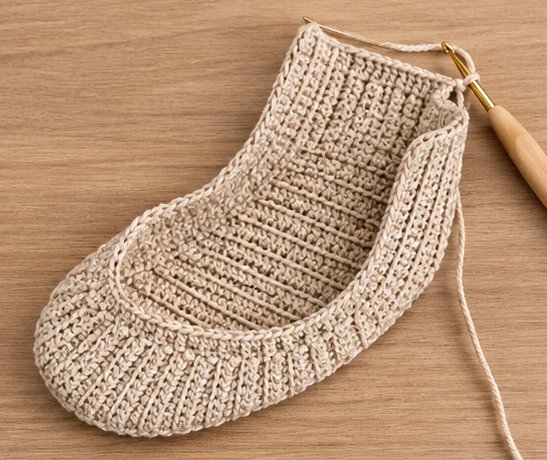
Keep the toe tube right-side out. After finishing Round 9, work across 28 consecutive stitches only, then turn. Leave the other 12 toe stitches unworked. Those twelve stitches form the front edge of the foot opening. The flat section will travel along the sole and sides toward the heel.
Flat Row 1: Hdc in the next 28 stitches. Ch 1 and turn. (28 hdc)
Flat Rows 2–20: Hdc in each of the 28 stitches across. Ch 1 and turn between rows; omit the final turning chain. (28 hdc each row)
For a shorter foot, stop before Row 20. For a longer foot, add whole rows until the piece reaches your heel, allowing for the seam. Record the final row count and repeat it on the second slipper. A useful fit check is to pin the heel temporarily and try it on while seated.
Step 3. Close the back heel seam
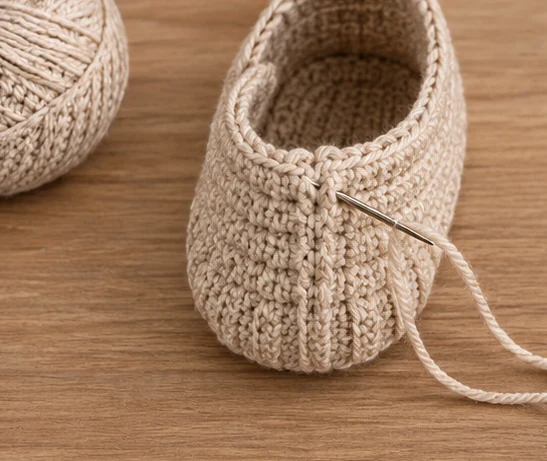
Lay the unfinished slipper with the toe pointing away from you. Fold the last 28-stitch row in half, bringing its two ends together. The two groups of 14 stitches become the left and right sides of the back seam. The fold becomes the center bottom of the heel.
1. Turn the slipper wrong-side out and align the two halves of the last row.
2. Using the yarn tail, sew through the 14 matching stitch pairs from the upper back opening toward the bottom fold. Keep each pair aligned.
3. Weave the tail inside the heel, turn right-side out, and check that the seam lies flat.
For a tidy top edge, attach matching yarn at the back seam and work one loose round of sc evenly around the opening. Slip stitch to join and fasten off. Use enough stitches to keep the edge flat; the count changes with the row length you chose.
Step 4. Make and sew the Mary Jane strap
Work the narrow strap separately. It should cross the top of your foot without pulling the sides of the slipper inward. Measure across the actual opening before choosing its final length.
Foundation: Ch 18.
Row 1: Sc in the second chain and each remaining chain. Ch 1 and turn. (17 sc)
Row 2: Sc in all 17 stitches. Fasten off, leaving a long sewing tail. (17 sc)
Fit: If the strap is too short, remake it using additional chains; if too long, use fewer. Sew each end through several stitches along opposite sides of the slipper opening, slightly behind the toe edge.
Step 5. Add optional texture and finish both slippers
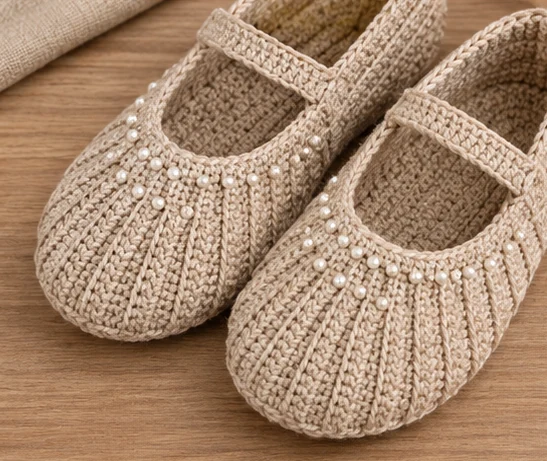
For a lightly ribbed look inspired by the beige photo, add several surface slip-stitch lines along the front toe. Work with a separate yarn strand and a small hook. Keep the surface stitches loose and follow the toe from its front center toward the opening. Space the lines evenly, then secure the ends inside. This decorative step is optional; it changes the surface texture, not the slipper construction.
If making adult-only decorative slippers, sew a few pearl beads firmly along the toe opening, not across the sole. Use strong thread, secure each pearl separately, and inspect the stitching regularly. The original photo uses more pearl decoration than this simplified pattern requires.
Repeat all steps for the second slipper, using the same rounds, rows, strap length, and trim. Add a suitable non-slip treatment before wearing on smooth floors.
Sizing, troubleshooting, and common questions
| Problem | What to check |
|---|---|
| Toe feels tight | Check the 40-stitch circumference and try a larger hook or adjust the toe size before beginning flat rows. |
| One side becomes shorter | Keep 28 hdc in every flat row; the turning chain is not a stitch. |
| Heel seam hurts | Redo the seam with a flat yarn join; avoid knots under the foot. |
| Strap pulls the shoe inward | Lengthen the strap and attach both ends at matching positions. |
| Sole slips | Add tested non-slip treatment and avoid use on slick floors until traction is adequate. |
Can I make these slippers in another size?
Yes. Use the toe cup as a fit test, then change the number of flat rows for length. For a substantially wider foot, resize the toe circumference as well and recalculate the flat section rather than assuming 28 stitches will fit every size.
Do I need the pearls?
No. The slippers work without beads. If you prefer a simple everyday pair, leave the toe plain and skip the pearl decoration.
Are these slippers safe for outdoor use?
No. This is a soft indoor crochet slipper pattern without a weatherproof sole. For any floor surface, assess traction and use a suitable non-slip backing.
Save this free crochet slipper pattern
Keep the toe counts and heel seam instructions nearby while you work. If you need help with basic stitches, visit the CrochetEco beginner guide and crochet hook size chart.
Editorial accuracy note: This is an independently written adaptation inspired by the supplied beige shoe photograph. The source image and generated stage images do not establish exact stitch construction or tested sizing. The numerical counts were reviewed, but a real wearable sample has not been crocheted or tested.

Comments
Leave a Comment